HP LaserJet 4345 HP LaserJet 4345mfp - User Guide - Page 203
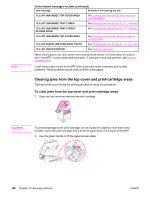
Clearing jams from the tray 1 area
 |
View all HP LaserJet 4345 manuals
Add to My Manuals
Save this manual to your list of manuals |
Page 203 highlights
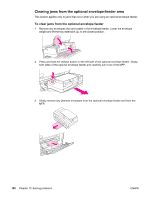
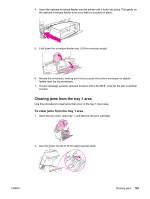
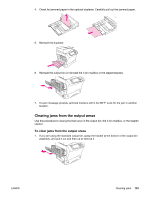
4. Insert the optional envelope feeder into the printer until it locks into place. Pull gently on the optional envelope feeder to be sure that it is securely in place. 5. Fold down the envelope-feeder tray. Lift the envelope weight. 6. Reload the envelopes, making sure that you push the bottom envelopes in slightly farther than the top envelopes. 7. If a jam message persists, jammed media is still in the MFP. Look for the jam in another location. Clearing jams from the tray 1 area Use this procedure to clear jams that occur in the tray 1 input area. To clear jams from the tray 1 area 1. Open the top cover, open tray 1, and remove the print cartridge. 2. Use the green handle to lift the paper-access plate. ENWW Clearing jams 189
-
 1
1 -
2
-
3
-
4
-
5
-
6
-
7
-
8
-
9
-
10
-
11
-
12
-
13
-
14
-
15
-
16
-
17
-
18
-
19
-
20
-
21
-
22
-
23
-
24
-
25
-
26
-
27
-
28
-
29
-
30
-
31
-
32
-
33
-
34
-
35
-
36
-
37
-
38
-
39
-
40
-
41
-
42
-
43
-
44
-
45
-
46
-
47
-
48
-
49
-
50
-
51
-
52
-
53
-
54
-
55
-
56
-
57
-
58
-
59
-
60
-
61
-
62
-
63
-
64
-
65
-
66
-
67
-
68
-
69
-
70
-
71
-
72
-
73
-
74
-
75
-
76
-
77
-
78
-
79
-
80
-
81
-
82
-
83
-
84
-
85
-
86
-
87
-
88
-
89
-
90
-
91
-
92
-
93
-
94
-
95
-
96
-
97
-
98
-
99
-
100
-
101
-
102
-
103
-
104
-
105
-
106
-
107
-
108
-
109
-
110
-
111
-
112
-
113
-
114
-
115
-
116
-
117
-
118
-
119
-
120
-
121
-
122
-
123
-
124
-
125
-
126
-
127
-
128
-
129
-
130
-
131
-
132
-
133
-
134
-
135
-
136
-
137
-
138
-
139
-
140
-
141
-
142
-
143
-
144
-
145
-
146
-
147
-
148
-
149
-
150
-
151
-
152
-
153
-
154
-
155
-
156
-
157
-
158
-
159
-
160
-
161
-
162
-
163
-
164
-
165
-
166
-
167
-
168
-
169
-
170
-
171
-
172
-
173
-
174
-
175
-
176
-
177
-
178
-
179
-
180
-
181
-
182
-
183
-
184
-
185
-
186
-
187
-
188
-
189
-
190
-
191
-
192
-
193
-
194
-
195
-
196
-
197
-
 198
198 -
 199
199 -
 200
200 -
 201
201 -
 202
202 -
 203
203 -
 204
204 -
 205
205 -
 206
206 -
 207
207 -
 208
208 -
209
-
210
-
211
-
212
-
213
-
214
-
215
-
216
-
217
-
218
-
219
-
220
-
221
-
222
-
223
-
224
-
225
-
226
-
227
-
228
-
229
-
230
-
231
-
232
-
233
-
234
-
235
-
236
-
237
-
238
-
239
-
240
-
241
-
242
-
243
-
244
-
245
-
246
-
247
-
248
-
249
-
250
-
251
-
252
-
253
-
254
-
255
-
256
-
257
-
258
-
259
-
260
-
261
-
262
-
263
-
264
-
265
-
266
-
267
-
268
-
269
-
270
-
271
-
272
-
273
-
274
-
275
-
276
-
277
-
278
-
279
-
280
-
281
-
282
-
283
-
284
-
285
-
286
-
287
-
288
-
289
-
290
-
291
-
292
-
293
-
294
-
295
-
296
-
297
-
298
-
299
-
300
-
301
-
302
-
303
-
304
-
305
-
306
-
307
-
308
-
309
-
310
-
311
-
312
-
313
-
314
-
315
-
316
-
317
-
318
-
319
-
320
-
321
-
322
-
323
-
324
 |
 |
4.
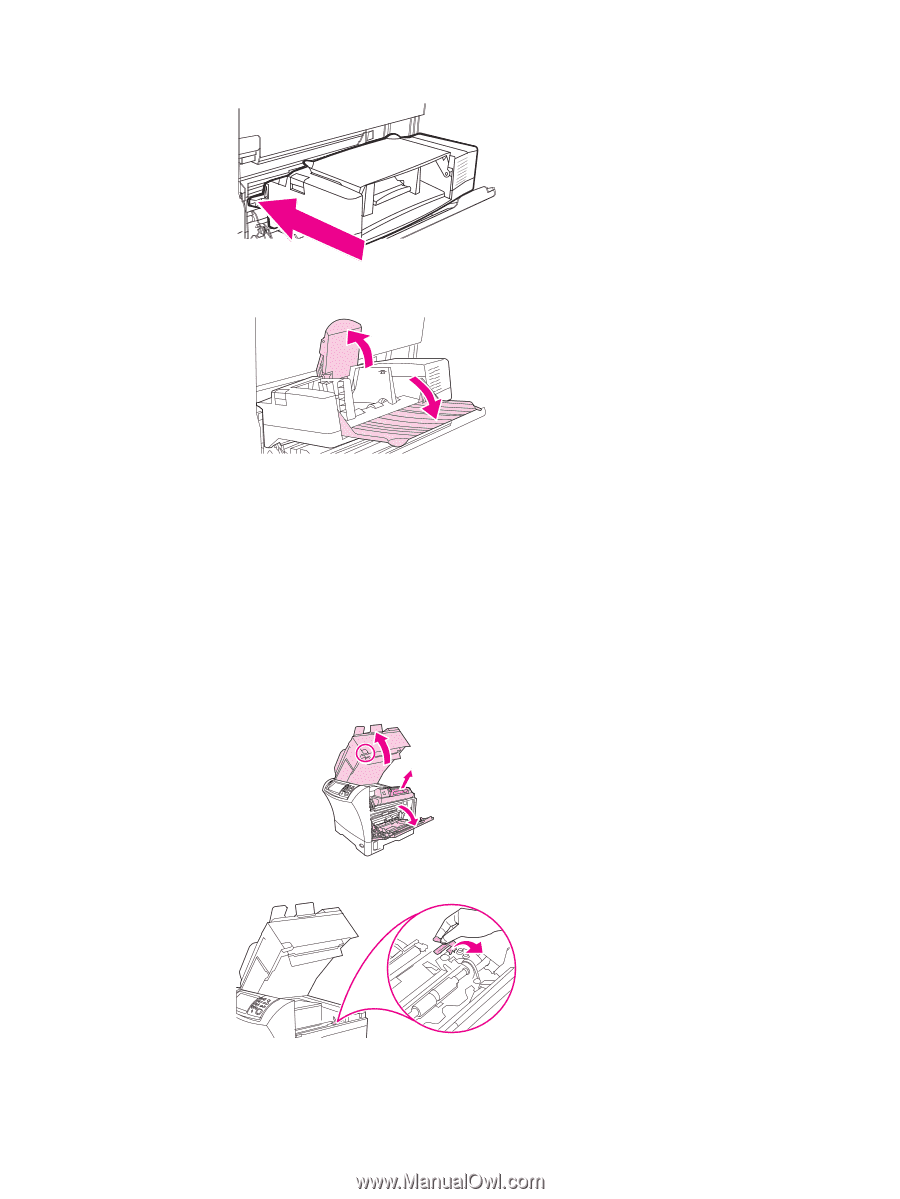
Insert the optional envelope feeder into the printer until it locks into place. Pull gently on
the optional envelope feeder to be sure that it is securely in place.
5.
Fold down the envelope-feeder tray. Lift the envelope weight.
6.
Reload the envelopes, making sure that you push the bottom envelopes in slightly
farther than the top envelopes.
7.
If a jam message persists, jammed media is still in the MFP. Look for the jam in another
location.
Clearing jams from the tray 1 area
Use this procedure to clear jams that occur in the tray 1 input area.
To clear jams from the tray 1 area
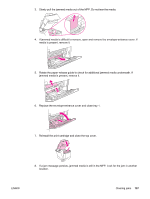
1.
Open the top cover, open tray 1, and remove the print cartridge.
2.
Use the green handle to lift the paper-access plate.
ENWW
Clearing jams
189