Ricoh 3045 User Instructions - Page 191
Box Settings
 |
View all Ricoh 3045 manuals
Add to My Manuals
Save this manual to your list of manuals |
Page 191 highlights
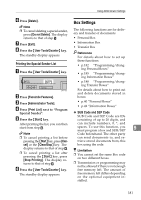
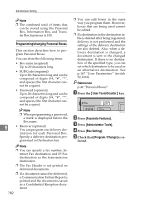
Using Administrator Settings F Press [Delete]. Box Settings Note ❒ To cancel deleting a special sender, press [Do not Delete]. The display returns to that of step E. The following functions are for delivery and transfer of documents: • Personal Box G Press [Exit]. H Press the {User Tools/Counter} key. The standby display appears. Printing the Special Sender List A Press the {User Tools/Counter} key. • Information Box • Transfer Box Reference For details about how to set up these functions: • p.182 "Programming/chang- ing Personal Boxes" • p.185 "Programming/chang- ing Information Boxes" • p.188 "Programming/changing Transfer Boxes" B Press [Facsimile Features]. For details about how to print out and delete documents stored in boxes: C Press [Administrator Tools]. D Press [Print List] next to "Program Special Sender". • p.40 "Personal Boxes" • p.42 "Information Boxes" ❖ SUB Code and SEP Code E Press the {Start} key. SUB Code and SEP Code are IDs consisting of up to 20 digits, and After printing the list, you can then start from step D. can include numbers, #, *, and spaces. To use this function, you must program a box and SUB/SEP 9 Note Code beforehand. The other party ❒ To cancel printing a list before can send documents to, and re- pressing the {Start} key, press [Can- trieve stored documents from, this cel] or the {Clear/Stop} key. The box using the code. display returns to that of step D. ❒ To cancel printing a list after pressing the {Start} key, press [Stop Printing]. The display returns to that of step D. F Press the {User Tools/Counter} key. Limitation ❒ You cannot set the same Box code on two different boxes. ❒ Transmission or programming may not be allowed if there is not enough free memory left. The amount of The standby display appears. free memory left differs depending on the optional equipment in- stalled. 181
-
 1
1 -
2
-
3
-
4
-
5
-
6
-
7
-
8
-
9
-
10
-
11
-
12
-
13
-
14
-
15
-
16
-
17
-
18
-
19
-
20
-
21
-
22
-
23
-
24
-
25
-
26
-
27
-
28
-
29
-
30
-
31
-
32
-
33
-
34
-
35
-
36
-
37
-
38
-
39
-
40
-
41
-
42
-
43
-
44
-
45
-
46
-
47
-
48
-
49
-
50
-
51
-
52
-
53
-
54
-
55
-
56
-
57
-
58
-
59
-
60
-
61
-
62
-
63
-
64
-
65
-
66
-
67
-
68
-
69
-
70
-
71
-
72
-
73
-
74
-
75
-
76
-
77
-
78
-
79
-
80
-
81
-
82
-
83
-
84
-
85
-
86
-
87
-
88
-
89
-
90
-
91
-
92
-
93
-
94
-
95
-
96
-
97
-
98
-
99
-
100
-
101
-
102
-
103
-
104
-
105
-
106
-
107
-
108
-
109
-
110
-
111
-
112
-
113
-
114
-
115
-
116
-
117
-
118
-
119
-
120
-
121
-
122
-
123
-
124
-
125
-
126
-
127
-
128
-
129
-
130
-
131
-
132
-
133
-
134
-
135
-
136
-
137
-
138
-
139
-
140
-
141
-
142
-
143
-
144
-
145
-
146
-
147
-
148
-
149
-
150
-
151
-
152
-
153
-
154
-
155
-
156
-
157
-
158
-
159
-
160
-
161
-
162
-
163
-
164
-
165
-
166
-
167
-
168
-
169
-
170
-
171
-
172
-
173
-
174
-
175
-
176
-
177
-
178
-
179
-
180
-
181
-
182
-
183
-
184
-
185
-
 186
186 -
 187
187 -
 188
188 -
 189
189 -
 190
190 -
 191
191 -
 192
192 -
 193
193 -
 194
194 -
 195
195 -
 196
196 -
197
-
198
-
199
-
200
-
201
-
202
-
203
-
204
-
205
-
206
-
207
-
208
-
209
-
210
-
211
-
212
-
213
-
214
-
215
-
216
-
217
-
218
-
219
-
220
-
221
-
222
-
223
-
224
-
225
-
226
-
227
-
228
-
229
-
230
-
231
-
232
-
233
-
234
-
235
-
236
 |
 |
