HP Visualize J5000 hp Visualize J5000, J7000 workstations owner's guide (a4978 - Page 111
Operating the DDS Tape Drive, Loading and Unloading a Data Cassette, Using Device Files
 |
View all HP Visualize J5000 manuals
Add to My Manuals
Save this manual to your list of manuals |
Page 111 highlights
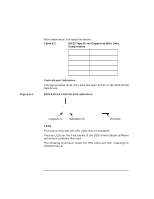
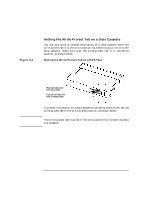
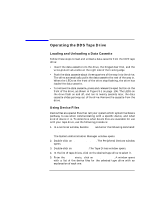
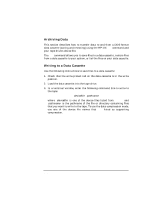
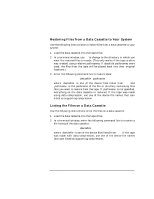
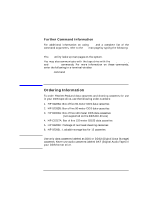
Using Your Digital Data Storage (DDS) Tape Drive Operating the DDS Tape Drive Operating the DDS Tape Drive Loading and Unloading a Data Cassette Follow these steps to load and unload a data cassette from the DDS tape drive: • Insert the data cassette into the drive, the hinged door first, and the write-protect tab visible on the right side of the trailing edge. • Push the data cassette about three quarters of the way into the drive. The drive automatically pulls the data cassette the rest of the way in. When the LEDs on the front of the drive stop flashing, the drive has loaded the data cassette. • To remove the data cassette, press and release the eject button on the front of the drive, as shown in Figure 5-1 on page 106. The LEDs on the drive flash on and off, and ten to twenty seconds later, the data cassette slides partway out of the drive. Remove the cassette from the drive. Using Device Files Device files are special files that tell your system which system hardware pathway to use when communicating with a specific device, and what kind of device it is. To determine what device files are available for use with your tape drive, use the following procedure: 1. In a terminal window, become root and enter the following command: sam Return The System Administration Manager window opens. 2. Double-click on Peripheral Devices ->. The Peripheral Devices window opens. 3. Double-click on Tape Drives ->. The Tape Drives window opens. 4. In the list of tape drives, click on the desired tape drive to select it. 5. From the Actions menu, click on Show Device Files. A window opens with a list of the device files for the selected tape drive with an explanation of each one. Chapter 5 111
-
 1
1 -
2
-
3
-
4
-
5
-
6
-
7
-
8
-
9
-
10
-
11
-
12
-
13
-
14
-
15
-
16
-
17
-
18
-
19
-
20
-
21
-
22
-
23
-
24
-
25
-
26
-
27
-
28
-
29
-
30
-
31
-
32
-
33
-
34
-
35
-
36
-
37
-
38
-
39
-
40
-
41
-
42
-
43
-
44
-
45
-
46
-
47
-
48
-
49
-
50
-
51
-
52
-
53
-
54
-
55
-
56
-
57
-
58
-
59
-
60
-
61
-
62
-
63
-
64
-
65
-
66
-
67
-
68
-
69
-
70
-
71
-
72
-
73
-
74
-
75
-
76
-
77
-
78
-
79
-
80
-
81
-
82
-
83
-
84
-
85
-
86
-
87
-
88
-
89
-
90
-
91
-
92
-
93
-
94
-
95
-
96
-
97
-
98
-
99
-
100
-
101
-
102
-
103
-
104
-
105
-
 106
106 -
 107
107 -
 108
108 -
 109
109 -
 110
110 -
 111
111 -
 112
112 -
 113
113 -
 114
114 -
 115
115 -
 116
116 -
117
-
118
-
119
-
120
-
121
-
122
-
123
-
124
-
125
-
126
-
127
-
128
-
129
-
130
-
131
-
132
-
133
-
134
-
135
-
136
-
137
-
138
-
139
-
140
-
141
-
142
-
143
-
144
-
145
-
146
-
147
-
148
-
149
-
150
-
151
-
152
-
153
-
154
-
155
-
156
-
157
-
158
-
159
-
160
-
161
-
162
-
163
-
164
-
165
-
166
-
167
-
168
-
169
-
170
-
171
-
172
-
173
-
174
-
175
-
176
-
177
-
178
-
179
-
180
-
181
-
182
-
183
-
184
-
185
-
186
-
187
-
188
-
189
-
190
-
191
-
192
-
193
-
194
-
195
-
196
-
197
-
198
-
199
-
200
-
201
-
202
-
203
-
204
-
205
-
206
-
207
-
208
-
209
-
210
-
211
-
212
 |
 |