HP Visualize J5000 hp Visualize J5000, J7000 workstations owner's guide (a4978 - Page 112
Archiving Data, Writing to a Data Cassette, Operating the DDS Tape Drive
 |
View all HP Visualize J5000 manuals
Add to My Manuals
Save this manual to your list of manuals |
Page 112 highlights
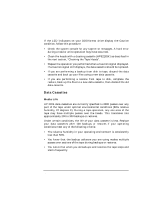
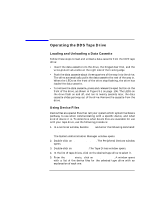
Using Your Digital Data Storage (DDS) Tape Drive Operating the DDS Tape Drive Archiving Data This section describes how to transfer data to and from a DDS-format data cassette (saving and restoring) using the HP-UX tar command and your tape drive's device file. The tar command allows you to save files to a data cassette, restore files from a data cassette to your system, or list the files on your data cassette. Writing to a Data Cassette Use the following instructions to save files to a data cassette: 1. Check that the write-protect tab on the data cassette is in the write position. 2. Load the data cassette into the tape drive. 3. In a terminal window, enter the following command line to write to the tape: tar -cvf /dev/rmt/〈devicefile〉 〈pathname〉 where 〈devicefile〉 is one of the device files listed from ioscan and 〈pathname〉 is the pathname of the file or directory containing files that you want to write to the tape. To use the data-compression mode, use one of the device file names that sam listed as supporting compression. 112 Chapter 5
-
 1
1 -
2
-
3
-
4
-
5
-
6
-
7
-
8
-
9
-
10
-
11
-
12
-
13
-
14
-
15
-
16
-
17
-
18
-
19
-
20
-
21
-
22
-
23
-
24
-
25
-
26
-
27
-
28
-
29
-
30
-
31
-
32
-
33
-
34
-
35
-
36
-
37
-
38
-
39
-
40
-
41
-
42
-
43
-
44
-
45
-
46
-
47
-
48
-
49
-
50
-
51
-
52
-
53
-
54
-
55
-
56
-
57
-
58
-
59
-
60
-
61
-
62
-
63
-
64
-
65
-
66
-
67
-
68
-
69
-
70
-
71
-
72
-
73
-
74
-
75
-
76
-
77
-
78
-
79
-
80
-
81
-
82
-
83
-
84
-
85
-
86
-
87
-
88
-
89
-
90
-
91
-
92
-
93
-
94
-
95
-
96
-
97
-
98
-
99
-
100
-
101
-
102
-
103
-
104
-
105
-
106
-
 107
107 -
 108
108 -
 109
109 -
 110
110 -
 111
111 -
 112
112 -
 113
113 -
 114
114 -
 115
115 -
 116
116 -
 117
117 -
118
-
119
-
120
-
121
-
122
-
123
-
124
-
125
-
126
-
127
-
128
-
129
-
130
-
131
-
132
-
133
-
134
-
135
-
136
-
137
-
138
-
139
-
140
-
141
-
142
-
143
-
144
-
145
-
146
-
147
-
148
-
149
-
150
-
151
-
152
-
153
-
154
-
155
-
156
-
157
-
158
-
159
-
160
-
161
-
162
-
163
-
164
-
165
-
166
-
167
-
168
-
169
-
170
-
171
-
172
-
173
-
174
-
175
-
176
-
177
-
178
-
179
-
180
-
181
-
182
-
183
-
184
-
185
-
186
-
187
-
188
-
189
-
190
-
191
-
192
-
193
-
194
-
195
-
196
-
197
-
198
-
199
-
200
-
201
-
202
-
203
-
204
-
205
-
206
-
207
-
208
-
209
-
210
-
211
-
212
 |
 |