HP Visualize J5000 hp Visualize J5000, J7000 workstations owner's guide (a4978 - Page 85
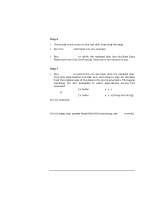
Step 6, Reserved Area of all the Physical Volumes in the Volume Group.
 |
View all HP Visualize J5000 manuals
Add to My Manuals
Save this manual to your list of manuals |
Page 85 highlights
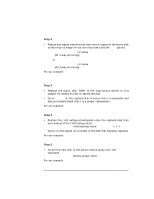
Hot-Pluggable Hard Disk Drives The Hot-Plug Process Step 6 • If this disk is not a mirror of a root disk, then skip this step. • Run the mkboot command. For our example: mkboot /dev/rdsk/c2t4d0 • Run lvlnboot -R to relink the replaced disk into the Boot Data Reserved Area of all the Physical Volumes in the Volume Group. lvlnboot -R Step 7 • Run lvextend to extend the mirrors back onto the replaced disk. This may take several minutes, as it will have to copy all the data from the original copy of the data to the mirrored extents. The logical volume(s) are still accessible to users' applications during this command. lvextend -m 1 〈LV name〉 /dev/dsk/cxtxdx or lvextend -m 2 〈LV name〉 /dev/dsk/cxtxdx (3-way mirroring) For our example: lvextend -m 1 /dev/vg02/vg02 /dev/dsk/c3t5d0 lvextend -m 1 /dev/vg00/lvol4 /dev/dsk/c2t4d0 lvextend -m 1 /dev/vg00/lvol5 /dev/dsk/c2t4d0 At this stage, your system should be fully functioning; use xstm to verify. Chapter 3 85
-
 1
1 -
2
-
3
-
4
-
5
-
6
-
7
-
8
-
9
-
10
-
11
-
12
-
13
-
14
-
15
-
16
-
17
-
18
-
19
-
20
-
21
-
22
-
23
-
24
-
25
-
26
-
27
-
28
-
29
-
30
-
31
-
32
-
33
-
34
-
35
-
36
-
37
-
38
-
39
-
40
-
41
-
42
-
43
-
44
-
45
-
46
-
47
-
48
-
49
-
50
-
51
-
52
-
53
-
54
-
55
-
56
-
57
-
58
-
59
-
60
-
61
-
62
-
63
-
64
-
65
-
66
-
67
-
68
-
69
-
70
-
71
-
72
-
73
-
74
-
75
-
76
-
77
-
78
-
79
-
 80
80 -
 81
81 -
 82
82 -
 83
83 -
 84
84 -
 85
85 -
 86
86 -
 87
87 -
 88
88 -
 89
89 -
 90
90 -
91
-
92
-
93
-
94
-
95
-
96
-
97
-
98
-
99
-
100
-
101
-
102
-
103
-
104
-
105
-
106
-
107
-
108
-
109
-
110
-
111
-
112
-
113
-
114
-
115
-
116
-
117
-
118
-
119
-
120
-
121
-
122
-
123
-
124
-
125
-
126
-
127
-
128
-
129
-
130
-
131
-
132
-
133
-
134
-
135
-
136
-
137
-
138
-
139
-
140
-
141
-
142
-
143
-
144
-
145
-
146
-
147
-
148
-
149
-
150
-
151
-
152
-
153
-
154
-
155
-
156
-
157
-
158
-
159
-
160
-
161
-
162
-
163
-
164
-
165
-
166
-
167
-
168
-
169
-
170
-
171
-
172
-
173
-
174
-
175
-
176
-
177
-
178
-
179
-
180
-
181
-
182
-
183
-
184
-
185
-
186
-
187
-
188
-
189
-
190
-
191
-
192
-
193
-
194
-
195
-
196
-
197
-
198
-
199
-
200
-
201
-
202
-
203
-
204
-
205
-
206
-
207
-
208
-
209
-
210
-
211
-
212
 |
 |
