HP Visualize J5000 hp Visualize J5000, J7000 workstations owner's guide (a4978 - Page 70
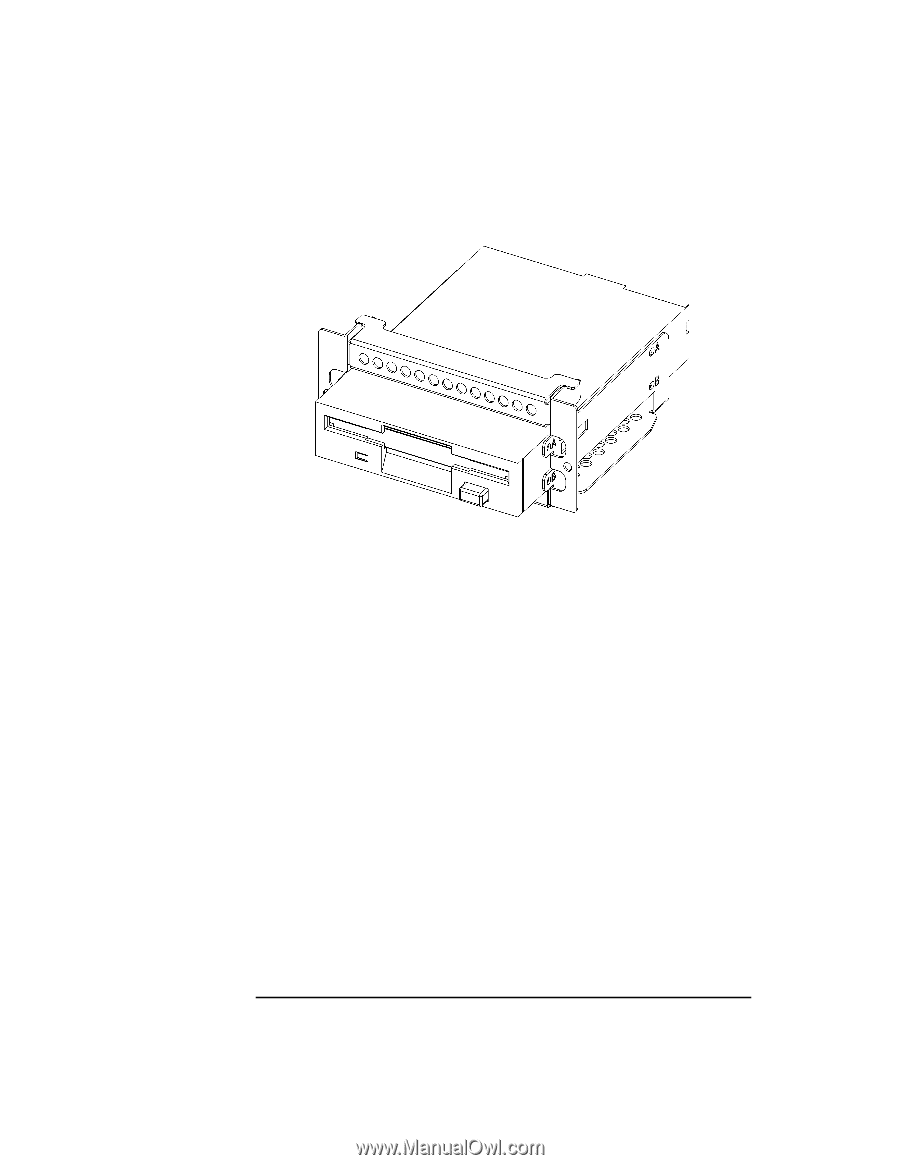
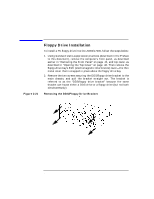
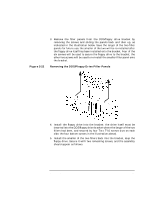
Floppy Drive, Filler Installed into the DDS/Floppy Drive Bracket
 |
View all HP Visualize J5000 manuals
Add to My Manuals
Save this manual to your list of manuals |
Page 70 highlights
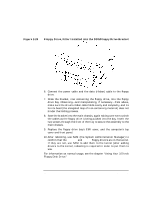
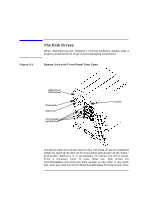
Changing Your Computer's Hardware Configuration Floppy Drive Installation Figure 2-23 Floppy Drive, Filler Installed into the DDS/Floppy Drive Bracket 6. Connect the power cable and the data (ribbon) cable to the floppy drive. 7. Slide the bracket, now containing the floppy drive, into the floppy drive bay. Observing-and manipulating, if necessary-from above, make sure the drive's ribbon cable folds neatly and compactly, and its ferrite bead (the elongated loop of iron-containing material) does not hinder the folding process. 8. Seat the bracket into the main chassis, again taking care not to pinch the cables as the floppy drive is being pushed into the bay. Insert the two screws through the front of the tray to secure the assembly to the main chassis. 9. Replace the floppy drive bay's EMI cover, and the computer's top cover and front panel. 10. After rebooting, use SAM (the System Administration Manager) to confirm that the sioflop and siofdc floppy drivers are in the kernel. If they are not, use SAM to add them to the kernel (after adding drivers to the kernel, rebooting is required in order to put them to use. For information on normal usage, see the chapter "Using Your 3.5-Inch Floppy Disk Drive." 70 Chapter 2
-
 1
1 -
2
-
3
-
4
-
5
-
6
-
7
-
8
-
9
-
10
-
11
-
12
-
13
-
14
-
15
-
16
-
17
-
18
-
19
-
20
-
21
-
22
-
23
-
24
-
25
-
26
-
27
-
28
-
29
-
30
-
31
-
32
-
33
-
34
-
35
-
36
-
37
-
38
-
39
-
40
-
41
-
42
-
43
-
44
-
45
-
46
-
47
-
48
-
49
-
50
-
51
-
52
-
53
-
54
-
55
-
56
-
57
-
58
-
59
-
60
-
61
-
62
-
63
-
64
-
 65
65 -
 66
66 -
 67
67 -
 68
68 -
 69
69 -
 70
70 -
 71
71 -
 72
72 -
 73
73 -
 74
74 -
 75
75 -
76
-
77
-
78
-
79
-
80
-
81
-
82
-
83
-
84
-
85
-
86
-
87
-
88
-
89
-
90
-
91
-
92
-
93
-
94
-
95
-
96
-
97
-
98
-
99
-
100
-
101
-
102
-
103
-
104
-
105
-
106
-
107
-
108
-
109
-
110
-
111
-
112
-
113
-
114
-
115
-
116
-
117
-
118
-
119
-
120
-
121
-
122
-
123
-
124
-
125
-
126
-
127
-
128
-
129
-
130
-
131
-
132
-
133
-
134
-
135
-
136
-
137
-
138
-
139
-
140
-
141
-
142
-
143
-
144
-
145
-
146
-
147
-
148
-
149
-
150
-
151
-
152
-
153
-
154
-
155
-
156
-
157
-
158
-
159
-
160
-
161
-
162
-
163
-
164
-
165
-
166
-
167
-
168
-
169
-
170
-
171
-
172
-
173
-
174
-
175
-
176
-
177
-
178
-
179
-
180
-
181
-
182
-
183
-
184
-
185
-
186
-
187
-
188
-
189
-
190
-
191
-
192
-
193
-
194
-
195
-
196
-
197
-
198
-
199
-
200
-
201
-
202
-
203
-
204
-
205
-
206
-
207
-
208
-
209
-
210
-
211
-
212
 |
 |