Pfaff creative 2140 Owner's Manual - Page 103
Embroidery
 |
View all Pfaff creative 2140 manuals
Add to My Manuals
Save this manual to your list of manuals |
Page 103 highlights
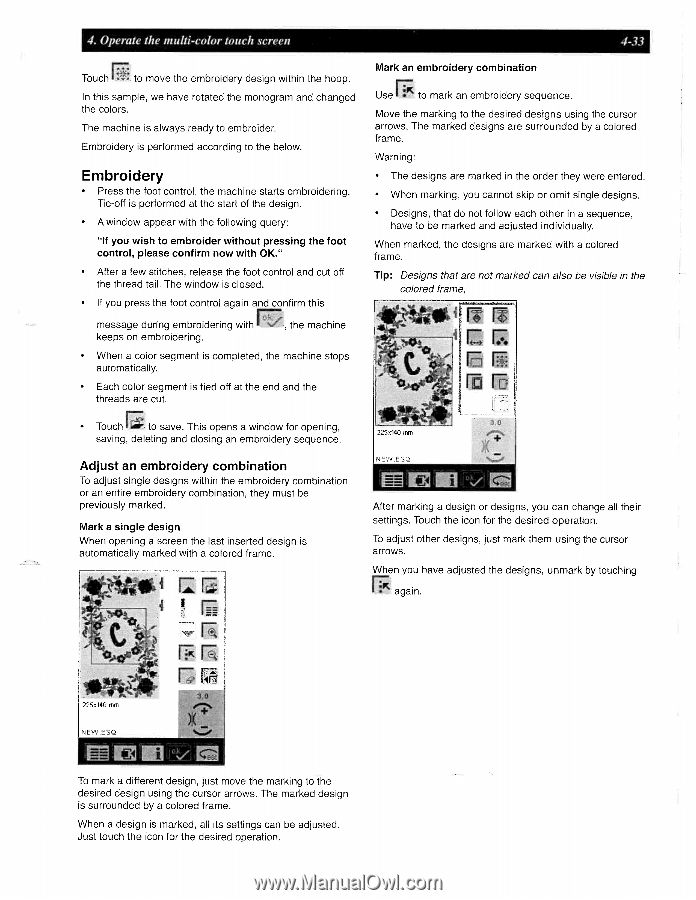
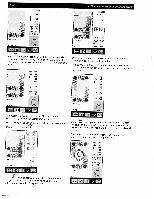
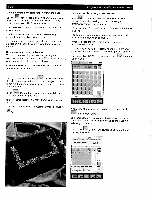
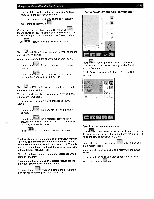
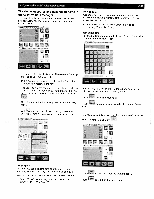
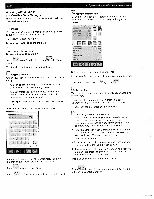
4. Operate the multi-color touch screen 4-33 Touch to move the embroidery design within the hoop. In this sample, we have rotated the monogram and changed the colors. The machine is always ready to embroider. Embroidery is performed according to the below. Embroidery • Press the foot control, the machine starts embroidering. Tie-off is performed at the start of the design. • A window appear with the following query: "If you wish to embroider without pressing the foot control, please confirm now with OK." • After a few stitches, release the foot control and cut off the thread tail. The window is closed. • If you press the foot control again and confirm this message during embroidering with , the machine keeps on embroidering. • When a color segment is completed, the machine stops automatically. • Each color segment is tied off at the end and the threads are cut. Mark an embroidery combination Use to mark an embroidery sequence. Move the marking to the desired designs using the cursor arrows. The marked designs are surrounded by a colored frame. Warning: • The designs are marked in the order they were entered. • When marking, you cannot skip or omit single designs. • Designs, that do not follow each other in a sequence, have to be marked and adjusted individually. When marked, the designs are marked with a colored frame. Tip: Designs that are not marked can also be visible in the colored frame, • Touch to save. This opens a window for opening, saving, deleting and closing an embroidery sequence. Adjust an embroidery combination To adjust single designs within the embroidery combination or an entire embroidery combination, they must be previously marked. Mark a single design When opening a screen the last inserted design is automatically marked with a colored frame. I After marking a design or designs, you can change all their settings. Touch the icon for the desired operation. To adjust other designs, just mark them using the cursor arrows. When you have adjusted the designs, unmark by touching again. rz 225x140 mm NWESQ To mark a different design, just move the marking to the desired design using the cursor arrows. The marked design is surrounded by a colored frame. When a design is marked, all its settings can be adjusted. Just touch the icon for the desired operation.
-
 1
1 -
2
-
3
-
4
-
5
-
6
-
7
-
8
-
9
-
10
-
11
-
12
-
13
-
14
-
15
-
16
-
17
-
18
-
19
-
20
-
21
-
22
-
23
-
24
-
25
-
26
-
27
-
28
-
29
-
30
-
31
-
32
-
33
-
34
-
35
-
36
-
37
-
38
-
39
-
40
-
41
-
42
-
43
-
44
-
45
-
46
-
47
-
48
-
49
-
50
-
51
-
52
-
53
-
54
-
55
-
56
-
57
-
58
-
59
-
60
-
61
-
62
-
63
-
64
-
65
-
66
-
67
-
68
-
69
-
70
-
71
-
72
-
73
-
74
-
75
-
76
-
77
-
78
-
79
-
80
-
81
-
82
-
83
-
84
-
85
-
86
-
87
-
88
-
89
-
90
-
91
-
92
-
93
-
94
-
95
-
96
-
97
-
 98
98 -
 99
99 -
 100
100 -
 101
101 -
 102
102 -
 103
103 -
 104
104 -
 105
105 -
 106
106 -
 107
107 -
 108
108 -
109
-
110
-
111
-
112
-
113
-
114
-
115
-
116
-
117
-
118
-
119
-
120
-
121
-
122
-
123
-
124
-
125
-
126
-
127
-
128
-
129
-
130
-
131
-
132
-
133
-
134
-
135
-
136
-
137
-
138
-
139
-
140
-
141
-
142
-
143
-
144
-
145
-
146
-
147
-
148
-
149
-
150
-
151
-
152
-
153
-
154
-
155
-
156
-
157
-
158
-
159
-
160
-
161
-
162
-
163
-
164
-
165
-
166
-
167
-
168
-
169
-
170
-
171
-
172
-
173
-
174
-
175
-
176
-
177
-
178
-
179
-
180
-
181
-
182
-
183
-
184
-
185
-
186
-
187
-
188
-
189
-
190
-
191
 |
 |