Pfaff creative 2140 Owner's Manual - Page 168
Cording, Shirring
 |
View all Pfaff creative 2140 manuals
Add to My Manuals
Save this manual to your list of manuals |
Page 168 highlights
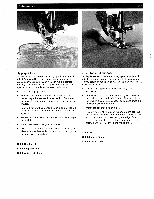
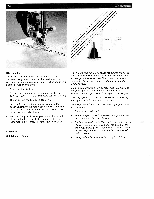
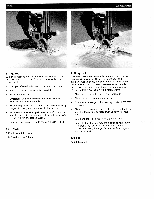
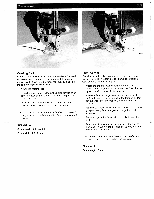
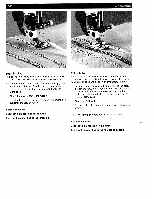
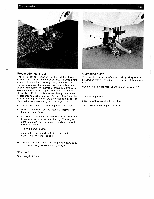
7. Accessories 7-11 Cording foot Cording is a technique in which pearl thread or a fine cord is overstitched to produce a purl seam. With this you can obtain an effect similar to braiding. Appliqués can also be made more effective with this seam. • Attach the cording foot. • Place the pearl thread in the foot so it leads through one of the grooves at the front and lies under the presser foot at the back. • Overstitch the pearl thread with a narrow satin stitch. This produces what is known as the purl seam. Tip: You can also obtain a remarkable effect by overstitch ing a medium pearl thread with a thread of a different color. Stitch No: 22 Stitch length: 0.4 - 0.6 mm Stitch width: 1.5 - 2 mm Shirring foot Beautiful gathering effects can be achieved quickly and easily with the shirring foot, i.e. on lightweight children s wear or home decorating projects. • Attach the shirring foot by hooking the rear bar of the foot into the rear groove of the foot holder. Push the foot upwards until it snaps into the front bar. • Place the fabric to be gathered under the presser foot, and the fabric to remain flat on the top through the foot cut out. Make sure the fabrics are placed right sdes together. • Hold the top fabric slightly taut while sewing. The harder you pull the top fabric the greater the gathering effect you achieve. • Be sure to guide the fabric edges evenly through the foot. • Disengage the shirring foot by pushing it down at the front and remove it in the direction of the groove of the presser foot holder at the back. Tip: Tighter gathers can be achieved by increasing the needle thread tension and the stitch length. Stitch No: 1 Stitch length: 3 mm
-
 1
1 -
2
-
3
-
4
-
5
-
6
-
7
-
8
-
9
-
10
-
11
-
12
-
13
-
14
-
15
-
16
-
17
-
18
-
19
-
20
-
21
-
22
-
23
-
24
-
25
-
26
-
27
-
28
-
29
-
30
-
31
-
32
-
33
-
34
-
35
-
36
-
37
-
38
-
39
-
40
-
41
-
42
-
43
-
44
-
45
-
46
-
47
-
48
-
49
-
50
-
51
-
52
-
53
-
54
-
55
-
56
-
57
-
58
-
59
-
60
-
61
-
62
-
63
-
64
-
65
-
66
-
67
-
68
-
69
-
70
-
71
-
72
-
73
-
74
-
75
-
76
-
77
-
78
-
79
-
80
-
81
-
82
-
83
-
84
-
85
-
86
-
87
-
88
-
89
-
90
-
91
-
92
-
93
-
94
-
95
-
96
-
97
-
98
-
99
-
100
-
101
-
102
-
103
-
104
-
105
-
106
-
107
-
108
-
109
-
110
-
111
-
112
-
113
-
114
-
115
-
116
-
117
-
118
-
119
-
120
-
121
-
122
-
123
-
124
-
125
-
126
-
127
-
128
-
129
-
130
-
131
-
132
-
133
-
134
-
135
-
136
-
137
-
138
-
139
-
140
-
141
-
142
-
143
-
144
-
145
-
146
-
147
-
148
-
149
-
150
-
151
-
152
-
153
-
154
-
155
-
156
-
157
-
158
-
159
-
160
-
161
-
162
-
 163
163 -
 164
164 -
 165
165 -
 166
166 -
 167
167 -
 168
168 -
 169
169 -
 170
170 -
 171
171 -
 172
172 -
 173
173 -
174
-
175
-
176
-
177
-
178
-
179
-
180
-
181
-
182
-
183
-
184
-
185
-
186
-
187
-
188
-
189
-
190
-
191
 |
 |
