Pfaff creative 2140 Owner's Manual - Page 170
Eyelet, plate, Ruffler - buy
 |
View all Pfaff creative 2140 manuals
Add to My Manuals
Save this manual to your list of manuals |
Page 170 highlights
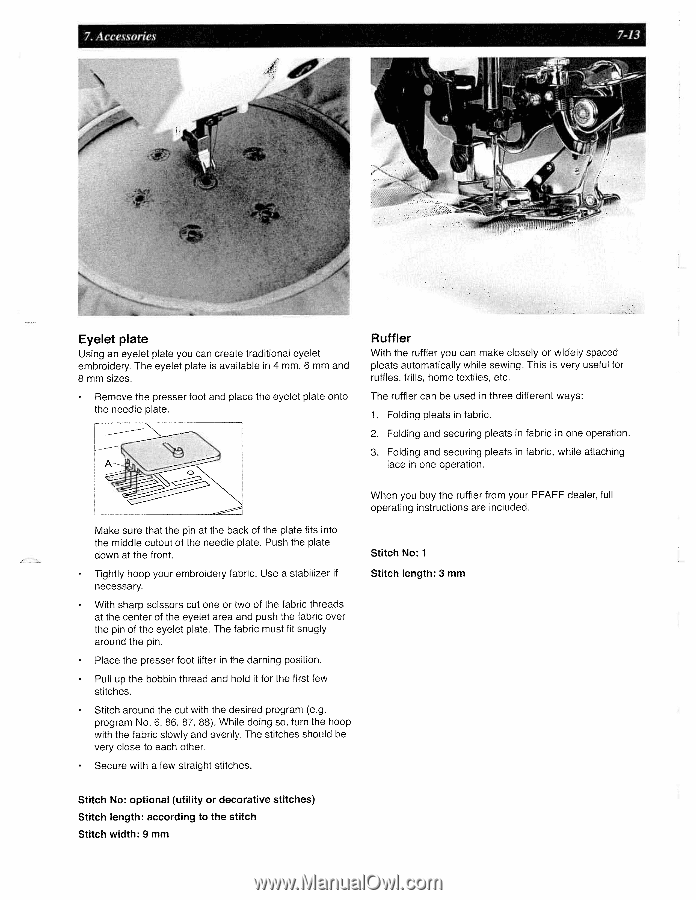
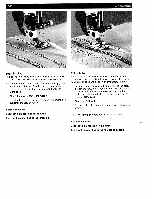
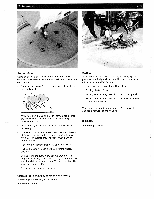
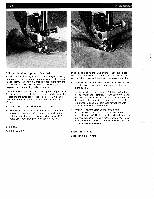
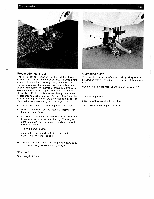
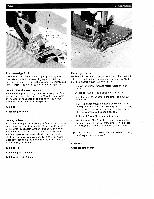
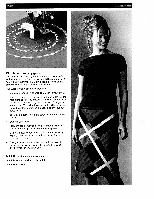
Eyelet plate Using an eyelet plate you can create traditional eyelet embroidery. The eyelet plate is available in 4 mm, 6 mm and 8 mm sizes. • Remove the presser foot and place the eyelet plate onto the needle plate. N -- Ruffler With the ruffler you can make closely or widely spaced pleats automatically while sewing. This is very useful for ruffles, frills, home textiles. etc. The ruffler can be used in three different ways: 1. Folding pleats in fabric. 2. Folding and securing pleats in fabric in one operation. 3. Folding and securing pleats in fabric, while attaching lace in one operation. Make sure that the pin at the back of the plate fits into the middle cutout of the needle plate. Push the plate down at the front. • Tightly hoop your embroidery fabric. Use a stabilizer if necessary. • With sharp scissors cut one or two of the fabric threads at the center of the eyelet area and push the fabric over the pin of the eyelet plate. The fabric must fit snugly around the pin. • Place the presser foot lifter in the darning position. • Pull up the bobbin thread and hold it for the first few stitches. • Stitch around the cut with the desired program (e.g. program No. 6. 86, 87, 88). While doing so, turn the hoop with the fabric slowly and evenly. The stitches should be very close to each other. Secure with a few straight stitches. When you buy the ruffler from your PFAFF dealer, full operating instructions are included. Stitch No: 1 Stitch length: 3 mm Stitch No: optional (utility or decorative stitches) Stitch length: according to the stitch Stitch width: 9 mm
-
 1
1 -
2
-
3
-
4
-
5
-
6
-
7
-
8
-
9
-
10
-
11
-
12
-
13
-
14
-
15
-
16
-
17
-
18
-
19
-
20
-
21
-
22
-
23
-
24
-
25
-
26
-
27
-
28
-
29
-
30
-
31
-
32
-
33
-
34
-
35
-
36
-
37
-
38
-
39
-
40
-
41
-
42
-
43
-
44
-
45
-
46
-
47
-
48
-
49
-
50
-
51
-
52
-
53
-
54
-
55
-
56
-
57
-
58
-
59
-
60
-
61
-
62
-
63
-
64
-
65
-
66
-
67
-
68
-
69
-
70
-
71
-
72
-
73
-
74
-
75
-
76
-
77
-
78
-
79
-
80
-
81
-
82
-
83
-
84
-
85
-
86
-
87
-
88
-
89
-
90
-
91
-
92
-
93
-
94
-
95
-
96
-
97
-
98
-
99
-
100
-
101
-
102
-
103
-
104
-
105
-
106
-
107
-
108
-
109
-
110
-
111
-
112
-
113
-
114
-
115
-
116
-
117
-
118
-
119
-
120
-
121
-
122
-
123
-
124
-
125
-
126
-
127
-
128
-
129
-
130
-
131
-
132
-
133
-
134
-
135
-
136
-
137
-
138
-
139
-
140
-
141
-
142
-
143
-
144
-
145
-
146
-
147
-
148
-
149
-
150
-
151
-
152
-
153
-
154
-
155
-
156
-
157
-
158
-
159
-
160
-
161
-
162
-
163
-
164
-
 165
165 -
 166
166 -
 167
167 -
 168
168 -
 169
169 -
 170
170 -
 171
171 -
 172
172 -
 173
173 -
 174
174 -
 175
175 -
176
-
177
-
178
-
179
-
180
-
181
-
182
-
183
-
184
-
185
-
186
-
187
-
188
-
189
-
190
-
191
 |
 |