Pfaff creative 2140 Owner's Manual - Page 129
Eyelet, embroidery
 |
View all Pfaff creative 2140 manuals
Add to My Manuals
Save this manual to your list of manuals |
Page 129 highlights
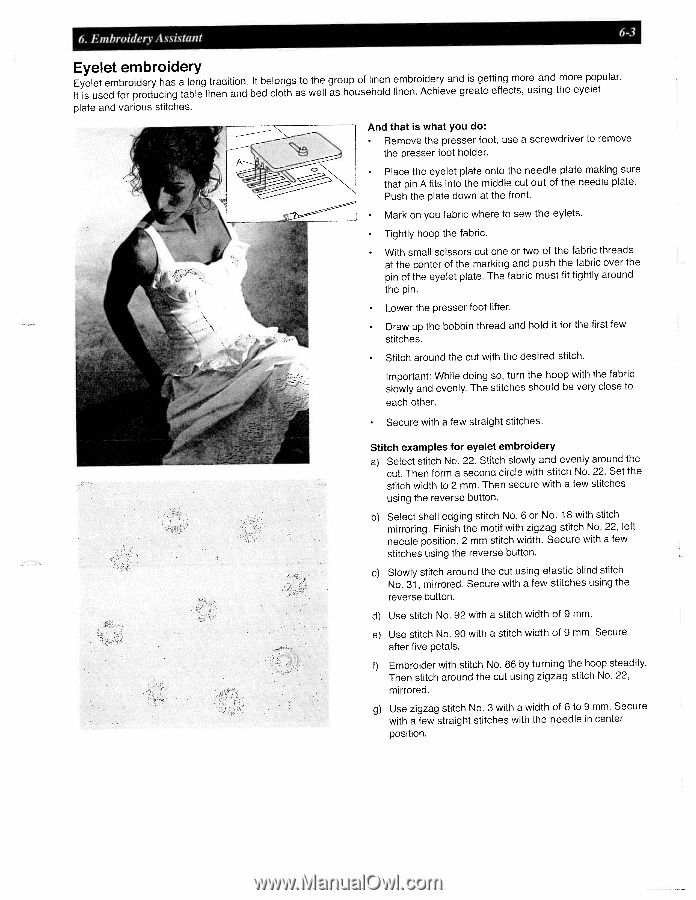
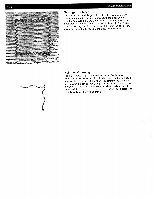
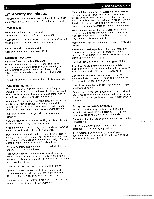
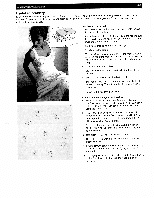
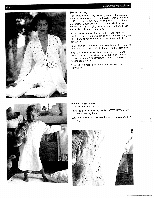
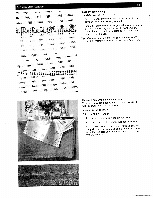
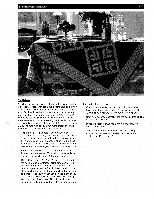
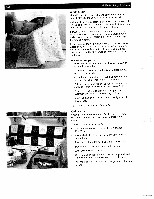
6. Embroidery Assistant 6-3 Eyelet embroidery Eyelet embroidery has It is used for producing a long tradition. table linen and It belongs to the bed cloth as well group of linen as household embroidery and is getting more and more popular. linen. Achieve greate effects, using the eyelet plate and various stitches. And that is what you do: • Remove the presser foot, use a screwdriver to remove the presser foot holder. • Place the eyelet plate onto the needle plate making sure that pin A fits into the middle cut out of the needle plate. Push the plate down at the front. • Mark on you fabric where to sew the eylets. • Tightly hoop the fabric. • With small scissors cut one or two of the fabric threads at the center of the marking and push the fabric over the pin of the eyelet plate. The fabric must fit tightly around the pin. • Lower the presser foot lifter. • Draw up the bobbin thread and hold it for the first few stitches. • Stitch around the cut with the desired stitch. Important: While doing so, turn the hoop with the fabric slowly and evenly. The stitches should be very close to each other. • Secure with a few straight stitches. Stitch examples for eyelet embroidery a) Select stitch No. 22. Stitch slowly and evenly around the cut. Then form a second circle with stitch No. 22. Set the stitch width to 2 mm. Then secure with a few stitches using the reverse button, b) Select shell edging stitch No. 6 or No. 18 with stitch mirroring. Finish the motif with zigzag stitch No. 22, left needle position, 2 mm stitch width. Secure with a few stitches using the reverse button. c) Slowly stitch around the cut using elastic blind stitch No. 31, mirrored. Secure with a few stitches using the reverse button. d) Use stitch No. 92 with a stitch width of 9 mm. e) Use stitch No. 90 with a stitch width of 9 mm. Secure after five petals. f) Embroider with stitch No. 86 by turning the hoop steadily. Then stitch around the cut using zigzag stitch No. 22, mirrored. g) Use zigzag stitch No. 3 with a width of 6 to 9 mm. Secure with a few straight stitches with the needle in center position.
-
 1
1 -
2
-
3
-
4
-
5
-
6
-
7
-
8
-
9
-
10
-
11
-
12
-
13
-
14
-
15
-
16
-
17
-
18
-
19
-
20
-
21
-
22
-
23
-
24
-
25
-
26
-
27
-
28
-
29
-
30
-
31
-
32
-
33
-
34
-
35
-
36
-
37
-
38
-
39
-
40
-
41
-
42
-
43
-
44
-
45
-
46
-
47
-
48
-
49
-
50
-
51
-
52
-
53
-
54
-
55
-
56
-
57
-
58
-
59
-
60
-
61
-
62
-
63
-
64
-
65
-
66
-
67
-
68
-
69
-
70
-
71
-
72
-
73
-
74
-
75
-
76
-
77
-
78
-
79
-
80
-
81
-
82
-
83
-
84
-
85
-
86
-
87
-
88
-
89
-
90
-
91
-
92
-
93
-
94
-
95
-
96
-
97
-
98
-
99
-
100
-
101
-
102
-
103
-
104
-
105
-
106
-
107
-
108
-
109
-
110
-
111
-
112
-
113
-
114
-
115
-
116
-
117
-
118
-
119
-
120
-
121
-
122
-
123
-
 124
124 -
 125
125 -
 126
126 -
 127
127 -
 128
128 -
 129
129 -
 130
130 -
 131
131 -
 132
132 -
 133
133 -
 134
134 -
135
-
136
-
137
-
138
-
139
-
140
-
141
-
142
-
143
-
144
-
145
-
146
-
147
-
148
-
149
-
150
-
151
-
152
-
153
-
154
-
155
-
156
-
157
-
158
-
159
-
160
-
161
-
162
-
163
-
164
-
165
-
166
-
167
-
168
-
169
-
170
-
171
-
172
-
173
-
174
-
175
-
176
-
177
-
178
-
179
-
180
-
181
-
182
-
183
-
184
-
185
-
186
-
187
-
188
-
189
-
190
-
191
 |
 |