Pfaff creative 2140 Owner's Manual - Page 113
Flatlock, seams, Bridging, stitch, Cross-hem
 |
View all Pfaff creative 2140 manuals
Add to My Manuals
Save this manual to your list of manuals |
Page 113 highlights
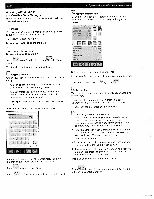
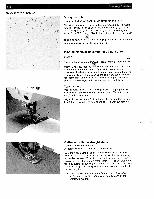
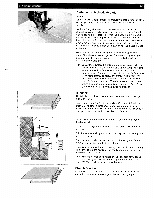
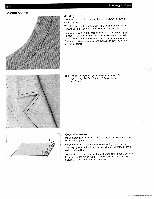
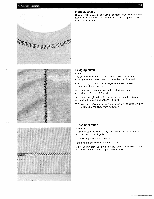
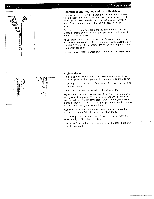
5. Sewing Assistant 5-5 Flatlock seams Covering stitches are used when a flat seam finish is desired. This type of stitch produces a flatlock effect that lends a professional look to your sewing. Bridging stitch Stitch 11 The bridging stitch creates a very stretchy seam with a hem stitching effect, It is often used for connecting two fabric edges. Clean-finish (neaten) the fabric edges and press the seam allowance to the wrong side. Place the fabric under the presser foot with the edges approximately 3 mm (1/8") apart. Stitch from the right side of the fabric, making sure that the needle pierces the fabric on the right and left sides. TIP: Use the bridging guide (optional accessory) to easily join two edges of fabric at a consistent spacing. Cross-hem stitch Stitch 13 This highly stretchy stitch is very suitable for decorative hems as used on T-shirts and lingerie. Clean-finish (neaten) the raw edge. Fold the hem allowance to the reverse side. Stitch the hem from the right side of the fabric. When sewing, make sure the underneath fabric edge is fully enclosed.
-
 1
1 -
2
-
3
-
4
-
5
-
6
-
7
-
8
-
9
-
10
-
11
-
12
-
13
-
14
-
15
-
16
-
17
-
18
-
19
-
20
-
21
-
22
-
23
-
24
-
25
-
26
-
27
-
28
-
29
-
30
-
31
-
32
-
33
-
34
-
35
-
36
-
37
-
38
-
39
-
40
-
41
-
42
-
43
-
44
-
45
-
46
-
47
-
48
-
49
-
50
-
51
-
52
-
53
-
54
-
55
-
56
-
57
-
58
-
59
-
60
-
61
-
62
-
63
-
64
-
65
-
66
-
67
-
68
-
69
-
70
-
71
-
72
-
73
-
74
-
75
-
76
-
77
-
78
-
79
-
80
-
81
-
82
-
83
-
84
-
85
-
86
-
87
-
88
-
89
-
90
-
91
-
92
-
93
-
94
-
95
-
96
-
97
-
98
-
99
-
100
-
101
-
102
-
103
-
104
-
105
-
106
-
107
-
 108
108 -
 109
109 -
 110
110 -
 111
111 -
 112
112 -
 113
113 -
 114
114 -
 115
115 -
 116
116 -
 117
117 -
 118
118 -
119
-
120
-
121
-
122
-
123
-
124
-
125
-
126
-
127
-
128
-
129
-
130
-
131
-
132
-
133
-
134
-
135
-
136
-
137
-
138
-
139
-
140
-
141
-
142
-
143
-
144
-
145
-
146
-
147
-
148
-
149
-
150
-
151
-
152
-
153
-
154
-
155
-
156
-
157
-
158
-
159
-
160
-
161
-
162
-
163
-
164
-
165
-
166
-
167
-
168
-
169
-
170
-
171
-
172
-
173
-
174
-
175
-
176
-
177
-
178
-
179
-
180
-
181
-
182
-
183
-
184
-
185
-
186
-
187
-
188
-
189
-
190
-
191
 |
 |
