eMachines T6528 NG3 Hardware Reference - Page 141
Recovering your system
 |
View all eMachines T6528 manuals
Add to My Manuals
Save this manual to your list of manuals |
Page 141 highlights
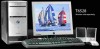
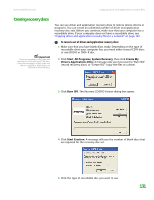
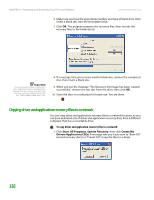
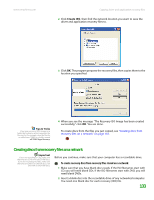
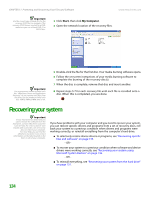
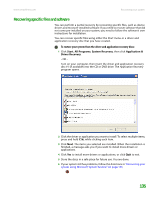
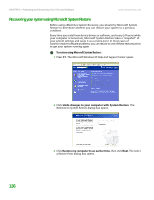
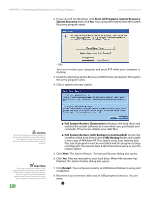
CHAPTER 11: Protecting and Recovering Your Files and Software www.emachines.com Important Use the correct type of blank disc for the recovery (ISO) file. For example, if the recovery (ISO) file was created for a DVD, make sure you use a blank DVD+R or DVD-R disc. 3 Click Start, then click My Computer. 4 Open the network location of the recovery files. Important Use a permanent marker to label each disc "eMachines Driver and Application Recovery." As you remove each disc from the drive, use the marker to label each disc 1 of x, 2 of x, 3 of x, and so on. 5 Double-click the file for the first disc. Your media burning software opens. 6 Follow the on-screen instructions of your media burning software to complete the burning of the recovery disc(s). 7 When the disc is complete, remove that disc and insert another. 8 Repeat steps 5-7 for each recovery file until each file is recorded onto a disc. When this is completed, you are done. Recovering your system Important If your hard drive has failed and you cannot restore the software from the hard drive, contact eMachines Customer Care for help. For a fee, Customer Care may be able to provide a set of recovery discs to restore your computer. For more help, you can find the eMachines Customer Care contact information on the label located on the front or side of your computer. If you have problems with your computer and you need to recover your system, you can restore specific drivers and programs from a set of recovery discs, roll back your system to a previous condition when drivers and programs were working correctly, or reinstall everything from the computer's hard drive. ■ To selectively restore device drivers or programs, see "Recovering specific files and software" on page 135. - OR - ■ To recover your system to a previous condition when software and device drivers were working correctly, see "Recovering your system using Microsoft System Restore" on page 136. - OR - ■ To reinstall everything, see "Recovering your system from the hard drive" on page 137. 134
-
 1
1 -
2
-
3
-
4
-
5
-
6
-
7
-
8
-
9
-
10
-
11
-
12
-
13
-
14
-
15
-
16
-
17
-
18
-
19
-
20
-
21
-
22
-
23
-
24
-
25
-
26
-
27
-
28
-
29
-
30
-
31
-
32
-
33
-
34
-
35
-
36
-
37
-
38
-
39
-
40
-
41
-
42
-
43
-
44
-
45
-
46
-
47
-
48
-
49
-
50
-
51
-
52
-
53
-
54
-
55
-
56
-
57
-
58
-
59
-
60
-
61
-
62
-
63
-
64
-
65
-
66
-
67
-
68
-
69
-
70
-
71
-
72
-
73
-
74
-
75
-
76
-
77
-
78
-
79
-
80
-
81
-
82
-
83
-
84
-
85
-
86
-
87
-
88
-
89
-
90
-
91
-
92
-
93
-
94
-
95
-
96
-
97
-
98
-
99
-
100
-
101
-
102
-
103
-
104
-
105
-
106
-
107
-
108
-
109
-
110
-
111
-
112
-
113
-
114
-
115
-
116
-
117
-
118
-
119
-
120
-
121
-
122
-
123
-
124
-
125
-
126
-
127
-
128
-
129
-
130
-
131
-
132
-
133
-
134
-
135
-
 136
136 -
 137
137 -
 138
138 -
 139
139 -
 140
140 -
 141
141 -
 142
142 -
 143
143 -
 144
144 -
 145
145 -
 146
146 -
147
-
148
-
149
-
150
-
151
-
152
-
153
-
154
-
155
-
156
-
157
-
158
-
159
-
160
-
161
-
162
-
163
-
164
-
165
-
166
-
167
-
168
-
169
-
170
-
171
-
172
-
173
-
174
-
175
-
176
-
177
-
178
-
179
-
180
-
181
-
182
-
183
-
184
-
185
-
186
-
187
-
188
-
189
-
190
-
191
-
192
-
193
-
194
-
195
-
196
-
197
-
198
-
199
-
200
-
201
-
202
-
203
-
204
-
205
-
206
-
207
-
208
-
209
-
210
-
211
-
212
-
213
-
214
 |
 |