eMachines T6528 NG3 Hardware Reference - Page 153
Backing up files, To defragment the hard drive
 |
View all eMachines T6528 manuals
Add to My Manuals
Save this manual to your list of manuals |
Page 153 highlights
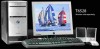
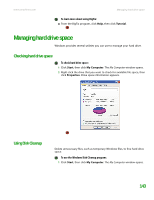
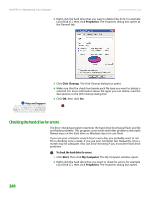
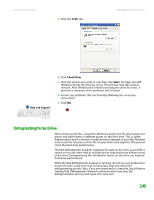
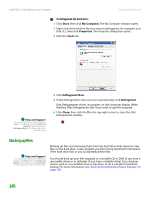
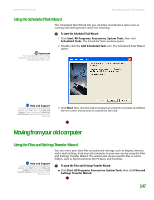
CHAPTER 12: Maintaining Your Computer www.emachines.com To defragment the hard drive: 1 Click Start, then click My Computer. The My Computer window opens. 2 Right-click the hard drive that you want to defragment, for example Local Disk (C:), then click Properties. The Properties dialog box opens. 3 Click the Tools tab. Help and Support For more information about Windows Update, click Start, then click Help and Support. Type the keyword defragmenting in the Search box, then click the arrow. 4 Click Defragment Now. 5 If Disk Defragmenter does not start automatically, click Defragment. Disk Defragmenter shows its progress on the computer display. When finished, Disk Defragmenter asks if you want to quit the program. 6 Click Close, then click the X in the top-right corner to close the Disk Defragmenter window. Backing up files Help and Support For more information about Windows Update, click Start, then click Help and Support. Type the keyword saving files in the Search box, then click the arrow. Backing up files and removing them from the hard drive frees space for new files on the hard drive. It also protects you from losing important information if the hard drive fails or you accidentally delete files. You should back up your files regularly to a writable CD or DVD (if you have a recordable drive) or to diskettes (if you have a diskette drive). Use a backup device, such as a recordable drive or Zip drive, to do a complete hard drive backup. For more information, see "Advanced multimedia software features" on page 105. 146
-
 1
1 -
2
-
3
-
4
-
5
-
6
-
7
-
8
-
9
-
10
-
11
-
12
-
13
-
14
-
15
-
16
-
17
-
18
-
19
-
20
-
21
-
22
-
23
-
24
-
25
-
26
-
27
-
28
-
29
-
30
-
31
-
32
-
33
-
34
-
35
-
36
-
37
-
38
-
39
-
40
-
41
-
42
-
43
-
44
-
45
-
46
-
47
-
48
-
49
-
50
-
51
-
52
-
53
-
54
-
55
-
56
-
57
-
58
-
59
-
60
-
61
-
62
-
63
-
64
-
65
-
66
-
67
-
68
-
69
-
70
-
71
-
72
-
73
-
74
-
75
-
76
-
77
-
78
-
79
-
80
-
81
-
82
-
83
-
84
-
85
-
86
-
87
-
88
-
89
-
90
-
91
-
92
-
93
-
94
-
95
-
96
-
97
-
98
-
99
-
100
-
101
-
102
-
103
-
104
-
105
-
106
-
107
-
108
-
109
-
110
-
111
-
112
-
113
-
114
-
115
-
116
-
117
-
118
-
119
-
120
-
121
-
122
-
123
-
124
-
125
-
126
-
127
-
128
-
129
-
130
-
131
-
132
-
133
-
134
-
135
-
136
-
137
-
138
-
139
-
140
-
141
-
142
-
143
-
144
-
145
-
146
-
147
-
 148
148 -
 149
149 -
 150
150 -
 151
151 -
 152
152 -
 153
153 -
 154
154 -
 155
155 -
 156
156 -
 157
157 -
 158
158 -
159
-
160
-
161
-
162
-
163
-
164
-
165
-
166
-
167
-
168
-
169
-
170
-
171
-
172
-
173
-
174
-
175
-
176
-
177
-
178
-
179
-
180
-
181
-
182
-
183
-
184
-
185
-
186
-
187
-
188
-
189
-
190
-
191
-
192
-
193
-
194
-
195
-
196
-
197
-
198
-
199
-
200
-
201
-
202
-
203
-
204
-
205
-
206
-
207
-
208
-
209
-
210
-
211
-
212
-
213
-
214
 |
 |