eMachines T6528 NG3 Hardware Reference - Page 167
Adding or replacing a CD or DVD drive
 |
View all eMachines T6528 manuals
Add to My Manuals
Save this manual to your list of manuals |
Page 167 highlights
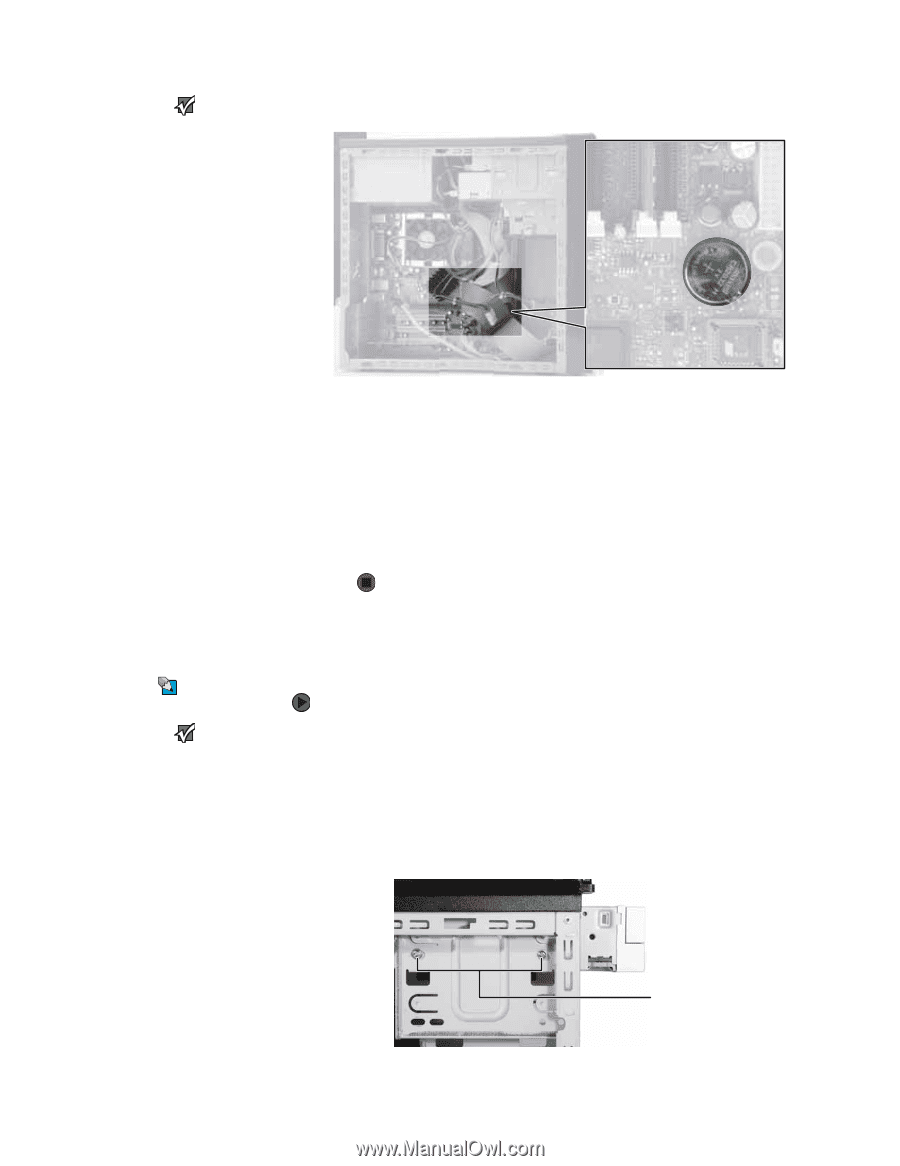
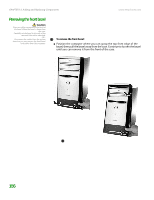
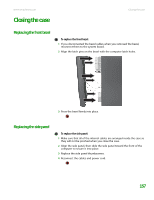
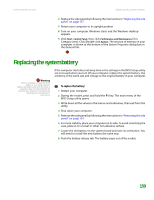
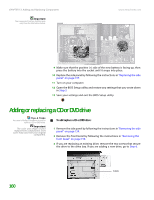
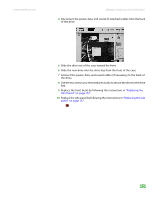
CHAPTER 13: Adding and Replacing Components Important Your computer's battery location may vary from the illustration below. www.emachines.com 9 Make sure that the positive (+) side of the new battery is facing up, then press the battery into the socket until it snaps into place. 10 Replace the side panel by following the instructions in "Replacing the side panel" on page 157. 11 Turn on your computer. 12 Open the BIOS Setup utility and restore any settings that you wrote down in Step 3. 13 Save your settings and exit the BIOS Setup utility. Adding or replacing a CD or DVD drive Tips & Tricks You need a Phillips screwdriver to add or replace a CD or DVD drive. Important The color and shape of your replacement component's front cover may vary from your original component. To add replace a CD or DVD drive: 1 Remove the side panel by following the instructions in "Removing the side panel" on page 154. 2 Remove the front bezel by following the instructions in "Removing the front bezel" on page 156. 3 If you are replacing an existing drive, remove the two screws that secure the drive to the drive bay. If you are adding a new drive, go to Step 6. Screws 160
-
 1
1 -
2
-
3
-
4
-
5
-
6
-
7
-
8
-
9
-
10
-
11
-
12
-
13
-
14
-
15
-
16
-
17
-
18
-
19
-
20
-
21
-
22
-
23
-
24
-
25
-
26
-
27
-
28
-
29
-
30
-
31
-
32
-
33
-
34
-
35
-
36
-
37
-
38
-
39
-
40
-
41
-
42
-
43
-
44
-
45
-
46
-
47
-
48
-
49
-
50
-
51
-
52
-
53
-
54
-
55
-
56
-
57
-
58
-
59
-
60
-
61
-
62
-
63
-
64
-
65
-
66
-
67
-
68
-
69
-
70
-
71
-
72
-
73
-
74
-
75
-
76
-
77
-
78
-
79
-
80
-
81
-
82
-
83
-
84
-
85
-
86
-
87
-
88
-
89
-
90
-
91
-
92
-
93
-
94
-
95
-
96
-
97
-
98
-
99
-
100
-
101
-
102
-
103
-
104
-
105
-
106
-
107
-
108
-
109
-
110
-
111
-
112
-
113
-
114
-
115
-
116
-
117
-
118
-
119
-
120
-
121
-
122
-
123
-
124
-
125
-
126
-
127
-
128
-
129
-
130
-
131
-
132
-
133
-
134
-
135
-
136
-
137
-
138
-
139
-
140
-
141
-
142
-
143
-
144
-
145
-
146
-
147
-
148
-
149
-
150
-
151
-
152
-
153
-
154
-
155
-
156
-
157
-
158
-
159
-
160
-
161
-
 162
162 -
 163
163 -
 164
164 -
 165
165 -
 166
166 -
 167
167 -
 168
168 -
 169
169 -
 170
170 -
 171
171 -
 172
172 -
173
-
174
-
175
-
176
-
177
-
178
-
179
-
180
-
181
-
182
-
183
-
184
-
185
-
186
-
187
-
188
-
189
-
190
-
191
-
192
-
193
-
194
-
195
-
196
-
197
-
198
-
199
-
200
-
201
-
202
-
203
-
204
-
205
-
206
-
207
-
208
-
209
-
210
-
211
-
212
-
213
-
214
 |
 |