eMachines T6528 NG3 Hardware Reference - Page 180
heatsink slightly to loosen it., Lift the processor retention lever
 |
View all eMachines T6528 manuals
Add to My Manuals
Save this manual to your list of manuals |
Page 180 highlights
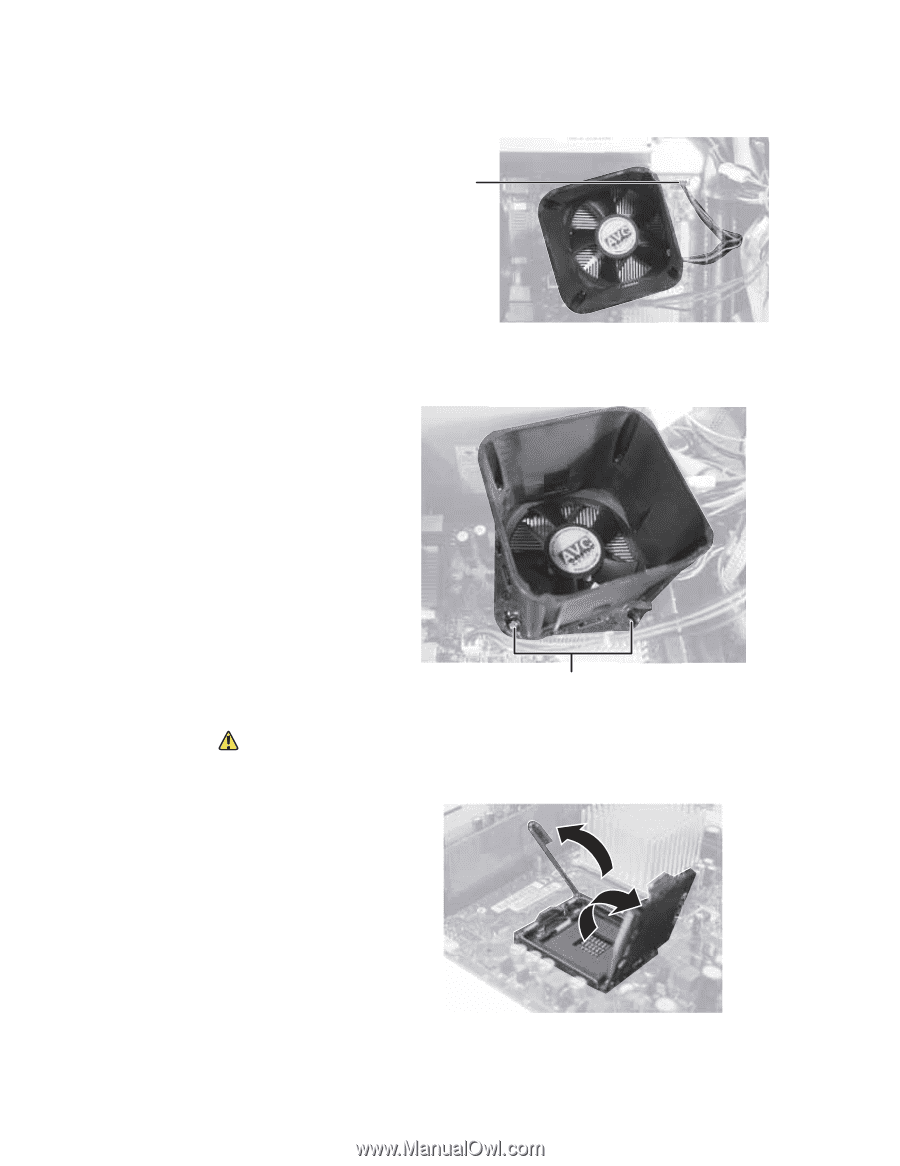
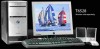
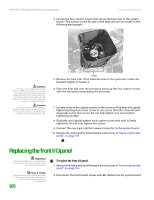
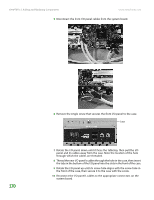
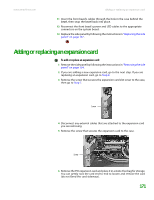
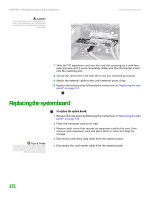
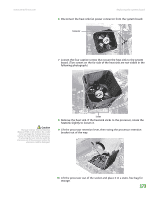
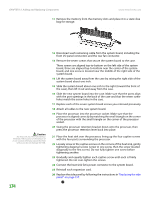
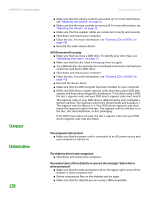
www.emachines.com Replacing the system board 6 Disconnect the heat sink fan power connector from the system board. Connector 7 Loosen the four captive screws that secure the heat sink to the system board. (Two screws on the far side of the heat sink are not visible in the following photograph.) Caution The heat sink has Thermal Interface Material (TIM) on the bottom. Be careful not to damage this material when you remove the heat sink from the processor. If removing the heat sink also pulls the processor out of the processor socket, the processor could be damaged. Screws 8 Remove the heat sink. If the heatsink sticks to the processor, rotate the heatsink slightly to loosen it. 9 Lift the processor retention lever, then swing the processor retention bracket out of the way. 10 Lift the processor out of the socket and place it in a static-free bag for storage. 173
-
 1
1 -
2
-
3
-
4
-
5
-
6
-
7
-
8
-
9
-
10
-
11
-
12
-
13
-
14
-
15
-
16
-
17
-
18
-
19
-
20
-
21
-
22
-
23
-
24
-
25
-
26
-
27
-
28
-
29
-
30
-
31
-
32
-
33
-
34
-
35
-
36
-
37
-
38
-
39
-
40
-
41
-
42
-
43
-
44
-
45
-
46
-
47
-
48
-
49
-
50
-
51
-
52
-
53
-
54
-
55
-
56
-
57
-
58
-
59
-
60
-
61
-
62
-
63
-
64
-
65
-
66
-
67
-
68
-
69
-
70
-
71
-
72
-
73
-
74
-
75
-
76
-
77
-
78
-
79
-
80
-
81
-
82
-
83
-
84
-
85
-
86
-
87
-
88
-
89
-
90
-
91
-
92
-
93
-
94
-
95
-
96
-
97
-
98
-
99
-
100
-
101
-
102
-
103
-
104
-
105
-
106
-
107
-
108
-
109
-
110
-
111
-
112
-
113
-
114
-
115
-
116
-
117
-
118
-
119
-
120
-
121
-
122
-
123
-
124
-
125
-
126
-
127
-
128
-
129
-
130
-
131
-
132
-
133
-
134
-
135
-
136
-
137
-
138
-
139
-
140
-
141
-
142
-
143
-
144
-
145
-
146
-
147
-
148
-
149
-
150
-
151
-
152
-
153
-
154
-
155
-
156
-
157
-
158
-
159
-
160
-
161
-
162
-
163
-
164
-
165
-
166
-
167
-
168
-
169
-
170
-
171
-
172
-
173
-
174
-
 175
175 -
 176
176 -
 177
177 -
 178
178 -
 179
179 -
 180
180 -
 181
181 -
 182
182 -
 183
183 -
 184
184 -
 185
185 -
186
-
187
-
188
-
189
-
190
-
191
-
192
-
193
-
194
-
195
-
196
-
197
-
198
-
199
-
200
-
201
-
202
-
203
-
204
-
205
-
206
-
207
-
208
-
209
-
210
-
211
-
212
-
213
-
214
 |
 |