Netgear D7800 User Manual - Page 109
Use WPS With the PIN Method
 |
View all Netgear D7800 manuals
Add to My Manuals
Save this manual to your list of manuals |
Page 109 highlights
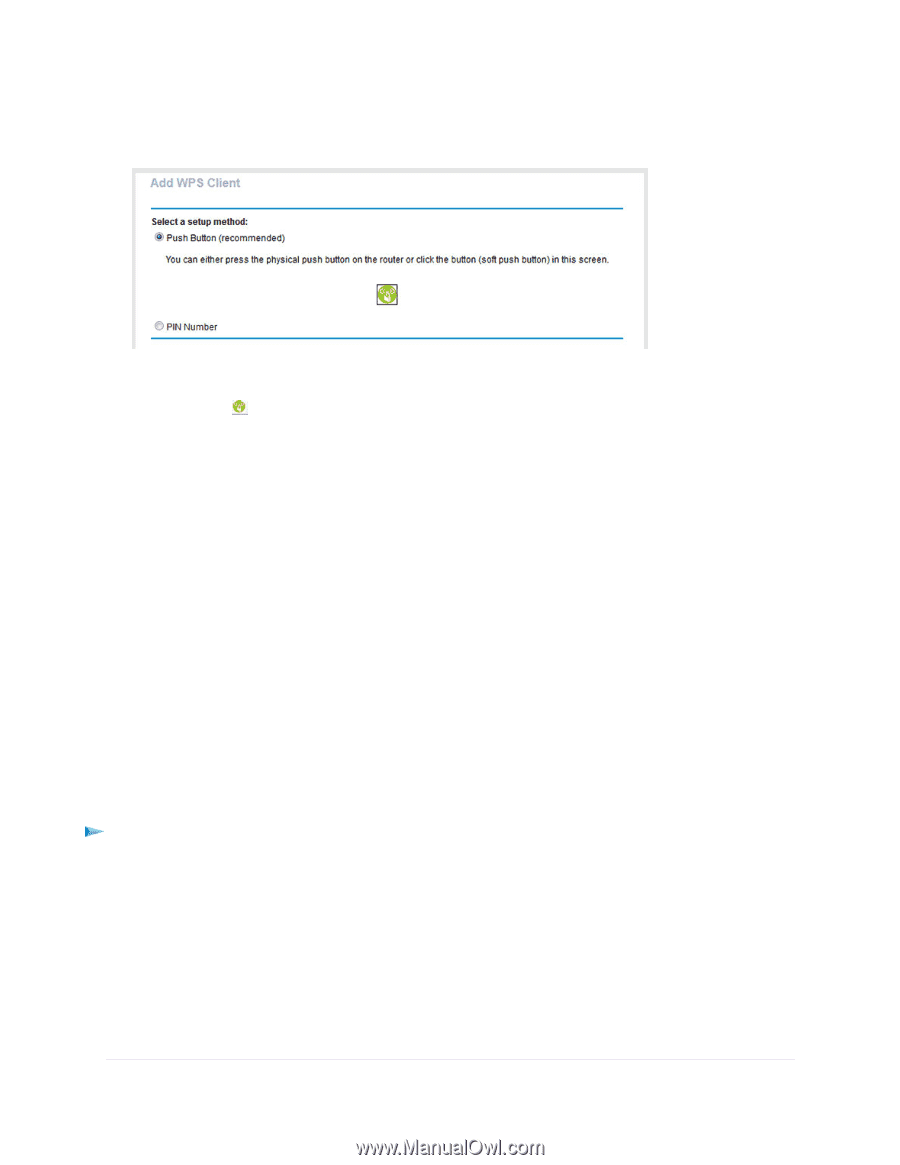
Nighthawk X4S AC2600 WiFi VDSL/ADSL Modem Router Model D7800 5. Click the Next button. By default, the Push Button (recommended) radio button is selected. 6. Either click the button onscreen or press the WPS button on the right side panel of the modem router. For two minutes, the modem router attempts to find the WiFi device (that is, the client) that you want to join the modem router's main WiFi network. During this time, the WiFi LED on the top panel of the modem router blinks white. 7. Within two minutes, go to the WiFi device and press its WPS button to join the modem router's main WiFi network without entering a password. After the modem router establishes a WPS connection, the WiFi LED lights solid white and the Add WPS Client page displays a confirmation message. 8. To verify that the WiFi device is connected to the modem router's main WiFi network, select BASIC > Attached Devices. The WiFi device displays onscreen. Use WPS With the PIN Method To use the PIN method to connect a WiFi device to the modem router's WiFi network, you must know the PIN of the WiFi device that you are trying to connect. To let a WiFi device join the modem router's WiFi network using WPS with the PIN method: 1. Launch a web browser from a computer or WiFi device that is connected to the network. 2. Enter http://www.routerlogin.net. A login window opens. 3. Enter the modem router user name and password. The user name is admin. The default password is password. The user name and password are case-sensitive. The BASIC Home page displays. Manage the Basic WiFi Network Settings 109
-
 1
1 -
2
-
3
-
4
-
5
-
6
-
7
-
8
-
9
-
10
-
11
-
12
-
13
-
14
-
15
-
16
-
17
-
18
-
19
-
20
-
21
-
22
-
23
-
24
-
25
-
26
-
27
-
28
-
29
-
30
-
31
-
32
-
33
-
34
-
35
-
36
-
37
-
38
-
39
-
40
-
41
-
42
-
43
-
44
-
45
-
46
-
47
-
48
-
49
-
50
-
51
-
52
-
53
-
54
-
55
-
56
-
57
-
58
-
59
-
60
-
61
-
62
-
63
-
64
-
65
-
66
-
67
-
68
-
69
-
70
-
71
-
72
-
73
-
74
-
75
-
76
-
77
-
78
-
79
-
80
-
81
-
82
-
83
-
84
-
85
-
86
-
87
-
88
-
89
-
90
-
91
-
92
-
93
-
94
-
95
-
96
-
97
-
98
-
99
-
100
-
101
-
102
-
103
-
 104
104 -
 105
105 -
 106
106 -
 107
107 -
 108
108 -
 109
109 -
 110
110 -
 111
111 -
 112
112 -
 113
113 -
 114
114 -
115
-
116
-
117
-
118
-
119
-
120
-
121
-
122
-
123
-
124
-
125
-
126
-
127
-
128
-
129
-
130
-
131
-
132
-
133
-
134
-
135
-
136
-
137
-
138
-
139
-
140
-
141
-
142
-
143
-
144
-
145
-
146
-
147
-
148
-
149
-
150
-
151
-
152
-
153
-
154
-
155
-
156
-
157
-
158
-
159
-
160
-
161
-
162
-
163
-
164
-
165
-
166
-
167
-
168
-
169
-
170
-
171
-
172
-
173
-
174
-
175
-
176
-
177
-
178
-
179
-
180
-
181
-
182
-
183
-
184
-
185
-
186
-
187
-
188
-
189
-
190
-
191
-
192
-
193
-
194
-
195
-
196
-
197
-
198
-
199
-
200
-
201
-
202
-
203
-
204
-
205
-
206
-
207
-
208
-
209
-
210
-
211
-
212
-
213
-
214
-
215
-
216
-
217
-
218
-
219
-
220
-
221
-
222
-
223
-
224
-
225
-
226
-
227
-
228
-
229
-
230
-
231
-
232
-
233
-
234
-
235
-
236
-
237
-
238
-
239
-
240
-
241
-
242
-
243
-
244
-
245
-
246
-
247
-
248
-
249
-
250
-
251
-
252
-
253
-
254
-
255
-
256
-
257
-
258
-
259
-
260
-
261
-
262
-
263
-
264
-
265
-
266
-
267
-
268
-
269
-
270
-
271
-
272
-
273
-
274
-
275
-
276
-
277
-
278
-
279
-
280
-
281
-
282
-
283
-
284
-
285
-
286
-
287
-
288
-
289
-
290
-
291
-
292
-
293
-
294
-
295
-
296
-
297
-
298
-
299
 |
 |