Samsung SCH-R530C User Manual Ver.lj3_f2 (English(north America)) - Page 49
Contacts, Adding Contacts
 |
View all Samsung SCH-R530C manuals
Add to My Manuals
Save this manual to your list of manuals |
Page 49 highlights
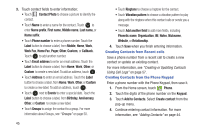
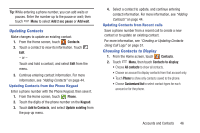
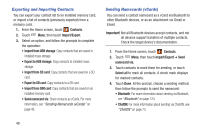
Adding an account 1. From the Home screen, touch Menu ➔ Settings. 2. Touch Accounts and sync ➔ Add account. 3. Select an account provider. Follow the prompts to enter your credentials and sign in. 4. The phone communicates with the provider's server to set up your account on the phone. Managing accounts 1. From the Home screen, touch Menu ➔ Settings. 2. Under Personal, touch Accounts and sync. 3. Select an account, and touch a setting to enable or disable synchronization. A check mark displays to indicate activation. Contacts To access Contacts: Ⅲ From the Home screen, touch Contacts. Contact tips: • Swipe your finger left to right across a contact to make a call to the contact. • Swipe right to left across a contact to create a message addressed to the contact. Adding Contacts 1. From the Home screen, touch + Add contact. Contacts ➔ • If you have defined accounts (Google, Samsung, and so on), the Save contact pop-up displays: • If you have not defined any accounts, the Save contact pop-up displays. The following options are available: - OK: Saves your contacts in "my device contacts." - Add new account: Lets you define an account to which your phone saves your contacts. The Add new account screen displays. (For more information, refer to "Setting Up Your Accounts" on page 43..) 2. At the Save contact to prompt, select a save option for the contact (available options depend on accounts you define to your device): • Samsung account: Save to your Samsung account. • ChatON: Save to your ChatON account. • Google: Save to your Google account. • Microsoft Exchange ActiveSync: Save to your Corporate account. Accounts and Contacts 44
-
 1
1 -
2
-
3
-
4
-
5
-
6
-
7
-
8
-
9
-
10
-
11
-
12
-
13
-
14
-
15
-
16
-
17
-
18
-
19
-
20
-
21
-
22
-
23
-
24
-
25
-
26
-
27
-
28
-
29
-
30
-
31
-
32
-
33
-
34
-
35
-
36
-
37
-
38
-
39
-
40
-
41
-
42
-
43
-
 44
44 -
 45
45 -
 46
46 -
 47
47 -
 48
48 -
 49
49 -
 50
50 -
 51
51 -
 52
52 -
 53
53 -
 54
54 -
55
-
56
-
57
-
58
-
59
-
60
-
61
-
62
-
63
-
64
-
65
-
66
-
67
-
68
-
69
-
70
-
71
-
72
-
73
-
74
-
75
-
76
-
77
-
78
-
79
-
80
-
81
-
82
-
83
-
84
-
85
-
86
-
87
-
88
-
89
-
90
-
91
-
92
-
93
-
94
-
95
-
96
-
97
-
98
-
99
-
100
-
101
-
102
-
103
-
104
-
105
-
106
-
107
-
108
-
109
-
110
-
111
-
112
-
113
-
114
-
115
-
116
-
117
-
118
-
119
-
120
-
121
-
122
-
123
-
124
-
125
-
126
-
127
-
128
-
129
-
130
-
131
-
132
-
133
-
134
-
135
-
136
-
137
-
138
-
139
-
140
-
141
-
142
-
143
-
144
-
145
-
146
-
147
-
148
-
149
-
150
-
151
-
152
-
153
-
154
-
155
-
156
-
157
-
158
-
159
-
160
-
161
-
162
-
163
-
164
-
165
-
166
-
167
-
168
-
169
-
170
-
171
-
172
-
173
-
174
-
175
-
176
-
177
-
178
-
179
-
180
-
181
-
182
-
183
-
184
-
185
-
186
-
187
-
188
-
189
-
190
-
191
-
192
-
193
-
194
-
195
-
196
-
197
-
198
-
199
-
200
-
201
-
202
-
203
-
204
-
205
-
206
-
207
-
208
-
209
-
210
 |
 |