HP MSA 1040 HP MSA 1040 SMU Reference Guide (762784-001, March 2014) - Page 49
Configuring advanced settings, Changing disk settings, Configuring SMART, Configuring dynamic spares
 |
View all HP MSA 1040 manuals
Add to My Manuals
Save this manual to your list of manuals |
Page 49 highlights
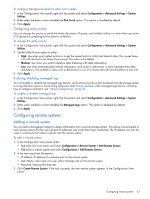
Configuring advanced settings Changing disk settings Configuring SMART Self-Monitoring Analysis and Reporting Technology (SMART) provides data that enables you to monitor disks and analyze why a disk failed. When SMART is enabled, the system checks for SMART events one minute after a restart and every five minutes thereafter. SMART events are recorded in the event log. To change the SMART setting 1. In the Configuration View panel, right-click the system and select Configuration > Advanced Settings > Disk. 2. Set the SMART Configuration option to one of the following: • Don't Modify. Allows current disks to retain their individual SMART settings and does not change the setting for new disks added to the system. • Enabled. Enables SMART for all current disks after the next rescan and automatically enables SMART for new disks added to the system. This option is the default. • Disabled. Disables SMART for all current disks after the next rescan and automatically disables SMART for new disks added to the system. 3. Click Apply. Configuring dynamic spares The dynamic spares feature lets you use all of your disks in fault-tolerant vdisks without designating a disk as a spare. With dynamic spares enabled, if a disk fails and you replace it with a compatible disk, the storage system rescans the bus, finds the new disk, automatically designates it a spare, and starts reconstructing the vdisk. A compatible disk has enough capacity to replace the failed disk and is the same type (enterprise SAS or midline SAS). If a dedicated spare, global spare, or available compatible disk is already present, the dynamic spares feature uses that disk to start the reconstruction and the replacement disk can be used for another purpose. To change the dynamic spares setting 1. In the Configuration View panel, right-click the system and select Configuration > Advanced Settings > Disk. 2. Either select (enable) or clear (disable) the Dynamic Spare Capability option. 3. Click Apply. Configuring drive spin down for available disks and global spares The drive spin down (DSD) feature monitors disk activity within system enclosures and spins down inactive disks to conserve energy. You can enable or disable DSD for available disks and global spares, and set the period of inactivity after which available disks and global spares automatically spin down. To configure a time period to suspend and resume DSD for all disks, see "Scheduling drive spin down for all disks" (page 50). To configure DSD for a vdisk, see "Configuring drive spin down for a vdisk" (page 55). DSD affects disk operations as follows: • Spun-down disks are not polled for SMART events. • Operations requiring access to disks may be delayed while the disks are spinning back up. To configure DSD for available disks and global spares 1. In the Configuration View panel, right-click the local system and select Configuration > Advanced Settings > Disk. 2. Set the options: • Either select (enable) or clear (disable) the Available and Spare Drive Spin Down Capability option. If you are enabling DSD, a warning prompt appears; to use DSD, click Yes; to leave DSD disabled, click No. • Set the Drive Spin Down Delay (minutes) option, which is the period of inactivity after which available disks and global spares automatically spin down, from 1-360 minutes. The default is 15 minutes. 3. Click Apply. When processing is complete a success dialog appears. 4. Click OK. Configuring advanced settings 49
-
 1
1 -
2
-
3
-
4
-
5
-
6
-
7
-
8
-
9
-
10
-
11
-
12
-
13
-
14
-
15
-
16
-
17
-
18
-
19
-
20
-
21
-
22
-
23
-
24
-
25
-
26
-
27
-
28
-
29
-
30
-
31
-
32
-
33
-
34
-
35
-
36
-
37
-
38
-
39
-
40
-
41
-
42
-
43
-
 44
44 -
 45
45 -
 46
46 -
 47
47 -
 48
48 -
 49
49 -
 50
50 -
 51
51 -
 52
52 -
 53
53 -
 54
54 -
55
-
56
-
57
-
58
-
59
-
60
-
61
-
62
-
63
-
64
-
65
-
66
-
67
-
68
-
69
-
70
-
71
-
72
-
73
-
74
-
75
-
76
-
77
-
78
-
79
-
80
-
81
-
82
-
83
-
84
-
85
-
86
-
87
-
88
-
89
-
90
-
91
-
92
-
93
-
94
-
95
-
96
-
97
-
98
-
99
-
100
-
101
-
102
-
103
-
104
-
105
-
106
-
107
-
108
-
109
-
110
-
111
-
112
-
113
-
114
-
115
-
116
-
117
-
118
-
119
-
120
-
121
-
122
-
123
-
124
-
125
-
126
-
127
-
128
-
129
-
130
-
131
-
132
-
133
-
134
-
135
-
136
-
137
-
138
-
139
-
140
-
141
-
142
-
143
-
144
-
145
-
146
-
147
-
148
-
149
-
150
-
151
-
152
-
153
-
154
-
155
-
156
-
157
-
158
-
159
-
160
-
161
-
162
-
163
-
164
-
165
-
166
-
167
-
168
-
169
-
170
-
171
-
172
-
173
-
174
-
175
-
176
-
177
-
178
-
179
-
180
-
181
-
182
-
183
-
184
-
185
-
186
-
187
-
188
-
189
-
190
 |
 |