Samsung SM-G900A User Manual At&t Wireless Sm-g900a Galaxy S 5 Kit Kat Eng - Page 165
Camera, Calendar Settings, Using the Camera
 |
View all Samsung SM-G900A manuals
Add to My Manuals
Save this manual to your list of manuals |
Page 165 highlights
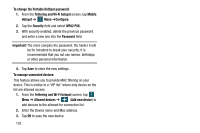
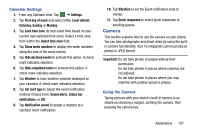
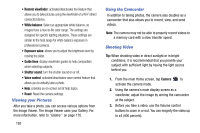
Calendar Settings 1. From any Calendar view, Tap ➔ Settings. 2. Tap First day of week and select either Local default, Saturday, Sunday or Monday. 3. Tap Lock time zone (to lock event time based on your current user-selected time zone). Select a time zone from within the Select time zone field. 4. Tap Show week numbers to display the week numbers along the side of the week entries. 5. Tap Hide declined events to activate this option. A check mark indicates selection. 6. Tap Hide completed tasks to activate this option. A check mark indicates selection. 7. Tap Weather to have weather symbols displayed on your calendar. A check mark indicates selection. 8. Tap Set alert type to adjust the event notification method. Choose from: Sound alerts, Status bar notifications, or Off. 9. Tap Notification sound to assign a ringtone to a calendar event notification. 10. Tap Vibration to set the Event notification tone to vibrate. 11. Tap Quick responses to select quick responses to emailing guests. Camera This section explains how to use the camera on your phone. You can take photographs and shoot video by using the builtin camera functionality. Your 16 megapixel camera produces photos in JPEG format. Important! Do not take photos of people without their permission. Do not take photos in places where cameras are not allowed. Do not take photos in places where you may interfere with another person's privacy. Using the Camera Taking pictures with your device's built-in camera is as simple as choosing a subject, pointing the camera, then pressing the camera key. Applications 157
-
 1
1 -
2
-
3
-
4
-
5
-
6
-
7
-
8
-
9
-
10
-
11
-
12
-
13
-
14
-
15
-
16
-
17
-
18
-
19
-
20
-
21
-
22
-
23
-
24
-
25
-
26
-
27
-
28
-
29
-
30
-
31
-
32
-
33
-
34
-
35
-
36
-
37
-
38
-
39
-
40
-
41
-
42
-
43
-
44
-
45
-
46
-
47
-
48
-
49
-
50
-
51
-
52
-
53
-
54
-
55
-
56
-
57
-
58
-
59
-
60
-
61
-
62
-
63
-
64
-
65
-
66
-
67
-
68
-
69
-
70
-
71
-
72
-
73
-
74
-
75
-
76
-
77
-
78
-
79
-
80
-
81
-
82
-
83
-
84
-
85
-
86
-
87
-
88
-
89
-
90
-
91
-
92
-
93
-
94
-
95
-
96
-
97
-
98
-
99
-
100
-
101
-
102
-
103
-
104
-
105
-
106
-
107
-
108
-
109
-
110
-
111
-
112
-
113
-
114
-
115
-
116
-
117
-
118
-
119
-
120
-
121
-
122
-
123
-
124
-
125
-
126
-
127
-
128
-
129
-
130
-
131
-
132
-
133
-
134
-
135
-
136
-
137
-
138
-
139
-
140
-
141
-
142
-
143
-
144
-
145
-
146
-
147
-
148
-
149
-
150
-
151
-
152
-
153
-
154
-
155
-
156
-
157
-
158
-
159
-
 160
160 -
 161
161 -
 162
162 -
 163
163 -
 164
164 -
 165
165 -
 166
166 -
 167
167 -
 168
168 -
 169
169 -
 170
170 -
171
-
172
-
173
-
174
-
175
-
176
-
177
-
178
-
179
-
180
-
181
-
182
-
183
-
184
-
185
-
186
-
187
-
188
-
189
-
190
-
191
-
192
-
193
-
194
-
195
-
196
-
197
-
198
-
199
-
200
-
201
-
202
-
203
-
204
-
205
-
206
-
207
-
208
-
209
-
210
-
211
-
212
-
213
-
214
 |
 |