Samsung SM-G900A User Manual At&t Wireless Sm-g900a Galaxy S 5 Kit Kat Eng - Page 73
Unlinking a Contact, Marking a Contact as Default, Connection, Contacts, Separate contact
 |
View all Samsung SM-G900A manuals
Add to My Manuals
Save this manual to your list of manuals |
Page 73 highlights
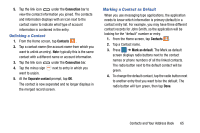
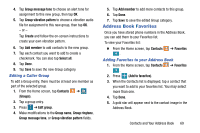
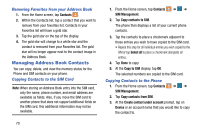
5. Tap the link icon under the Connection bar to view the contact information you joined. The contacts and information displays with an icon next to the contact name to indicate what type of account information is contained in the entry. Unlinking a Contact 1. From the Home screen, tap Contacts . 2. Tap a contact name (the account name from which you want to unlink an entry). Note: typically this is the same contact with a different name or account information. 3. Tap the link icon under the Connection bar. 4. Tap the minus sign next to entry in which you want to unjoin. 5. At the Separate contact prompt, tap OK. The contact is now separated and no longer displays in the merged record screen. Marking a Contact as Default When you use messaging type applications, the application needs to know which information is primary (default) in a contact entry list. For example, you may have three different contact records for John Smith, so the application will be looking for the "default" number or entry. 1. From the Home screen, tap Contacts . 2. Tap a Contact name. 3. Press ➔ Mark as default. The Mark as default screen displays radio buttons next to the contact names or phone numbers of all the linked contacts. The radio button next to the default contact will be green. 4. To change the default contact, tap the radio button next to another entry that you want to be the default. The radio button will turn green, then tap Done. Contacts and Your Address Book 65
-
 1
1 -
2
-
3
-
4
-
5
-
6
-
7
-
8
-
9
-
10
-
11
-
12
-
13
-
14
-
15
-
16
-
17
-
18
-
19
-
20
-
21
-
22
-
23
-
24
-
25
-
26
-
27
-
28
-
29
-
30
-
31
-
32
-
33
-
34
-
35
-
36
-
37
-
38
-
39
-
40
-
41
-
42
-
43
-
44
-
45
-
46
-
47
-
48
-
49
-
50
-
51
-
52
-
53
-
54
-
55
-
56
-
57
-
58
-
59
-
60
-
61
-
62
-
63
-
64
-
65
-
66
-
67
-
 68
68 -
 69
69 -
 70
70 -
 71
71 -
 72
72 -
 73
73 -
 74
74 -
 75
75 -
 76
76 -
 77
77 -
 78
78 -
79
-
80
-
81
-
82
-
83
-
84
-
85
-
86
-
87
-
88
-
89
-
90
-
91
-
92
-
93
-
94
-
95
-
96
-
97
-
98
-
99
-
100
-
101
-
102
-
103
-
104
-
105
-
106
-
107
-
108
-
109
-
110
-
111
-
112
-
113
-
114
-
115
-
116
-
117
-
118
-
119
-
120
-
121
-
122
-
123
-
124
-
125
-
126
-
127
-
128
-
129
-
130
-
131
-
132
-
133
-
134
-
135
-
136
-
137
-
138
-
139
-
140
-
141
-
142
-
143
-
144
-
145
-
146
-
147
-
148
-
149
-
150
-
151
-
152
-
153
-
154
-
155
-
156
-
157
-
158
-
159
-
160
-
161
-
162
-
163
-
164
-
165
-
166
-
167
-
168
-
169
-
170
-
171
-
172
-
173
-
174
-
175
-
176
-
177
-
178
-
179
-
180
-
181
-
182
-
183
-
184
-
185
-
186
-
187
-
188
-
189
-
190
-
191
-
192
-
193
-
194
-
195
-
196
-
197
-
198
-
199
-
200
-
201
-
202
-
203
-
204
-
205
-
206
-
207
-
208
-
209
-
210
-
211
-
212
-
213
-
214
 |
 |