Samsung SM-G900A User Manual At&t Wireless Sm-g900a Galaxy S 5 Kit Kat Eng - Page 170
Viewing your Pictures, Using the Camcorder, Shooting Video
 |
View all Samsung SM-G900A manuals
Add to My Manuals
Save this manual to your list of manuals |
Page 170 highlights
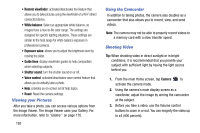
• Remote viewfinder: activates/deactivates the feature that allows you to take pictures using the viewfinder of a Wi-Fi direct connected device. • White balance: Select an appropriate white balance, so images have a true-to-life color range. The settings are designed for specific lighting situations. These settings are similar to the heat range for white-balance exposure in professional cameras. • Exposure value: allows you to adjust the brightness level by moving the slider. • Guide lines: display viewfinder guides to help composition when selecting subjects. • Shutter sound: turn the shutter sound on or off. • Voice control: activates/deactivates voice control feature that allows you to verbally take a photo. • Help: provides an on-screen set of help topics. • Reset: Reset the camera settings. Viewing your Pictures After you take a photo, you can access various options from the Image Viewer. The Image Viewer uses your Gallery. For more information, refer to "Gallery" on page 170. 162 Using the Camcorder In addition to taking photos, the camera also doubles as a camcorder that also allows you to record, view, and send videos. Note: The camera may not be able to properly record videos to a memory card with a slow transfer speed. Shooting Video Tip: When shooting video in direct sunlight or in bright conditions, it is recommended that you provide your subject with sufficient light by having the light source behind you. 1. From the main Home screen, tap Camera to activate the camera mode. 2. Using the camera's main display screen as a viewfinder, adjust the image by aiming the camcorder at the subject. 3. Before you take a video, use the Volume control buttons to zoom in or out. You can magnify the video up to x4 (400 percent).
-
 1
1 -
2
-
3
-
4
-
5
-
6
-
7
-
8
-
9
-
10
-
11
-
12
-
13
-
14
-
15
-
16
-
17
-
18
-
19
-
20
-
21
-
22
-
23
-
24
-
25
-
26
-
27
-
28
-
29
-
30
-
31
-
32
-
33
-
34
-
35
-
36
-
37
-
38
-
39
-
40
-
41
-
42
-
43
-
44
-
45
-
46
-
47
-
48
-
49
-
50
-
51
-
52
-
53
-
54
-
55
-
56
-
57
-
58
-
59
-
60
-
61
-
62
-
63
-
64
-
65
-
66
-
67
-
68
-
69
-
70
-
71
-
72
-
73
-
74
-
75
-
76
-
77
-
78
-
79
-
80
-
81
-
82
-
83
-
84
-
85
-
86
-
87
-
88
-
89
-
90
-
91
-
92
-
93
-
94
-
95
-
96
-
97
-
98
-
99
-
100
-
101
-
102
-
103
-
104
-
105
-
106
-
107
-
108
-
109
-
110
-
111
-
112
-
113
-
114
-
115
-
116
-
117
-
118
-
119
-
120
-
121
-
122
-
123
-
124
-
125
-
126
-
127
-
128
-
129
-
130
-
131
-
132
-
133
-
134
-
135
-
136
-
137
-
138
-
139
-
140
-
141
-
142
-
143
-
144
-
145
-
146
-
147
-
148
-
149
-
150
-
151
-
152
-
153
-
154
-
155
-
156
-
157
-
158
-
159
-
160
-
161
-
162
-
163
-
164
-
 165
165 -
 166
166 -
 167
167 -
 168
168 -
 169
169 -
 170
170 -
 171
171 -
 172
172 -
 173
173 -
 174
174 -
 175
175 -
176
-
177
-
178
-
179
-
180
-
181
-
182
-
183
-
184
-
185
-
186
-
187
-
188
-
189
-
190
-
191
-
192
-
193
-
194
-
195
-
196
-
197
-
198
-
199
-
200
-
201
-
202
-
203
-
204
-
205
-
206
-
207
-
208
-
209
-
210
-
211
-
212
-
213
-
214
 |
 |