Samsung SM-G900A User Manual At&t Wireless Sm-g900a Galaxy S 5 Kit Kat Eng - Page 167
Camera Modes, Best photo, Best face, Eraser, Drama shot, Panning shot, Virtual tour
 |
View all Samsung SM-G900A manuals
Add to My Manuals
Save this manual to your list of manuals |
Page 167 highlights
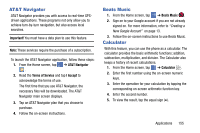
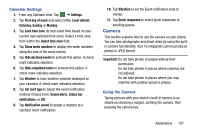
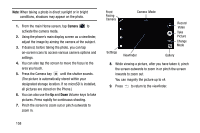
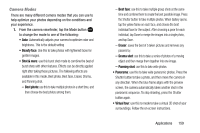
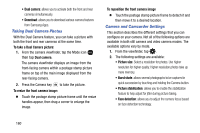
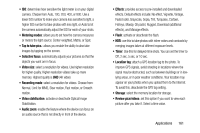
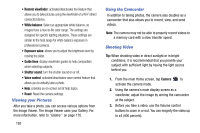
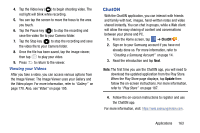
Camera Modes There are many different camera modes that you can use to help optimize your photos depending on the conditions and your experience. 1. From the camera viewfinder, tap the Mode button MODE to change the mode to one of the following: • Auto: Automatically adjusts your camera to optimize color and brightness. This is the default setting • Beauty face: Use this to take photos with lightened faces for gentler images. • Shot & more: use this burst shot mode to combine the best of burst shots with other features. Effects can be directly applied right after taking these pictures. The following effects are available in this mode, Best photo, Best face, Eraser, Drama, and Panning shot. - Best photo: use this to take multiple photos in a short time, and then choose the best photos among them. - Best face: use this to take multiple group shots at the same time and combine them to create the best possible image. Press the Shutter button to take multiple photos. When Gallery opens, tap the yellow frame on each face, and choose the best individual face for the subject. After choosing a pose for each individual, tap Done to merge the images into a single photo, and tap Save. - Eraser: saves the best of 5 taken pictures and removes any passers by. - Drama shot: use this to take a series of photos of a moving object and then merge them together into one image. - Panning shot: use this to take wide photos. • Panorama: use this to take wide panoramic photos. Press the Shutter button to take a photo, and then move the camera in any direction. When the blue frame aligns with the preview screen, the camera automatically takes another shot in the panoramic sequence. To stop shooting, press the Shutter button again. • Virtual tour: use this to mode to take a virtual 3D shot of your surroundings. Follow the on-screen instructions. Applications 159
-
 1
1 -
2
-
3
-
4
-
5
-
6
-
7
-
8
-
9
-
10
-
11
-
12
-
13
-
14
-
15
-
16
-
17
-
18
-
19
-
20
-
21
-
22
-
23
-
24
-
25
-
26
-
27
-
28
-
29
-
30
-
31
-
32
-
33
-
34
-
35
-
36
-
37
-
38
-
39
-
40
-
41
-
42
-
43
-
44
-
45
-
46
-
47
-
48
-
49
-
50
-
51
-
52
-
53
-
54
-
55
-
56
-
57
-
58
-
59
-
60
-
61
-
62
-
63
-
64
-
65
-
66
-
67
-
68
-
69
-
70
-
71
-
72
-
73
-
74
-
75
-
76
-
77
-
78
-
79
-
80
-
81
-
82
-
83
-
84
-
85
-
86
-
87
-
88
-
89
-
90
-
91
-
92
-
93
-
94
-
95
-
96
-
97
-
98
-
99
-
100
-
101
-
102
-
103
-
104
-
105
-
106
-
107
-
108
-
109
-
110
-
111
-
112
-
113
-
114
-
115
-
116
-
117
-
118
-
119
-
120
-
121
-
122
-
123
-
124
-
125
-
126
-
127
-
128
-
129
-
130
-
131
-
132
-
133
-
134
-
135
-
136
-
137
-
138
-
139
-
140
-
141
-
142
-
143
-
144
-
145
-
146
-
147
-
148
-
149
-
150
-
151
-
152
-
153
-
154
-
155
-
156
-
157
-
158
-
159
-
160
-
161
-
 162
162 -
 163
163 -
 164
164 -
 165
165 -
 166
166 -
 167
167 -
 168
168 -
 169
169 -
 170
170 -
 171
171 -
 172
172 -
173
-
174
-
175
-
176
-
177
-
178
-
179
-
180
-
181
-
182
-
183
-
184
-
185
-
186
-
187
-
188
-
189
-
190
-
191
-
192
-
193
-
194
-
195
-
196
-
197
-
198
-
199
-
200
-
201
-
202
-
203
-
204
-
205
-
206
-
207
-
208
-
209
-
210
-
211
-
212
-
213
-
214
 |
 |