HP OmniBook 500 hp omnibook 500 - Corporate Evaluator's Guide - Page 108
To install the OneTouch, utility, To install USB FDD support
 |
View all HP OmniBook 500 manuals
Add to My Manuals
Save this manual to your list of manuals |
Page 108 highlights
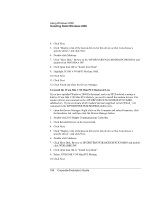
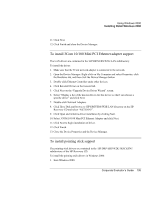
Using Windows 2000 Installing Retail Windows 2000 4. Click FINISH to reboot your computer. (Upon successful installation, a SpeedStep™ icon appears on the bottom right corner of the taskbar.) To install the OneTouch utility This utility enables the support for the OneTouch buttons above the keyboard as well as the multimedia buttons on the front of your HP Notebook. 1. Run \HP\DRIVERS\W2K\ONETOUCH\SETUP.EXE from the HP Recovery CD. 2. Click OK to confirm the installation of the utility. 3. Click YES to reboot the system at the "End of Installation" window. To install USB FDD support The USB FDD drivers are contained in the \HP\DRIVERS\W2K\FLOPPY subdirectory. To install the USB FDD drivers: 1. Connect the USB Floppy Disk drive to the computer. 2. The computer will identify that a new USB device has been added to the system, and will display the Found New Hardware wizard. Click Next to continue. 3. Windows will display the Install Hardware Device Drivers dialog. Select the default option, "Search for a suitable driver for my device". Click Next to continue. 4. Windows will display the Locate Driver Files dialog. Select "Specify a location" and click Next. 5. Click Browse, and browse to the \HP\DRIVERS\W2K\FLOPPY subdirectory. Select OK to continue. 6. Windows should inform you that it has found a driver for the device. Click Next to install the driver. 7. Windows will inform you that it has finished installing the drivers for your new hardware. Click Finish. Your new floppy disk is now successfully installed. You should see a floppy disk with a new drive letter added when you look inside My Computer. 108 Corporate Evaluator's Guide
-
 1
1 -
2
-
3
-
4
-
5
-
6
-
7
-
8
-
9
-
10
-
11
-
12
-
13
-
14
-
15
-
16
-
17
-
18
-
19
-
20
-
21
-
22
-
23
-
24
-
25
-
26
-
27
-
28
-
29
-
30
-
31
-
32
-
33
-
34
-
35
-
36
-
37
-
38
-
39
-
40
-
41
-
42
-
43
-
44
-
45
-
46
-
47
-
48
-
49
-
50
-
51
-
52
-
53
-
54
-
55
-
56
-
57
-
58
-
59
-
60
-
61
-
62
-
63
-
64
-
65
-
66
-
67
-
68
-
69
-
70
-
71
-
72
-
73
-
74
-
75
-
76
-
77
-
78
-
79
-
80
-
81
-
82
-
83
-
84
-
85
-
86
-
87
-
88
-
89
-
90
-
91
-
92
-
93
-
94
-
95
-
96
-
97
-
98
-
99
-
100
-
101
-
102
-
 103
103 -
 104
104 -
 105
105 -
 106
106 -
 107
107 -
 108
108 -
 109
109 -
 110
110 -
 111
111 -
 112
112 -
 113
113 -
114
-
115
-
116
-
117
-
118
-
119
-
120
-
121
-
122
-
123
-
124
-
125
-
126
-
127
-
128
-
129
-
130
-
131
-
132
-
133
-
134
-
135
-
136
-
137
-
138
-
139
-
140
-
141
-
142
-
143
-
144
-
145
-
146
-
147
-
148
-
149
-
150
-
151
-
152
-
153
-
154
-
155
-
156
-
157
-
158
-
159
-
160
-
161
-
162
-
163
-
164
-
165
-
166
-
167
-
168
-
169
-
170
-
171
-
172
-
173
-
174
-
175
-
176
-
177
-
178
-
179
-
180
-
181
-
182
-
183
-
184
-
185
-
186
-
187
-
188
-
189
-
190
-
191
-
192
-
193
-
194
-
195
-
196
-
197
-
198
-
199
 |
 |
