HP OmniBook 500 hp omnibook 500 - Corporate Evaluator's Guide - Page 115
When prompted with the PC Card Wizard click Next No, Next No, then Finish.
 |
View all HP OmniBook 500 manuals
Add to My Manuals
Save this manual to your list of manuals |
Page 115 highlights
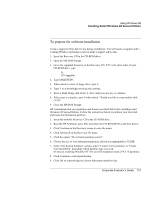
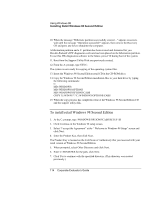
Using Windows 98 Installing Retail Windows 98 Second Edition 8. Choose Portable on the Setup Options screen, then click Next. 9. Enter the appropriate User Information, then click Next. 10. Select "Install The Most Common Components (recommended)", then click Next. 11. Enter your Computer name, Workgroup and Computer description and click continue. 12. Select your country or region and click Next. 13. The user will be prompted with "Windows will now create a startup disk" Click Next. 14. When prompted to insert disk, click cancel (HP recommends creating a startup disk after installation is complete). 15. Click next when prompted by the setup wizard to create startup disk. 16. When prompted to insert floppy disk, click cancel. 17. Click Next to start "Copying Windows 98 Second Edition files to Your Computer". 18. When finished copying Windows 98 Second Edition, click OK to restart. 19. When prompted with the PC Card Wizard click Next (No), Next (No), then Finish. 20. Apply any changes when the system displays the Date/Time Properties screen, then click Close. The Windows 98 Second Edition Setup Wizard will now configure the Control Panel, programs on the Start Menu, Windows help, and MS-DOS program settings. Afterwards, Windows 98 Second Edition will automatically reboot. 21. Enter a Windows Password and confirm. Retail Windows 98 Second Edition is now installed on the system. The HP Notebookspecific drivers will be installed next. To install video support The video driver is contained in the \HP\DRIVERS\W98\VIDEO directory on the HP Windows 98 Recovery CD. To install or upgrade the video driver: 1. Run SETUP.EXE from the \HP\DRIVERS\W98\VIDEO directory. 2. Follow the instructions on the screen to install the video driver. 3. Click Finish to reboot. Corporate Evaluator's Guide 115
-
 1
1 -
2
-
3
-
4
-
5
-
6
-
7
-
8
-
9
-
10
-
11
-
12
-
13
-
14
-
15
-
16
-
17
-
18
-
19
-
20
-
21
-
22
-
23
-
24
-
25
-
26
-
27
-
28
-
29
-
30
-
31
-
32
-
33
-
34
-
35
-
36
-
37
-
38
-
39
-
40
-
41
-
42
-
43
-
44
-
45
-
46
-
47
-
48
-
49
-
50
-
51
-
52
-
53
-
54
-
55
-
56
-
57
-
58
-
59
-
60
-
61
-
62
-
63
-
64
-
65
-
66
-
67
-
68
-
69
-
70
-
71
-
72
-
73
-
74
-
75
-
76
-
77
-
78
-
79
-
80
-
81
-
82
-
83
-
84
-
85
-
86
-
87
-
88
-
89
-
90
-
91
-
92
-
93
-
94
-
95
-
96
-
97
-
98
-
99
-
100
-
101
-
102
-
103
-
104
-
105
-
106
-
107
-
108
-
109
-
 110
110 -
 111
111 -
 112
112 -
 113
113 -
 114
114 -
 115
115 -
 116
116 -
 117
117 -
 118
118 -
 119
119 -
 120
120 -
121
-
122
-
123
-
124
-
125
-
126
-
127
-
128
-
129
-
130
-
131
-
132
-
133
-
134
-
135
-
136
-
137
-
138
-
139
-
140
-
141
-
142
-
143
-
144
-
145
-
146
-
147
-
148
-
149
-
150
-
151
-
152
-
153
-
154
-
155
-
156
-
157
-
158
-
159
-
160
-
161
-
162
-
163
-
164
-
165
-
166
-
167
-
168
-
169
-
170
-
171
-
172
-
173
-
174
-
175
-
176
-
177
-
178
-
179
-
180
-
181
-
182
-
183
-
184
-
185
-
186
-
187
-
188
-
189
-
190
-
191
-
192
-
193
-
194
-
195
-
196
-
197
-
198
-
199
 |
 |
