HP OmniBook 500 hp omnibook 500 - Corporate Evaluator's Guide - Page 65
To insert or remove a CD or DVD, Do not remove a CD or DVD while the computer is reading it. Otherwise
 |
View all HP OmniBook 500 manuals
Add to My Manuals
Save this manual to your list of manuals |
Page 65 highlights
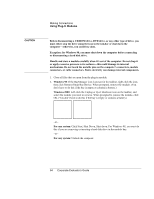
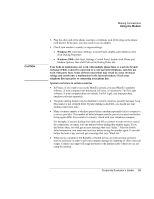
Making Connections Using Plug-In Modules 3. Press the button on the module release latch, and slide the latch toward the front of the expansion base. 4. Grasp the module and pull it out. CAUTION 5. Slide the new plug-in module into the computer until it clicks into place. 6. For Windows 98, click OK to close the BayManager window. If needed, you can connect the floppy disk drive to the USB port on the computer or expansion base-see "To connect the floppy disk drive" on page 26. If you need to format a hard disk drive module, see "To prepare a new hard disk drive" on page 97. To insert or remove a CD or DVD Do not remove a CD or DVD while the computer is reading it. Otherwise, the computer could stop responding and you could lose data. Before opening the drive, make sure the drive is not running by pressing the Stop button. 1. Press the button on the face of the drive. (If you are using this drive for the first time, be sure to remove the cardboard packing insert.) Corporate Evaluator's Guide 65
-
 1
1 -
2
-
3
-
4
-
5
-
6
-
7
-
8
-
9
-
10
-
11
-
12
-
13
-
14
-
15
-
16
-
17
-
18
-
19
-
20
-
21
-
22
-
23
-
24
-
25
-
26
-
27
-
28
-
29
-
30
-
31
-
32
-
33
-
34
-
35
-
36
-
37
-
38
-
39
-
40
-
41
-
42
-
43
-
44
-
45
-
46
-
47
-
48
-
49
-
50
-
51
-
52
-
53
-
54
-
55
-
56
-
57
-
58
-
59
-
 60
60 -
 61
61 -
 62
62 -
 63
63 -
 64
64 -
 65
65 -
 66
66 -
 67
67 -
 68
68 -
 69
69 -
 70
70 -
71
-
72
-
73
-
74
-
75
-
76
-
77
-
78
-
79
-
80
-
81
-
82
-
83
-
84
-
85
-
86
-
87
-
88
-
89
-
90
-
91
-
92
-
93
-
94
-
95
-
96
-
97
-
98
-
99
-
100
-
101
-
102
-
103
-
104
-
105
-
106
-
107
-
108
-
109
-
110
-
111
-
112
-
113
-
114
-
115
-
116
-
117
-
118
-
119
-
120
-
121
-
122
-
123
-
124
-
125
-
126
-
127
-
128
-
129
-
130
-
131
-
132
-
133
-
134
-
135
-
136
-
137
-
138
-
139
-
140
-
141
-
142
-
143
-
144
-
145
-
146
-
147
-
148
-
149
-
150
-
151
-
152
-
153
-
154
-
155
-
156
-
157
-
158
-
159
-
160
-
161
-
162
-
163
-
164
-
165
-
166
-
167
-
168
-
169
-
170
-
171
-
172
-
173
-
174
-
175
-
176
-
177
-
178
-
179
-
180
-
181
-
182
-
183
-
184
-
185
-
186
-
187
-
188
-
189
-
190
-
191
-
192
-
193
-
194
-
195
-
196
-
197
-
198
-
199
 |
 |