Kyocera KM-5530 KM/Ri 4530/5530 Operation Guide Rev 5F - Page 214
Copying in the Hole Punch mode
 |
View all Kyocera KM-5530 manuals
Add to My Manuals
Save this manual to your list of manuals |
Page 214 highlights
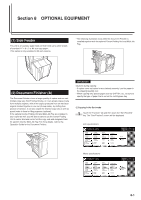
Section 8 OPTIONAL EQUIPMENT 4 Set the originals to be copied. Verify the direction in which the originals were set. 5 Press the [Start] key. Scanning of the originals will start and the number of originals that was set will be displayed. NOTE If you do not set the originals in the Document Processor, perform the appropriate procedure to set all of the originals to be copied. 6 Once all of the originals have been completely scanned, touch the "Scanning finished" key. Copying will start and each finished copy set will be automatically stapled and ejected onto the Finisher. 7 Once copying is completed, removed the finished copy sets from the Finisher. 4 Copying in the Hole Punch mode 1 Touch the "Function" tab and then touch the "Sort/Finished" key. The "Sort/Finished" screen will be displayed. Inch specifications Ready to copy. Paper size Set 11x81/2" Select paper Exposure mode Orig.image quality Sort/ Finished Basic 2 sided/ Separation Reduce /Enlarge Margin/ Centering Border Erase User choice Select orig. size Auto Selection Page # Cover Mode Function Combine Batch scanning Forms Overlay Booklet Program Up Down Metric specifications Ready to copy. Select paper Exposure mode Image quality Sort/ Finished Basic 2-sided/ Split Reduce/ Enlarge Margin/ Imag. shift Erase Mode User choice Select size orig. Auto selection Page numbering Cover Mode Function Merge copy Large # of originals Form overlay Booklet Program Paper size Set Up Down 2 Touch the "Punch mode" key. The "Punch" screen will be displayed. Inch specifications Ready to copy. Sort/Finished Sort Sorting Staple Register Punch Sort:OFF Sort:ON None One page per file Staple mode Punch mode Paper size Set 11x81/2" Back Check direction Check direction of original top side. Close Rear Left top corner Metric specifications Ready to copy. Sort/Finished Sort Group Staple Sort:Off Sort:On None Output each page Staple Mode Paper size Set Register Punch Punch Mode Back Close Check direction Check direction of original. Back Edge Left top corner IMPORTANT! If the optional Hole Punch Unit is not installed in your copier, the "Punch mode" key will not be displayed. 3 Touch the "2 holes" key or the "3 holes" key, as appropriate (select between the "2 holes" key or the "4 holes" key in metric specification copiers). The screen to select the hole positioning will be displayed. Inch specifications Reset originals in processor. Paper size Set 11x81/2" Punch mode Punch None 2 holes 3 holes Back Close Check direction Check direction of original top side. Rear Left top corner Metric specifications Ready to copy. Punch Mode Punch None 2 holes 4 holes Paper size Set Back Close Check direction Check direction of original. Back Edge Left top corner 8-4
-
 1
1 -
2
-
3
-
4
-
5
-
6
-
7
-
8
-
9
-
10
-
11
-
12
-
13
-
14
-
15
-
16
-
17
-
18
-
19
-
20
-
21
-
22
-
23
-
24
-
25
-
26
-
27
-
28
-
29
-
30
-
31
-
32
-
33
-
34
-
35
-
36
-
37
-
38
-
39
-
40
-
41
-
42
-
43
-
44
-
45
-
46
-
47
-
48
-
49
-
50
-
51
-
52
-
53
-
54
-
55
-
56
-
57
-
58
-
59
-
60
-
61
-
62
-
63
-
64
-
65
-
66
-
67
-
68
-
69
-
70
-
71
-
72
-
73
-
74
-
75
-
76
-
77
-
78
-
79
-
80
-
81
-
82
-
83
-
84
-
85
-
86
-
87
-
88
-
89
-
90
-
91
-
92
-
93
-
94
-
95
-
96
-
97
-
98
-
99
-
100
-
101
-
102
-
103
-
104
-
105
-
106
-
107
-
108
-
109
-
110
-
111
-
112
-
113
-
114
-
115
-
116
-
117
-
118
-
119
-
120
-
121
-
122
-
123
-
124
-
125
-
126
-
127
-
128
-
129
-
130
-
131
-
132
-
133
-
134
-
135
-
136
-
137
-
138
-
139
-
140
-
141
-
142
-
143
-
144
-
145
-
146
-
147
-
148
-
149
-
150
-
151
-
152
-
153
-
154
-
155
-
156
-
157
-
158
-
159
-
160
-
161
-
162
-
163
-
164
-
165
-
166
-
167
-
168
-
169
-
170
-
171
-
172
-
173
-
174
-
175
-
176
-
177
-
178
-
179
-
180
-
181
-
182
-
183
-
184
-
185
-
186
-
187
-
188
-
189
-
190
-
191
-
192
-
193
-
194
-
195
-
196
-
197
-
198
-
199
-
200
-
201
-
202
-
203
-
204
-
205
-
206
-
207
-
208
-
 209
209 -
 210
210 -
 211
211 -
 212
212 -
 213
213 -
 214
214 -
 215
215 -
 216
216 -
 217
217 -
 218
218 -
 219
219 -
220
-
221
-
222
-
223
-
224
-
225
-
226
-
227
-
228
-
229
-
230
-
231
-
232
-
233
-
234
-
235
-
236
-
237
-
238
-
239
-
240
-
241
-
242
-
243
-
244
-
245
-
246
-
247
-
248
-
249
-
250
-
251
-
252
 |
 |
