Samsung SCH-I910 User Manual (user Manual) (ver.f4) (English) - Page 86
Today, Message, Setup Email, Step 6, Username, Password, Save Password, Finish, Account Type, tap
 |
UPC - 635753474688
View all Samsung SCH-I910 manuals
Add to My Manuals
Save this manual to your list of manuals |
Page 86 highlights
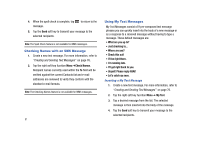
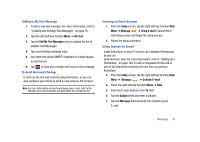
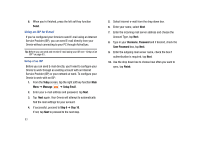
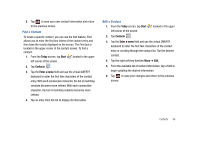
8. When you're finished, press the left soft key function Send. Using an ISP for E-mail If you've configured your Omnia to send E-mail using an Internet Service Provider (ISP), you can send E-mail directly from your Omnia without connecting to your PC through ActiveSync. Tip: Before you can send and receive E-mail using your ISP, see "Setup of an ISP" on page 83.. Setup of an ISP Before you can send E-mail directly, you'll need to configure your Omnia to work through an existing account with an Internet Service Provider (ISP) or your network at work. To configure your Omnia to work with an ISP: 1. From the Today screen, tap the right soft key function Main Menu ➔ Message ➔ Setup Email. 2. Enter your e-mail address and password, tap Next. 3. Tap Next again. Your Omnia will attempt to automatically find the mail settings for your account. 4. If successful, proceed to Step 6 ➔ Step 10. If not, tap Next to proceed to the next step. 83 5. Select Internet e-mail from the drop down box. 6. Enter your name, select Next. 7. Enter the incoming mail server address and choose the Account Type, tap Next. 8. Type in your Username, Password and if desired, check the Save Password box, tap Next. 9. Enter the outgoing mail server name, check the box if authentication is required, tap Next. 10. Use the drop down box to choose how often you want to sync, tap Finish.
-
 1
1 -
2
-
3
-
4
-
5
-
6
-
7
-
8
-
9
-
10
-
11
-
12
-
13
-
14
-
15
-
16
-
17
-
18
-
19
-
20
-
21
-
22
-
23
-
24
-
25
-
26
-
27
-
28
-
29
-
30
-
31
-
32
-
33
-
34
-
35
-
36
-
37
-
38
-
39
-
40
-
41
-
42
-
43
-
44
-
45
-
46
-
47
-
48
-
49
-
50
-
51
-
52
-
53
-
54
-
55
-
56
-
57
-
58
-
59
-
60
-
61
-
62
-
63
-
64
-
65
-
66
-
67
-
68
-
69
-
70
-
71
-
72
-
73
-
74
-
75
-
76
-
77
-
78
-
79
-
80
-
 81
81 -
 82
82 -
 83
83 -
 84
84 -
 85
85 -
 86
86 -
 87
87 -
 88
88 -
 89
89 -
 90
90 -
 91
91 -
92
-
93
-
94
-
95
-
96
-
97
-
98
-
99
-
100
-
101
-
102
-
103
-
104
-
105
-
106
-
107
-
108
-
109
-
110
-
111
-
112
-
113
-
114
-
115
-
116
-
117
-
118
-
119
-
120
-
121
-
122
-
123
-
124
-
125
-
126
-
127
-
128
-
129
-
130
-
131
-
132
-
133
-
134
-
135
-
136
-
137
-
138
-
139
-
140
-
141
-
142
-
143
-
144
-
145
-
146
-
147
-
148
-
149
-
150
-
151
-
152
-
153
-
154
-
155
-
156
-
157
-
158
-
159
-
160
-
161
-
162
-
163
-
164
-
165
-
166
-
167
-
168
-
169
-
170
-
171
-
172
-
173
-
174
-
175
-
176
-
177
-
178
-
179
-
180
-
181
-
182
-
183
-
184
-
185
-
186
-
187
-
188
-
189
-
190
-
191
-
192
-
193
-
194
-
195
-
196
-
197
-
198
-
199
-
200
-
201
-
202
-
203
-
204
-
205
-
206
-
207
-
208
-
209
 |
 |