Canon XF605 Instruction Manual - Page 168
X Authentication, Checking and Changing Connection Settings (SET)
 |
View all Canon XF605 manuals
Add to My Manuals
Save this manual to your list of manuals |
Page 168 highlights
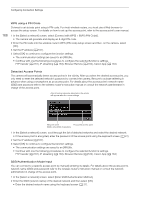
Configuring Connection Settings 168 3 Select > [ Network Settings] > [Advanced Settings] > [FTP Transfer Settings] > [Read Root Certificate] > [OK]. • The root certificate file is read from the card. • After reading a root certificate file, you can select [Root Certificate Details] to check the certificate's issuer and expiration date, or select [Delete Root Certificate] to delete the root certificate in the camera. NOTES • Only one root certificate, with one of the following file names, can be read by the camera: "ROOT.CER", "ROOT.CRT" and "ROOT.PEM". • If you transfer files using FTPS transfer with a self-signed certificate, you may not be able to trust the destination server. 802.1X Authentication The camera is compatible with the following protocols. EAP-TLS: X.509 supported EAP-TTLS, PEAP: MS-CHAP v.2 supported Select > [ Network Settings] > [Advanced Settings] > [802.1X Authentication] > [Setup Wizard]. • Follow the wizard to complete the authentication settings. When you select the [EAP-TLS] protocol, the root certificate, client certificate and private key will be read from the card. When you select the [EAP-TTLS] or [PEAP] protocol, select [User Name] and [Password] and enter the information using the keyboard screen (A 27). Then, read the root certificate from the card. • After reading the authentication files, select [Check Settings] to check their content. Select [Delete Settings] to delete the authentication files in the camera. Giving a Nickname to the Camera You can give the camera a nickname that is used on network connections and network devices to make it easier to identify. Select > [ Network Settings] > [Nickname]. • Enter the desired nickname using the keyboard screen (A 27). Checking and Changing Connection Settings (SET) You can check and, if necessary, change the settings of connection settings (SET) registered in the camera. In addition to deleting and renaming connection settings, you can also add to a connection setting a secondary network or second function. Checking the Content of a Connection Setting Select > [ Network Settings] > [Connection Setting] > Desired connection setting ([SET1] to [SET20]) > [Check Settings]. • The detailed content of the connection setting is displayed. • Push the joystick left/right to review all the settings and press the CANCEL button to return to the menu.
-
 1
1 -
2
-
3
-
4
-
5
-
6
-
7
-
8
-
9
-
10
-
11
-
12
-
13
-
14
-
15
-
16
-
17
-
18
-
19
-
20
-
21
-
22
-
23
-
24
-
25
-
26
-
27
-
28
-
29
-
30
-
31
-
32
-
33
-
34
-
35
-
36
-
37
-
38
-
39
-
40
-
41
-
42
-
43
-
44
-
45
-
46
-
47
-
48
-
49
-
50
-
51
-
52
-
53
-
54
-
55
-
56
-
57
-
58
-
59
-
60
-
61
-
62
-
63
-
64
-
65
-
66
-
67
-
68
-
69
-
70
-
71
-
72
-
73
-
74
-
75
-
76
-
77
-
78
-
79
-
80
-
81
-
82
-
83
-
84
-
85
-
86
-
87
-
88
-
89
-
90
-
91
-
92
-
93
-
94
-
95
-
96
-
97
-
98
-
99
-
100
-
101
-
102
-
103
-
104
-
105
-
106
-
107
-
108
-
109
-
110
-
111
-
112
-
113
-
114
-
115
-
116
-
117
-
118
-
119
-
120
-
121
-
122
-
123
-
124
-
125
-
126
-
127
-
128
-
129
-
130
-
131
-
132
-
133
-
134
-
135
-
136
-
137
-
138
-
139
-
140
-
141
-
142
-
143
-
144
-
145
-
146
-
147
-
148
-
149
-
150
-
151
-
152
-
153
-
154
-
155
-
156
-
157
-
158
-
159
-
160
-
161
-
162
-
 163
163 -
 164
164 -
 165
165 -
 166
166 -
 167
167 -
 168
168 -
 169
169 -
 170
170 -
 171
171 -
 172
172 -
 173
173 -
174
-
175
-
176
-
177
-
178
-
179
-
180
-
181
-
182
-
183
-
184
-
185
-
186
-
187
-
188
-
189
-
190
-
191
-
192
-
193
-
194
-
195
-
196
-
197
-
198
-
199
-
200
-
201
-
202
-
203
-
204
-
205
-
206
-
207
-
208
-
209
-
210
-
211
-
212
-
213
-
214
-
215
-
216
-
217
-
218
-
219
-
220
-
221
-
222
-
223
-
224
-
225
-
226
-
227
-
228
-
229
-
230
-
231
-
232
-
233
-
234
-
235
-
236
-
237
-
238
 |
 |