Canon XF605 Instruction Manual - Page 196
All Except REC Button], Enable], Normal], Always On], Entire Clip], PTP Connection/GP-E2]
 |
View all Canon XF605 manuals
Add to My Manuals
Save this manual to your list of manuals |
Page 196 highlights
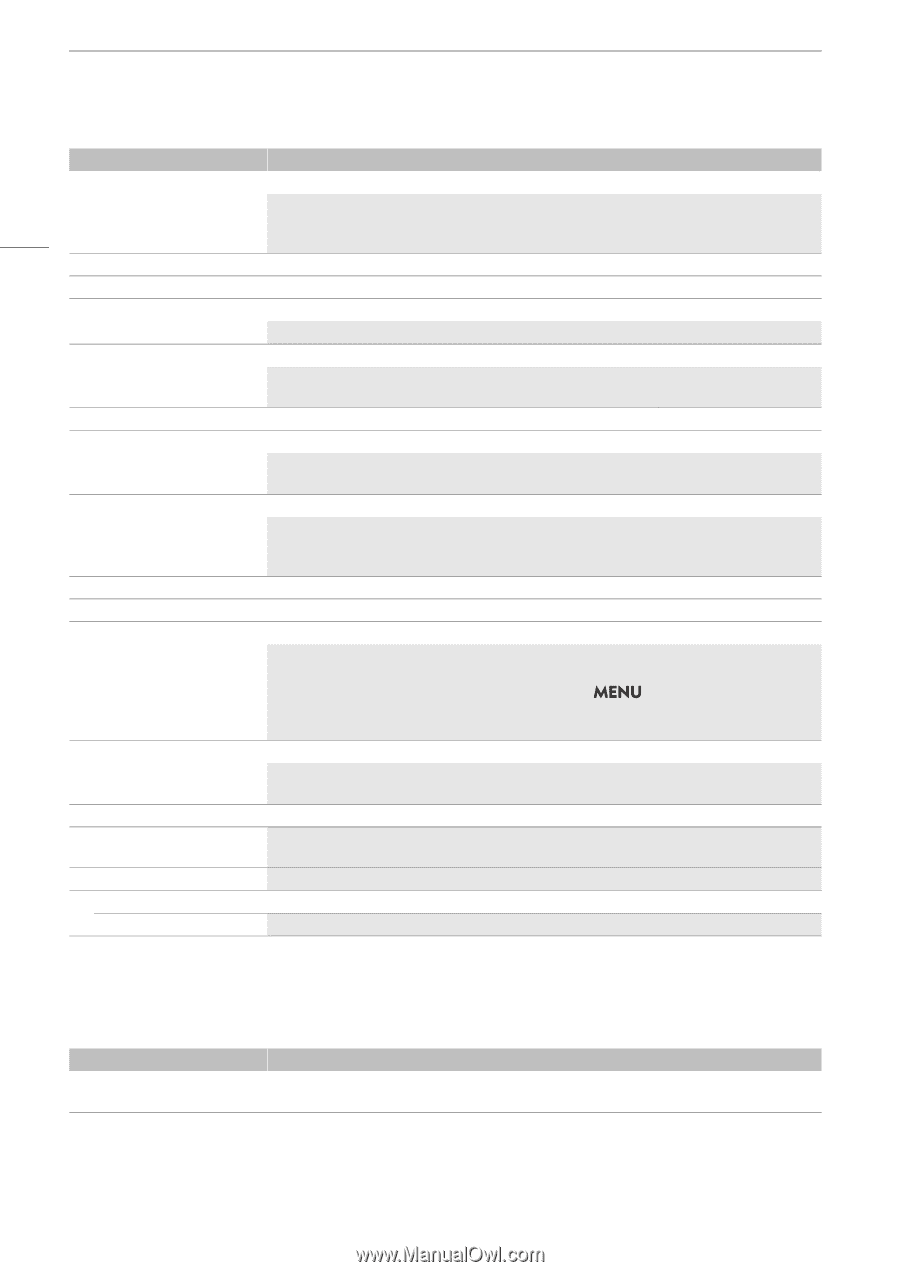
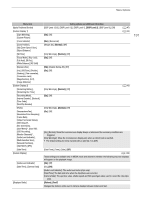
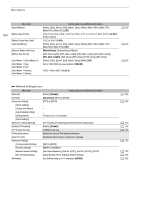
Menu Options 196 Menu item [Genlock Adjustment]2 [SYNC Scan Mode] [Key Lock] [REC Button] [Onscreen REC/STBY Button] [Touch Screen Response] [Power Supply LED] [Tally Lamp (Front)], [Tally Lamp (Rear)], [SD Card Access LED] [Fan Mode] [Review Recording] [GPS Auto Time]2 [USB (Type-C) Mode] [DC IN Warning (V)] [Reset Hour Meter] [Certification Information] [Firmware] [Camera] Setting options and additional information -1023 to +1023 (000) (A 89) The phase difference between the external Genlock signal and the camera is initially set to 0. This setting allows you to adjust it within the range of approx. ±0.4 H (-1023 to 1023). To set a 4-digit adjustment value, set the first field to 10 or -10. [P], [PsF] (A 90) [All Buttons], [All Except REC Button] (A 15) [Disable], [Enable] Enables or disables the use of the REC buttons. [On], [Off] (A 42) When this setting is set to [On], the recording operation indicator (REC/STBY) on the CAMERA mode screen becomes an onscreen button you can touch to start/stop recording. [Normal], [Low] (A 23) [On], [Off] (A 14) When this setting is set to [Off], the power indicator will not illuminate even when the camera is powered on. [On], [Off] These settings determine whether the following LEDs and indicators will illuminate. [Tally Lamp (Front)], [Tally Lamp (Rear)]: The tally lamp (A 14, 17) while recording. [SD Card Access LED]: The card access indicator (A 32) when the camera is accessing the card. [Automatic], [Always On] (A 40) [Entire Clip], [Last 4 sec] (A 48) [On], [Off] When this setting is set to [On], the camera automatically adjust its date and time settings according to the information received from the GPS signal. • While the automatic date/time adjustment is activated, the > [B System Setup] > [Date/ Time] setting will not be available. • The time will not be updated while recording video. [Video Output (UVC)], [Canon App(s) for iPhone], [PTP Connection/GP-E2] (A 113) Select [PTP Connection/GP-E2] when connecting the GP-E2 GPS Receiver to the camera using an optional interface cable. 11.5 V to 15.0 V in 0.1 V intervals (13.0 V) (A 22) The camera has two "hour meters" - the first keeps track of total operation time and the second keeps track of operation time since the last time the second hour meter was reset with this function. This displays select certification information that apply to this camera. Check/update the firmware version of the camera. 1 The default value depends on the country/region of purchase. 2 Only when the GP-E2 GPS Receiver is connected to the camera. [¥ My Menu] menu (CAMERA mode only) Menu item [CAMERA-1: Edit] to [CAMERA-5: Edit] Setting options and additional information [Register], [Move], [Delete], [Reset All], [Rename] (A 26)
-
 1
1 -
2
-
3
-
4
-
5
-
6
-
7
-
8
-
9
-
10
-
11
-
12
-
13
-
14
-
15
-
16
-
17
-
18
-
19
-
20
-
21
-
22
-
23
-
24
-
25
-
26
-
27
-
28
-
29
-
30
-
31
-
32
-
33
-
34
-
35
-
36
-
37
-
38
-
39
-
40
-
41
-
42
-
43
-
44
-
45
-
46
-
47
-
48
-
49
-
50
-
51
-
52
-
53
-
54
-
55
-
56
-
57
-
58
-
59
-
60
-
61
-
62
-
63
-
64
-
65
-
66
-
67
-
68
-
69
-
70
-
71
-
72
-
73
-
74
-
75
-
76
-
77
-
78
-
79
-
80
-
81
-
82
-
83
-
84
-
85
-
86
-
87
-
88
-
89
-
90
-
91
-
92
-
93
-
94
-
95
-
96
-
97
-
98
-
99
-
100
-
101
-
102
-
103
-
104
-
105
-
106
-
107
-
108
-
109
-
110
-
111
-
112
-
113
-
114
-
115
-
116
-
117
-
118
-
119
-
120
-
121
-
122
-
123
-
124
-
125
-
126
-
127
-
128
-
129
-
130
-
131
-
132
-
133
-
134
-
135
-
136
-
137
-
138
-
139
-
140
-
141
-
142
-
143
-
144
-
145
-
146
-
147
-
148
-
149
-
150
-
151
-
152
-
153
-
154
-
155
-
156
-
157
-
158
-
159
-
160
-
161
-
162
-
163
-
164
-
165
-
166
-
167
-
168
-
169
-
170
-
171
-
172
-
173
-
174
-
175
-
176
-
177
-
178
-
179
-
180
-
181
-
182
-
183
-
184
-
185
-
186
-
187
-
188
-
189
-
190
-
 191
191 -
 192
192 -
 193
193 -
 194
194 -
 195
195 -
 196
196 -
 197
197 -
 198
198 -
 199
199 -
 200
200 -
 201
201 -
202
-
203
-
204
-
205
-
206
-
207
-
208
-
209
-
210
-
211
-
212
-
213
-
214
-
215
-
216
-
217
-
218
-
219
-
220
-
221
-
222
-
223
-
224
-
225
-
226
-
227
-
228
-
229
-
230
-
231
-
232
-
233
-
234
-
235
-
236
-
237
-
238
 |
 |