Canon XF605 Instruction Manual - Page 93
Connecting an External Microphone or External Audio Input Source to the Camera
 |
View all Canon XF605 manuals
Add to My Manuals
Save this manual to your list of manuals |
Page 93 highlights
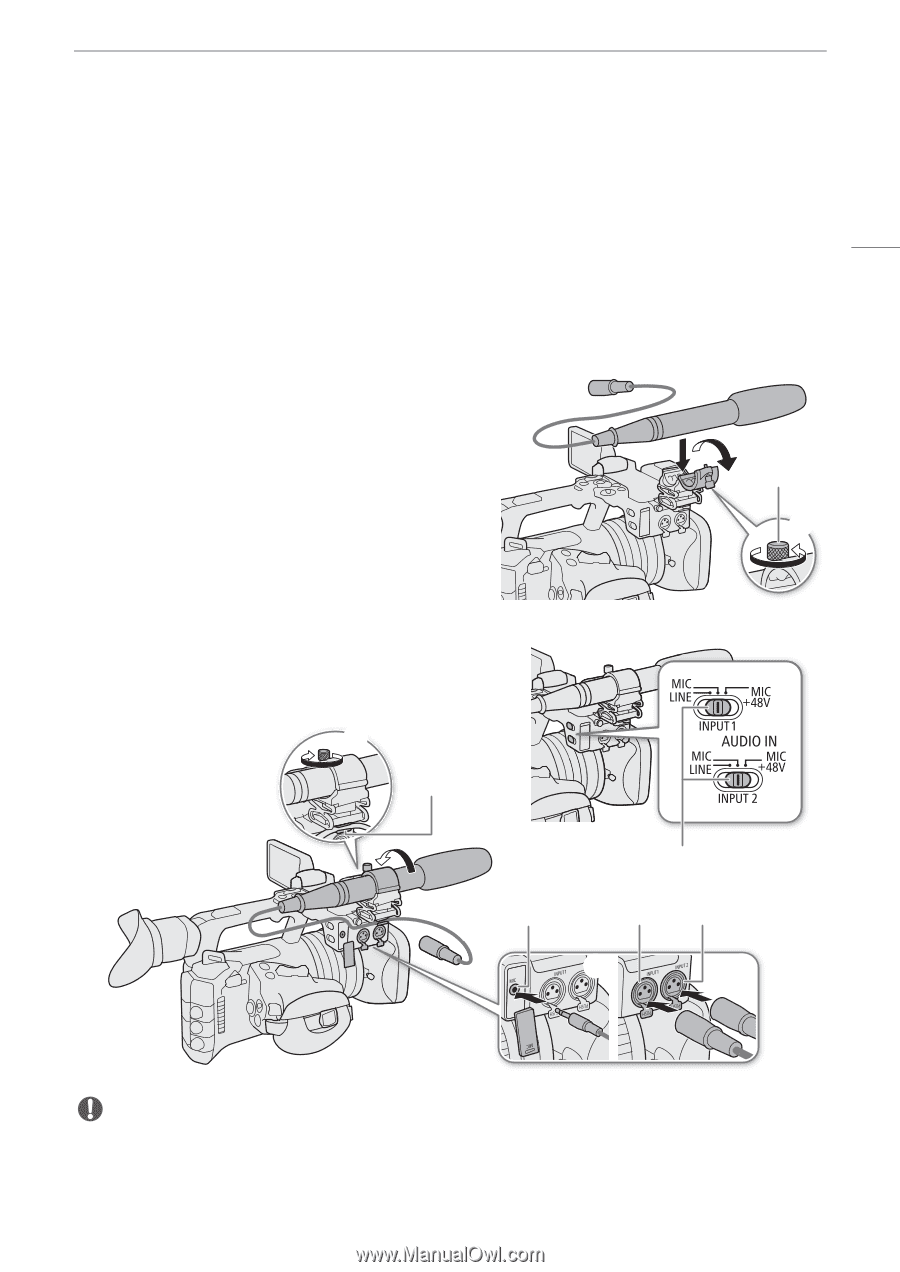
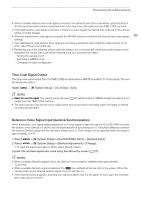
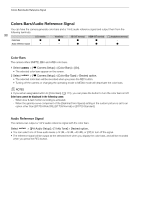
Recording Audio - Audio will not be recorded if there is an existing WAV file with the same file name. - A maximum of 999 WAV files can be recorded. 93 Connecting an External Microphone or External Audio Input Source to the Camera To each of the INPUT terminals you can attach commercially available microphones or analog line in sources with an XLR connector. To the MIC terminal you can attach commercially available condenser microphones with a 3.5 mm stereo mini plug/external line input device (analog). Using the supplied microphone holder, you can fix external microphones with a diameter of 19 mm to 20 mm. 1 To use a microphone, loosen the microphone lock screw (ቢ), open the microphone holder and insert the microphone (ባ). 2 Tighten the lock screw (ቤ) and put the microphone cable through the cable clamp. 3 When using any INPUT terminal, set the corresponding INPUT 1/INPUT 2 (audio source selection) switch to a position other than MIC+48V (ብ). 4 Plug the microphone/external line-in device cable into the desired INPUT terminal (ቦ) or the MIC terminal (ቧ). ባ Microphone lock screw ቢ ብ ቤ Cable clamp INPUT 1 / INPUT 2 switches (audio source selection) MIC terminal INPUT 1 terminal INPUT 2 terminal ቧ ቦ IMPORTANT • Do not connect or disconnect microphones and other audio devices from any INPUT terminal when the corresponding INPUT (audio source selection) switch is set to the MIC+48V position. This may damage the camera and/or device.
-
 1
1 -
2
-
3
-
4
-
5
-
6
-
7
-
8
-
9
-
10
-
11
-
12
-
13
-
14
-
15
-
16
-
17
-
18
-
19
-
20
-
21
-
22
-
23
-
24
-
25
-
26
-
27
-
28
-
29
-
30
-
31
-
32
-
33
-
34
-
35
-
36
-
37
-
38
-
39
-
40
-
41
-
42
-
43
-
44
-
45
-
46
-
47
-
48
-
49
-
50
-
51
-
52
-
53
-
54
-
55
-
56
-
57
-
58
-
59
-
60
-
61
-
62
-
63
-
64
-
65
-
66
-
67
-
68
-
69
-
70
-
71
-
72
-
73
-
74
-
75
-
76
-
77
-
78
-
79
-
80
-
81
-
82
-
83
-
84
-
85
-
86
-
87
-
 88
88 -
 89
89 -
 90
90 -
 91
91 -
 92
92 -
 93
93 -
 94
94 -
 95
95 -
 96
96 -
 97
97 -
 98
98 -
99
-
100
-
101
-
102
-
103
-
104
-
105
-
106
-
107
-
108
-
109
-
110
-
111
-
112
-
113
-
114
-
115
-
116
-
117
-
118
-
119
-
120
-
121
-
122
-
123
-
124
-
125
-
126
-
127
-
128
-
129
-
130
-
131
-
132
-
133
-
134
-
135
-
136
-
137
-
138
-
139
-
140
-
141
-
142
-
143
-
144
-
145
-
146
-
147
-
148
-
149
-
150
-
151
-
152
-
153
-
154
-
155
-
156
-
157
-
158
-
159
-
160
-
161
-
162
-
163
-
164
-
165
-
166
-
167
-
168
-
169
-
170
-
171
-
172
-
173
-
174
-
175
-
176
-
177
-
178
-
179
-
180
-
181
-
182
-
183
-
184
-
185
-
186
-
187
-
188
-
189
-
190
-
191
-
192
-
193
-
194
-
195
-
196
-
197
-
198
-
199
-
200
-
201
-
202
-
203
-
204
-
205
-
206
-
207
-
208
-
209
-
210
-
211
-
212
-
213
-
214
-
215
-
216
-
217
-
218
-
219
-
220
-
221
-
222
-
223
-
224
-
225
-
226
-
227
-
228
-
229
-
230
-
231
-
232
-
233
-
234
-
235
-
236
-
237
-
238
 |
 |