Canon XF605 Instruction Manual - Page 32
Inserting and Removing an SD Card, Initializing Cards, D CARD acce
 |
View all Canon XF605 manuals
Add to My Manuals
Save this manual to your list of manuals |
Page 32 highlights
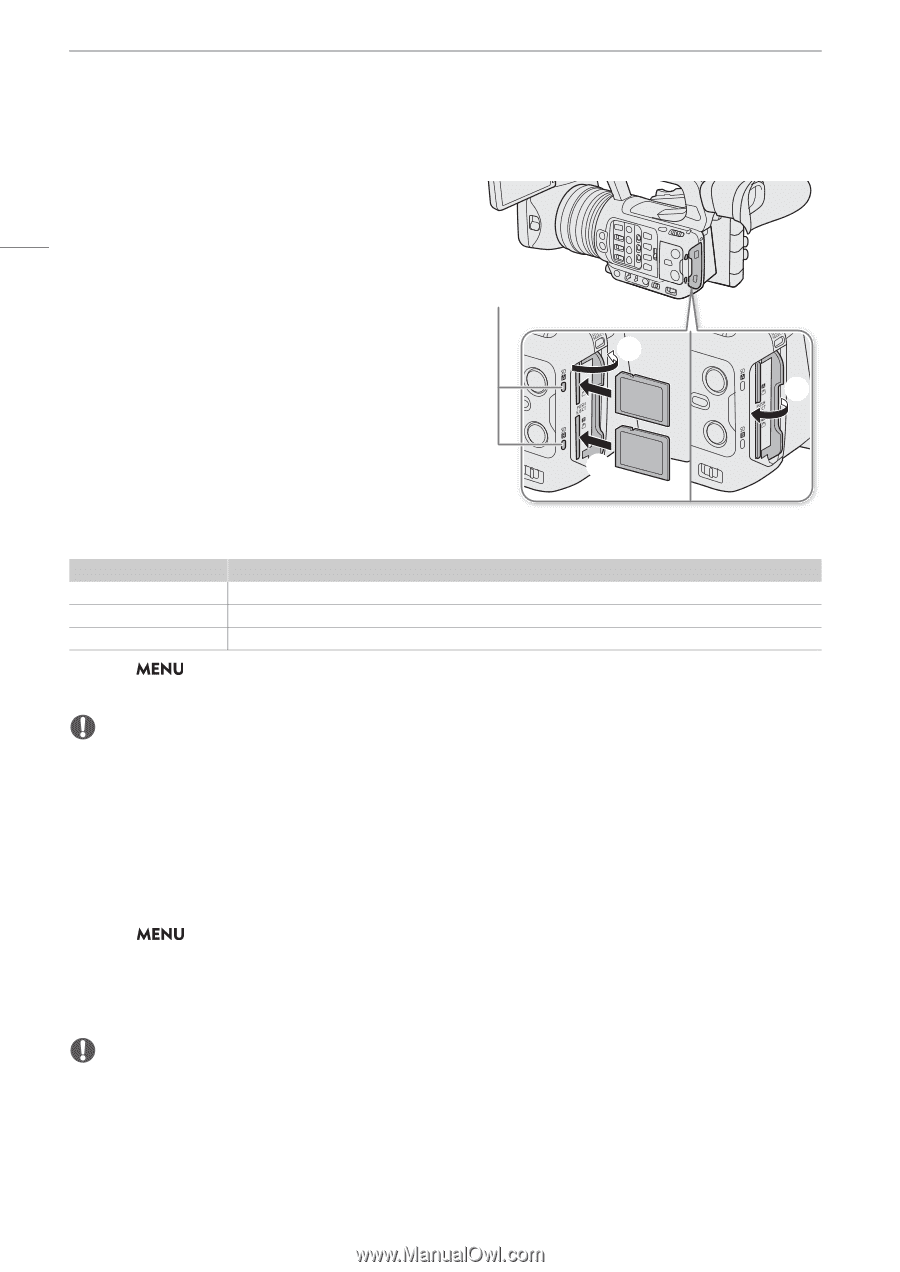
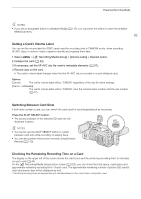
Preparing Recording Media Inserting and Removing an SD Card 1 Wait until the SD CARD access indicator is off or is illuminated in green. 32 2 Open the card compartment cover. 3 Insert the card straight, with the label facing the side of the operation buttons, into the SD card slot until it clicks. SD CARD indicator • You can use two cards, one in each card slot. • To remove the card, make sure the SD CARD indicator ባ is off and then push the card once to release it. When the card springs out, pull it all the way out. ብ 4 Close the card compartment cover. • Do not force the cover closed if the card is not correctly inserted. ቤ SD card access indicator Red Green Off Indicator Card status Accessing the card. Recording/playback is possible and the card is selected for recording/playback. A card is not inserted or the card slot is not currently selected. If you set illuminate. > [B System Setup] > [SD Card Access LED] to [Off], the SD card access indicator will not IMPORTANT • SD cards have front and back sides that are not interchangeable. Inserting a card facing the wrong direction can cause a malfunction of the camera. Be sure to insert the card as shown in the illustration. Initializing Cards Initialize cards when you use them with this camera for the first time. You can also initialize a card to permanently delete all the recordings it contains. 1 Select > [Æ Recording/Media Setup] > [Initialize Media]. 2 Select the desired card. 3 Select [OK]. • The card is initialized and all the data it contains is erased. IMPORTANT • SD cards are initialized using the FAT file system, SDHC cards using the FAT32 file system, and SDXC cards using the exFAT file system. • Initializing a card will permanently erase all data, including photos and protected custom picture files. Lost data cannot be recovered. Make sure you save important recordings in advance. • Depending on the card, initialization may take up to a few minutes.
-
 1
1 -
2
-
3
-
4
-
5
-
6
-
7
-
8
-
9
-
10
-
11
-
12
-
13
-
14
-
15
-
16
-
17
-
18
-
19
-
20
-
21
-
22
-
23
-
24
-
25
-
26
-
 27
27 -
 28
28 -
 29
29 -
 30
30 -
 31
31 -
 32
32 -
 33
33 -
 34
34 -
 35
35 -
 36
36 -
 37
37 -
38
-
39
-
40
-
41
-
42
-
43
-
44
-
45
-
46
-
47
-
48
-
49
-
50
-
51
-
52
-
53
-
54
-
55
-
56
-
57
-
58
-
59
-
60
-
61
-
62
-
63
-
64
-
65
-
66
-
67
-
68
-
69
-
70
-
71
-
72
-
73
-
74
-
75
-
76
-
77
-
78
-
79
-
80
-
81
-
82
-
83
-
84
-
85
-
86
-
87
-
88
-
89
-
90
-
91
-
92
-
93
-
94
-
95
-
96
-
97
-
98
-
99
-
100
-
101
-
102
-
103
-
104
-
105
-
106
-
107
-
108
-
109
-
110
-
111
-
112
-
113
-
114
-
115
-
116
-
117
-
118
-
119
-
120
-
121
-
122
-
123
-
124
-
125
-
126
-
127
-
128
-
129
-
130
-
131
-
132
-
133
-
134
-
135
-
136
-
137
-
138
-
139
-
140
-
141
-
142
-
143
-
144
-
145
-
146
-
147
-
148
-
149
-
150
-
151
-
152
-
153
-
154
-
155
-
156
-
157
-
158
-
159
-
160
-
161
-
162
-
163
-
164
-
165
-
166
-
167
-
168
-
169
-
170
-
171
-
172
-
173
-
174
-
175
-
176
-
177
-
178
-
179
-
180
-
181
-
182
-
183
-
184
-
185
-
186
-
187
-
188
-
189
-
190
-
191
-
192
-
193
-
194
-
195
-
196
-
197
-
198
-
199
-
200
-
201
-
202
-
203
-
204
-
205
-
206
-
207
-
208
-
209
-
210
-
211
-
212
-
213
-
214
-
215
-
216
-
217
-
218
-
219
-
220
-
221
-
222
-
223
-
224
-
225
-
226
-
227
-
228
-
229
-
230
-
231
-
232
-
233
-
234
-
235
-
236
-
237
-
238
 |
 |