Canon XF605 Instruction Manual - Page 30
Attaching and Removing the Eye Cup, Attaching an Accessory Compatible with the, Multi-Function Shoe
 |
View all Canon XF605 manuals
Add to My Manuals
Save this manual to your list of manuals |
Page 30 highlights
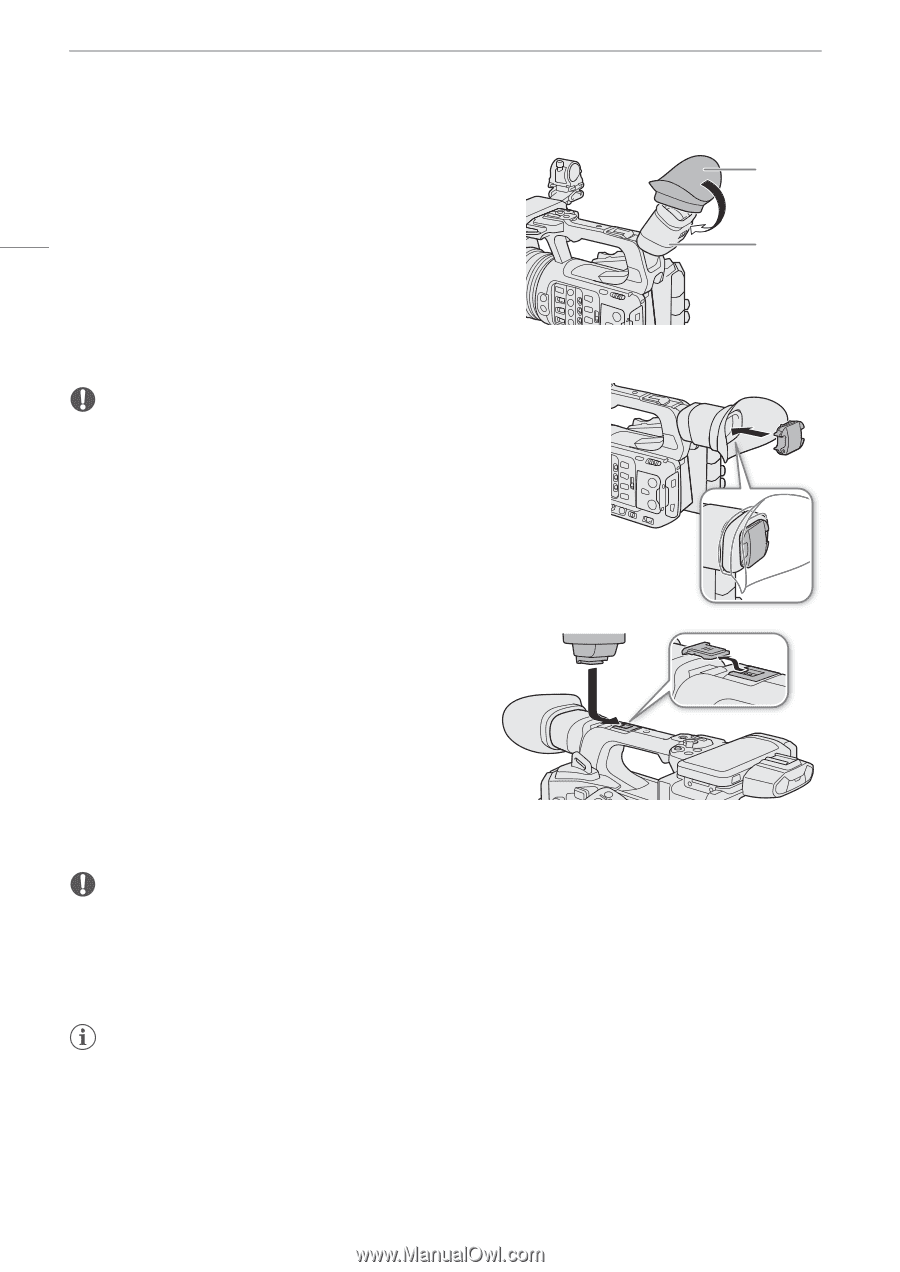
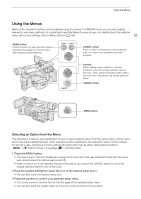
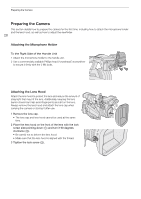
Preparing the Camera Attaching and Removing the Eye Cup Attach the eye cup so that it covers the rubber rim of the viewfinder unit. To remove the eye cup, pull it gently in a "peeling off" motion 30 from the bottom up. • For left eye use, attach the eye cup so that the protruding part faces the opposite side. Eye cup Viewfinder unit IMPORTANT • Pointing the viewfinder lens at the sun or other strong light sources may cause damage to internal components. When you are not using the viewfinder, make sure to attach the viewfinder cap to the viewfinder. This will also protect the viewfinder from scratches and dirt. Attach the viewfinder cap by inserting it into the rubber rim of the viewfinder unit. Attaching an Accessory Compatible with the Multi-Function Shoe ቢ For details on how to attach and use accessories, refer to the instruction manual of the accessory in use. ባ Remove the multi-function shoe cover (ቢ) and slide the accessory's connecting terminal into the multi-function shoe (ባ). • When attaching accessories that communicate through contacts of the multi-function shoe, insert the accessory's mounting foot until it clicks into place, then slide the mounting foot locking lever to secure it. IMPORTANT Protecting the multi-function shoe: • After removing accessories from the multi-function shoe, reattach the shoe cap to protect the contacts from dust and water. • Blow off any foreign material on the multi-function shoe with a commercially available blower or similar tool. • Allow the multi-function shoe to dry before use if it gets wet. NOTES • The Electronic Viewfinder EVF-DC2/EVF-DC1 cannot be attached to the multi-function shoe. Attempting to attach it by force may damage it or the multi-function shoe.
-
 1
1 -
2
-
3
-
4
-
5
-
6
-
7
-
8
-
9
-
10
-
11
-
12
-
13
-
14
-
15
-
16
-
17
-
18
-
19
-
20
-
21
-
22
-
23
-
24
-
 25
25 -
 26
26 -
 27
27 -
 28
28 -
 29
29 -
 30
30 -
 31
31 -
 32
32 -
 33
33 -
 34
34 -
 35
35 -
36
-
37
-
38
-
39
-
40
-
41
-
42
-
43
-
44
-
45
-
46
-
47
-
48
-
49
-
50
-
51
-
52
-
53
-
54
-
55
-
56
-
57
-
58
-
59
-
60
-
61
-
62
-
63
-
64
-
65
-
66
-
67
-
68
-
69
-
70
-
71
-
72
-
73
-
74
-
75
-
76
-
77
-
78
-
79
-
80
-
81
-
82
-
83
-
84
-
85
-
86
-
87
-
88
-
89
-
90
-
91
-
92
-
93
-
94
-
95
-
96
-
97
-
98
-
99
-
100
-
101
-
102
-
103
-
104
-
105
-
106
-
107
-
108
-
109
-
110
-
111
-
112
-
113
-
114
-
115
-
116
-
117
-
118
-
119
-
120
-
121
-
122
-
123
-
124
-
125
-
126
-
127
-
128
-
129
-
130
-
131
-
132
-
133
-
134
-
135
-
136
-
137
-
138
-
139
-
140
-
141
-
142
-
143
-
144
-
145
-
146
-
147
-
148
-
149
-
150
-
151
-
152
-
153
-
154
-
155
-
156
-
157
-
158
-
159
-
160
-
161
-
162
-
163
-
164
-
165
-
166
-
167
-
168
-
169
-
170
-
171
-
172
-
173
-
174
-
175
-
176
-
177
-
178
-
179
-
180
-
181
-
182
-
183
-
184
-
185
-
186
-
187
-
188
-
189
-
190
-
191
-
192
-
193
-
194
-
195
-
196
-
197
-
198
-
199
-
200
-
201
-
202
-
203
-
204
-
205
-
206
-
207
-
208
-
209
-
210
-
211
-
212
-
213
-
214
-
215
-
216
-
217
-
218
-
219
-
220
-
221
-
222
-
223
-
224
-
225
-
226
-
227
-
228
-
229
-
230
-
231
-
232
-
233
-
234
-
235
-
236
-
237
-
238
 |
 |