Dell PowerEdge T140 EMC PowerEdge Servers Troubleshooting Guide - Page 106
Storage Health, How do I con RAID using operating system deployment wizard
 |
View all Dell PowerEdge T140 manuals
Add to My Manuals
Save this manual to your list of manuals |
Page 106 highlights
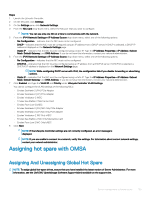
A global hot spare is an unused backup disk that is part of the disk group. Hot spares remain in standby mode. When a physical disk that is used in a virtual disk fails, the assigned hot spare is activated to replace the failed physical disk without interrupting the system or requiring your intervention. When a hot spare is activated, it rebuilds the data for all redundant virtual disks that were using the failed physical disk. You can change the hot spare assignment by unassigning a disk and choosing another disk as needed. You can also assign more than one physical disk as a global hot spare. NOTE: On PERC S100 and S300 controllers, if there is free space available on the global hot spare, it continues to function as a spare even after replacing a failed physical disk. Global hot spares must be assigned and unassigned manually. They are not assigned to specific virtual disks. If you want to assign a hot spare to a virtual disk (it replaces any physical disk that fails in the virtual disk), then use the Assign and Unassign Dedicated Hot Spare. NOTE: When deleting virtual disks, all assigned global hot spares may be automatically unassigned when the last virtual disk associated with the controller is deleted. When the last virtual disk of a disk group is deleted, all assigned dedicated hot spares automatically become global hot spares. NOTE: For PERC H310, H700, H710, H710P, H800, H810, H330, H730, H730P, H730P MX, H740P, H745P MX, H830, H840 and PERC FD33xD/FD33xS controllers, if any of the drives you selected are in the Spun Down state, the following message is displayed: The current physical drive is in the spun down state. Executing this task on this drive takes additional time, because the drive needs to spun up. You should be familiar with the size requirements and other considerations associated with hot spares. Storage Health The Storage Dashboard displays the combined status for each controller and lower-level storage components. For example, if the health of the storage system has been compromised due to a degraded enclosure, both the enclosure Health and the controller severity on the Storage Dashboard display a yellow exclamation mark to indicate a Warning severity. If a controller on the Storage Dashboard displays a Warning or Critical status, perform the following actions to investigate the cause: • Click Check Alert Log to display the Alerts Log. Review the Alert Log for alerts relating to the status of the controller and its lowerlevel components. The Check Alert Log link is only displayed when the controller displays a Warning or Critical status. • Select the controller and investigate the status of the lower-level components. For more information, see the Storage Component Severity section. • Click the virtual disk that is in degraded state to display the Physical Disk Properties page. NOTE: The virtual disk link is displayed only if the physical disks that are part of the virtual disk, are in a Warning or Critical state. For more information on how the status of lower-level components is rolled up into the status displayed for the controller, see the Determining The Health Status For Storage Components section. How do I configure RAID using operating system deployment wizard You can configure RAID using an operating System deployment wizard on the Dell Lifecycle controller. To configure RAID: • Launch the Lifecycle Controller. • In the left pane, click OS Deployment. • On the OS Deployment page, click Deploy OS. • On the Deploy OS page, click Configure RAID First, and then click Next. • The storage controllers available for configuration are displayed in the RAID Configuration page. NOTE: Make sure that the selected controller is not in a non-RAID mode. • Select a storage controller. The RAID configuration options are displayed. • Follow the instruction on the screen, complete the RAID setting tasks, and then click Finish. 106 Server management software issues
-
 1
1 -
2
-
3
-
4
-
5
-
6
-
7
-
8
-
9
-
10
-
11
-
12
-
13
-
14
-
15
-
16
-
17
-
18
-
19
-
20
-
21
-
22
-
23
-
24
-
25
-
26
-
27
-
28
-
29
-
30
-
31
-
32
-
33
-
34
-
35
-
36
-
37
-
38
-
39
-
40
-
41
-
42
-
43
-
44
-
45
-
46
-
47
-
48
-
49
-
50
-
51
-
52
-
53
-
54
-
55
-
56
-
57
-
58
-
59
-
60
-
61
-
62
-
63
-
64
-
65
-
66
-
67
-
68
-
69
-
70
-
71
-
72
-
73
-
74
-
75
-
76
-
77
-
78
-
79
-
80
-
81
-
82
-
83
-
84
-
85
-
86
-
87
-
88
-
89
-
90
-
91
-
92
-
93
-
94
-
95
-
96
-
97
-
98
-
99
-
100
-
 101
101 -
 102
102 -
 103
103 -
 104
104 -
 105
105 -
 106
106 -
 107
107 -
 108
108 -
 109
109 -
 110
110 -
 111
111 -
112
-
113
-
114
-
115
-
116
-
117
-
118
-
119
-
120
-
121
-
122
-
123
-
124
-
125
-
126
-
127
-
128
-
129
-
130
-
131
-
132
 |
 |
