Dell PowerEdge T140 EMC PowerEdge Servers Troubleshooting Guide - Page 43
Troubleshooting external connections, Troubleshooting the video subsystem, Troubleshooting a USB
 |
View all Dell PowerEdge T140 manuals
Add to My Manuals
Save this manual to your list of manuals |
Page 43 highlights
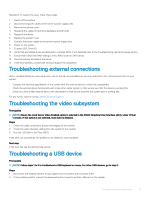
Resolution: To resolve the issue, follow these steps: 1 Switch off the system. 2 Disconnect all power cables to the server's power supply units. 3 Remove the system cover. 4 Reseat all the cables of hard drive backplane at both ends. 5 Reseat all the drives. 6 Replace the system cover. 7 Connect the power cables to the server's power supply units. 8 Power on the system 9 To enter UEFI, Press F2. 10 Verify that all installed drives are detected in controller BIOS, if not detected refer to the Troubleshooting Hard drive issues section. 11 Ensure that in BIOS the RAID setting is set to RAID mode for SATA drives. 12 Save the setting, and reboot the server. 13 If the issue persists, contact Dell Technical Support for assistance. Troubleshooting external connections Before troubleshooting any external devices, ensure that all external cables are securely attached to the external connectors on your system. • Compare the technical specification of the system with the external device to check the compatibility. • Check the external device functionality with some other similar system so that we are sure that the device is working fine. • Check any other similar external device with this system so that we are sure that the system port is working fine. For any further queries contact, Global Technical Support. Troubleshooting the video subsystem Prerequisite NOTE: Ensure the Local Server Video Enabled option is selected in the iDRAC Graphical User Interface (GUI), under Virtual Console. If this option is not selected, local video is disabled. Steps 1 Check the cable connections (power and display) to the monitor. 2 Check the video interface cabling from the system to the monitor. 3 Run the LCD Built-in Self Test (BIST). If the tests run successfully, the problem is not related to video hardware. Next step If the tests fail, see the Getting help section. Troubleshooting a USB device Prerequisite NOTE: Follow steps 1 to 5 to troubleshoot a USB keyboard or mouse. For other USB devices, go to step 6. Steps 1 Disconnect the keyboard and/or mouse cables from the system and reconnect them. 2 If the problem persists, connect the keyboard and/or mouse to another USB port on the system. Troubleshooting hardware issues 43
-
 1
1 -
2
-
3
-
4
-
5
-
6
-
7
-
8
-
9
-
10
-
11
-
12
-
13
-
14
-
15
-
16
-
17
-
18
-
19
-
20
-
21
-
22
-
23
-
24
-
25
-
26
-
27
-
28
-
29
-
30
-
31
-
32
-
33
-
34
-
35
-
36
-
37
-
 38
38 -
 39
39 -
 40
40 -
 41
41 -
 42
42 -
 43
43 -
 44
44 -
 45
45 -
 46
46 -
 47
47 -
 48
48 -
49
-
50
-
51
-
52
-
53
-
54
-
55
-
56
-
57
-
58
-
59
-
60
-
61
-
62
-
63
-
64
-
65
-
66
-
67
-
68
-
69
-
70
-
71
-
72
-
73
-
74
-
75
-
76
-
77
-
78
-
79
-
80
-
81
-
82
-
83
-
84
-
85
-
86
-
87
-
88
-
89
-
90
-
91
-
92
-
93
-
94
-
95
-
96
-
97
-
98
-
99
-
100
-
101
-
102
-
103
-
104
-
105
-
106
-
107
-
108
-
109
-
110
-
111
-
112
-
113
-
114
-
115
-
116
-
117
-
118
-
119
-
120
-
121
-
122
-
123
-
124
-
125
-
126
-
127
-
128
-
129
-
130
-
131
-
132
 |
 |
