IBM 6000R Hardware Maintenance Manual - Page 86
Installing internal drives, Internal drive bays, Using IBM ServeRAID, hot-swap
 |
UPC - 087944534341
View all IBM 6000R manuals
Add to My Manuals
Save this manual to your list of manuals |
Page 86 highlights
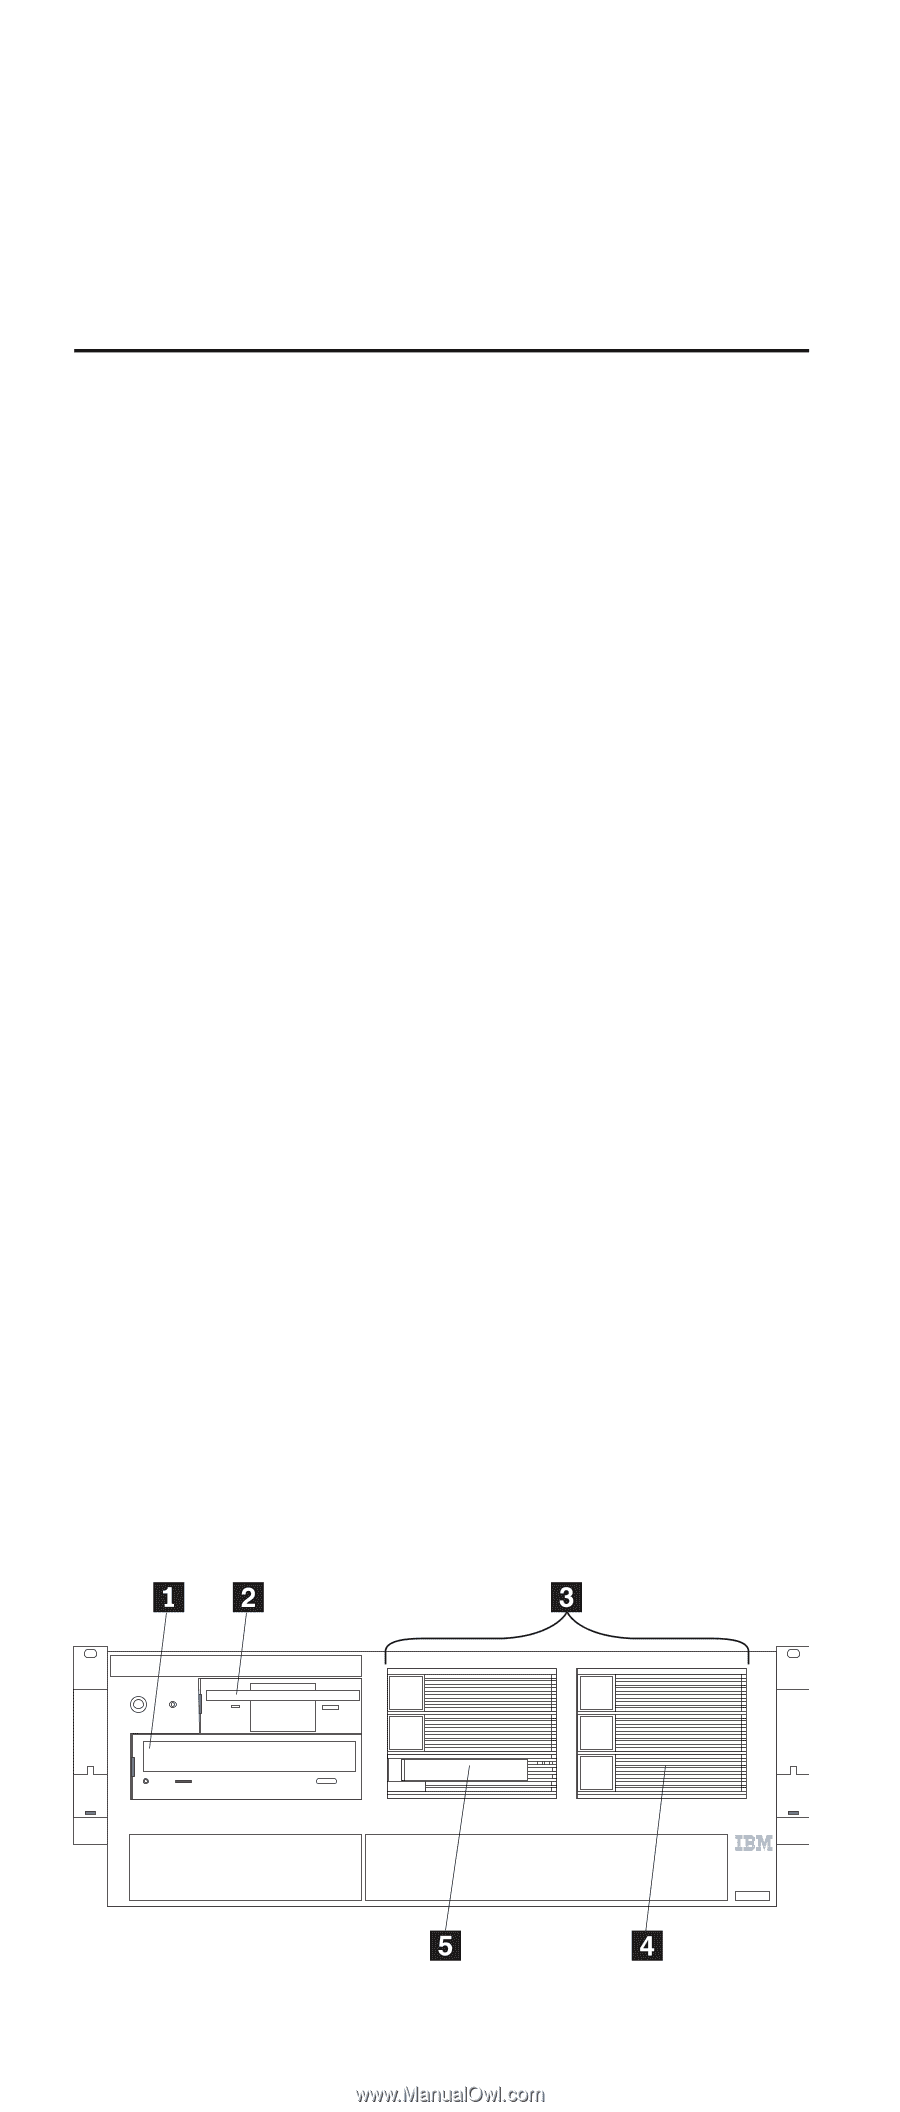
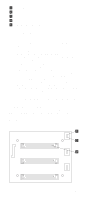
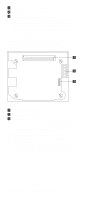
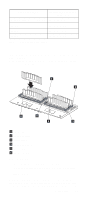
server and connecting the SCSI cable to a ServeRAID adapter. 12. Connect the SCSI cable to an internal channel connector on the ServeRAID adapter. Note: Refer to the Using IBM ServeRAID book on the Documentation CD for information on ServeRAID adapters and controllers. Installing internal drives If you add different types of drives, the system can read multiple types of media and store more data. Several types of drives are available, such as: • Diskette • Hard disk • CD-ROM • DVD-ROM • Tape Note: The server supports external tape drives; however, the server does not support internal tape drives. The server contains hardware that enables you to replace a failed hard disk drive without turning off the server. Therefore, you have the advantage of continuing to operate the system while a hard disk drive is removed or installed. These drives are known as hot-swap drives. Each hot-swap drive bay has two indicator lights on the front of the server (see "Start the server" on page 8). If the amber hard-disk status light for a drive is lit continuously, that individual drive is faulty and requires replacement. When the hard-disk status light indicates a drive fault, you can replace a hot-swap drive without turning off the server. Each hot-swap drive that you plan to install must be mounted in a hot-swap-drive tray. The drive must have a single connector attachment (SCA) connector. Hot-swapdrive trays come with hot-swap drives. Internal drive bays Internal drives are installed in bays. The server supports up to a maximum of six 1-inch (26 mm) slim high, 3.5 inch, hotswap hard disk drives when the media bay option is installed. 74 Netfinity 6000R Type 8682 Models 1RY, 2RY
-
 1
1 -
2
-
3
-
4
-
5
-
6
-
7
-
8
-
9
-
10
-
11
-
12
-
13
-
14
-
15
-
16
-
17
-
18
-
19
-
20
-
21
-
22
-
23
-
24
-
25
-
26
-
27
-
28
-
29
-
30
-
31
-
32
-
33
-
34
-
35
-
36
-
37
-
38
-
39
-
40
-
41
-
42
-
43
-
44
-
45
-
46
-
47
-
48
-
49
-
50
-
51
-
52
-
53
-
54
-
55
-
56
-
57
-
58
-
59
-
60
-
61
-
62
-
63
-
64
-
65
-
66
-
67
-
68
-
69
-
70
-
71
-
72
-
73
-
74
-
75
-
76
-
77
-
78
-
79
-
80
-
 81
81 -
 82
82 -
 83
83 -
 84
84 -
 85
85 -
 86
86 -
 87
87 -
 88
88 -
 89
89 -
 90
90 -
 91
91 -
92
-
93
-
94
-
95
-
96
-
97
-
98
-
99
-
100
-
101
-
102
-
103
-
104
-
105
-
106
-
107
-
108
-
109
-
110
-
111
-
112
-
113
-
114
-
115
-
116
-
117
-
118
-
119
-
120
-
121
-
122
-
123
-
124
-
125
-
126
-
127
-
128
-
129
-
130
-
131
-
132
-
133
-
134
-
135
-
136
-
137
-
138
-
139
-
140
-
141
-
142
-
143
-
144
-
145
-
146
-
147
-
148
-
149
-
150
-
151
-
152
-
153
-
154
-
155
-
156
-
157
-
158
-
159
-
160
-
161
-
162
-
163
-
164
-
165
-
166
-
167
-
168
-
169
-
170
-
171
-
172
-
173
-
174
-
175
-
176
-
177
-
178
-
179
-
180
-
181
-
182
-
183
-
184
-
185
-
186
-
187
-
188
-
189
-
190
-
191
-
192
-
193
-
194
-
195
-
196
-
197
-
198
-
199
-
200
-
201
-
202
-
203
-
204
-
205
-
206
-
207
-
208
-
209
-
210
-
211
-
212
-
213
-
214
-
215
-
216
-
217
-
218
-
219
-
220
-
221
-
222
-
223
-
224
-
225
-
226
-
227
-
228
-
229
-
230
-
231
-
232
-
233
-
234
-
235
-
236
-
237
-
238
-
239
-
240
-
241
-
242
-
243
-
244
-
245
-
246
-
247
-
248
-
249
-
250
-
251
-
252
 |
 |