IBM 6000R Hardware Maintenance Manual - Page 98
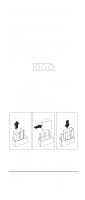
Place the handle on the power supply in the open posi, Remove the filler panel.
 |
UPC - 087944534341
View all IBM 6000R manuals
Add to My Manuals
Save this manual to your list of manuals |
Page 98 highlights
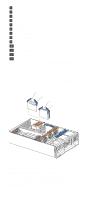
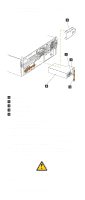
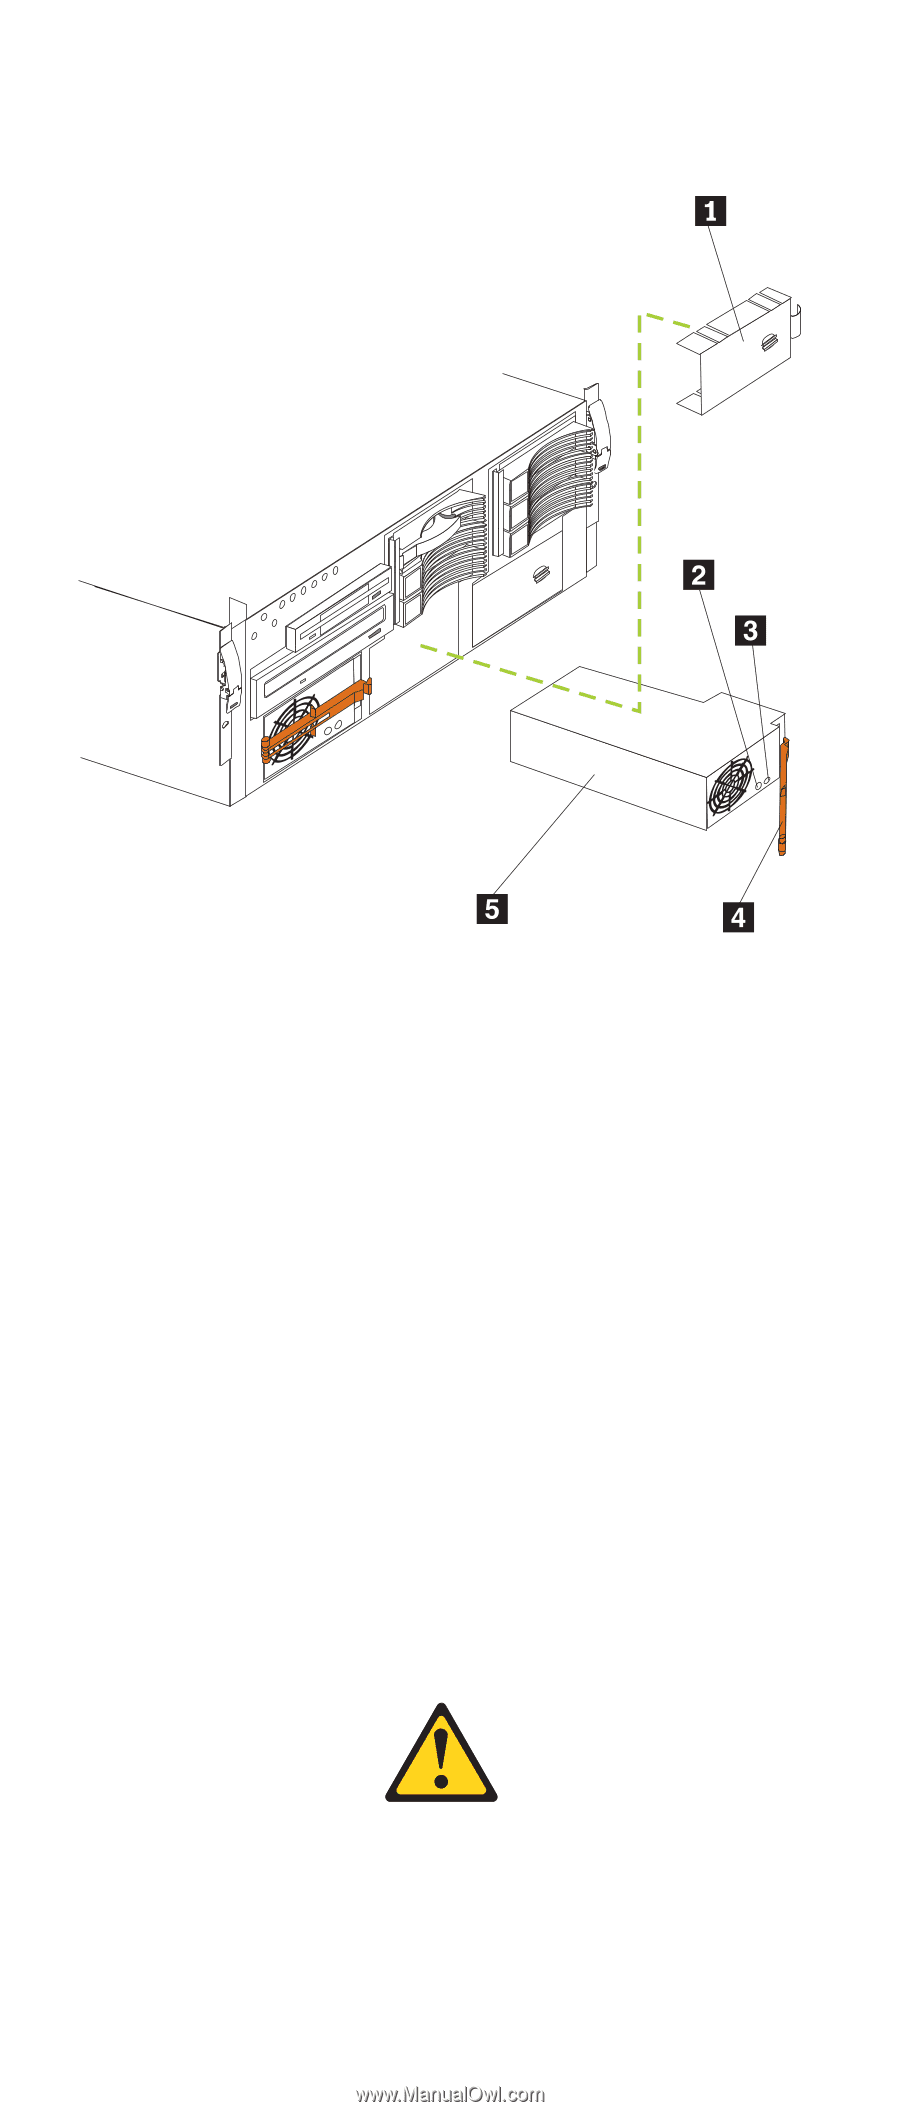
Note: The illustrations in this document might differ slightly from your hardware. 1 Filler panel 2 AC power light 3 DC power light 4 Power supply handle 5 Power supply To install an additional power supply: 1. Remove the filler panel. 2. Place the handle on the power supply in the open posi- tion. 3. Slide the power supply into the chassis and close the handle. 4. Plug the power cord into the power supply; then, into a properly grounded electrical outlet. 5. Verify that the DC Power light and the AC Power light on the power supply are lit, indicating that the power supply is operating properly. CAUTION: 86 Netfinity 6000R Type 8682 Models 1RY, 2RY
-
 1
1 -
2
-
3
-
4
-
5
-
6
-
7
-
8
-
9
-
10
-
11
-
12
-
13
-
14
-
15
-
16
-
17
-
18
-
19
-
20
-
21
-
22
-
23
-
24
-
25
-
26
-
27
-
28
-
29
-
30
-
31
-
32
-
33
-
34
-
35
-
36
-
37
-
38
-
39
-
40
-
41
-
42
-
43
-
44
-
45
-
46
-
47
-
48
-
49
-
50
-
51
-
52
-
53
-
54
-
55
-
56
-
57
-
58
-
59
-
60
-
61
-
62
-
63
-
64
-
65
-
66
-
67
-
68
-
69
-
70
-
71
-
72
-
73
-
74
-
75
-
76
-
77
-
78
-
79
-
80
-
81
-
82
-
83
-
84
-
85
-
86
-
87
-
88
-
89
-
90
-
91
-
92
-
 93
93 -
 94
94 -
 95
95 -
 96
96 -
 97
97 -
 98
98 -
 99
99 -
 100
100 -
 101
101 -
 102
102 -
 103
103 -
104
-
105
-
106
-
107
-
108
-
109
-
110
-
111
-
112
-
113
-
114
-
115
-
116
-
117
-
118
-
119
-
120
-
121
-
122
-
123
-
124
-
125
-
126
-
127
-
128
-
129
-
130
-
131
-
132
-
133
-
134
-
135
-
136
-
137
-
138
-
139
-
140
-
141
-
142
-
143
-
144
-
145
-
146
-
147
-
148
-
149
-
150
-
151
-
152
-
153
-
154
-
155
-
156
-
157
-
158
-
159
-
160
-
161
-
162
-
163
-
164
-
165
-
166
-
167
-
168
-
169
-
170
-
171
-
172
-
173
-
174
-
175
-
176
-
177
-
178
-
179
-
180
-
181
-
182
-
183
-
184
-
185
-
186
-
187
-
188
-
189
-
190
-
191
-
192
-
193
-
194
-
195
-
196
-
197
-
198
-
199
-
200
-
201
-
202
-
203
-
204
-
205
-
206
-
207
-
208
-
209
-
210
-
211
-
212
-
213
-
214
-
215
-
216
-
217
-
218
-
219
-
220
-
221
-
222
-
223
-
224
-
225
-
226
-
227
-
228
-
229
-
230
-
231
-
232
-
233
-
234
-
235
-
236
-
237
-
238
-
239
-
240
-
241
-
242
-
243
-
244
-
245
-
246
-
247
-
248
-
249
-
250
-
251
-
252
 |
 |
86
Netfinity 6000R Type 8682 Models 1RY, 2RY
Note:
The illustrations in this document might differ slightly
from your hardware.
±
1
²
Filler panel
±
2
²
AC power light
±
3
²
DC power light
±
4
²
Power supply handle
±
5
²
Power supply
To install an additional power supply:
1.
Remove the filler panel.
2.
Place the handle on the power supply in the open posi-
tion.
3.
Slide the power supply into the chassis and close the
handle.
4.
Plug the power cord into the power supply; then, into a
properly grounded electrical outlet.
5.
Verify that the DC Power light and the AC Power light
on the power supply are lit, indicating that the power
supply is operating properly.
CAUTION: