Yamaha QY700 Owner's Manual - Page 107
Song Recording
 |
View all Yamaha QY700 manuals
Add to My Manuals
Save this manual to your list of manuals |
Page 107 highlights
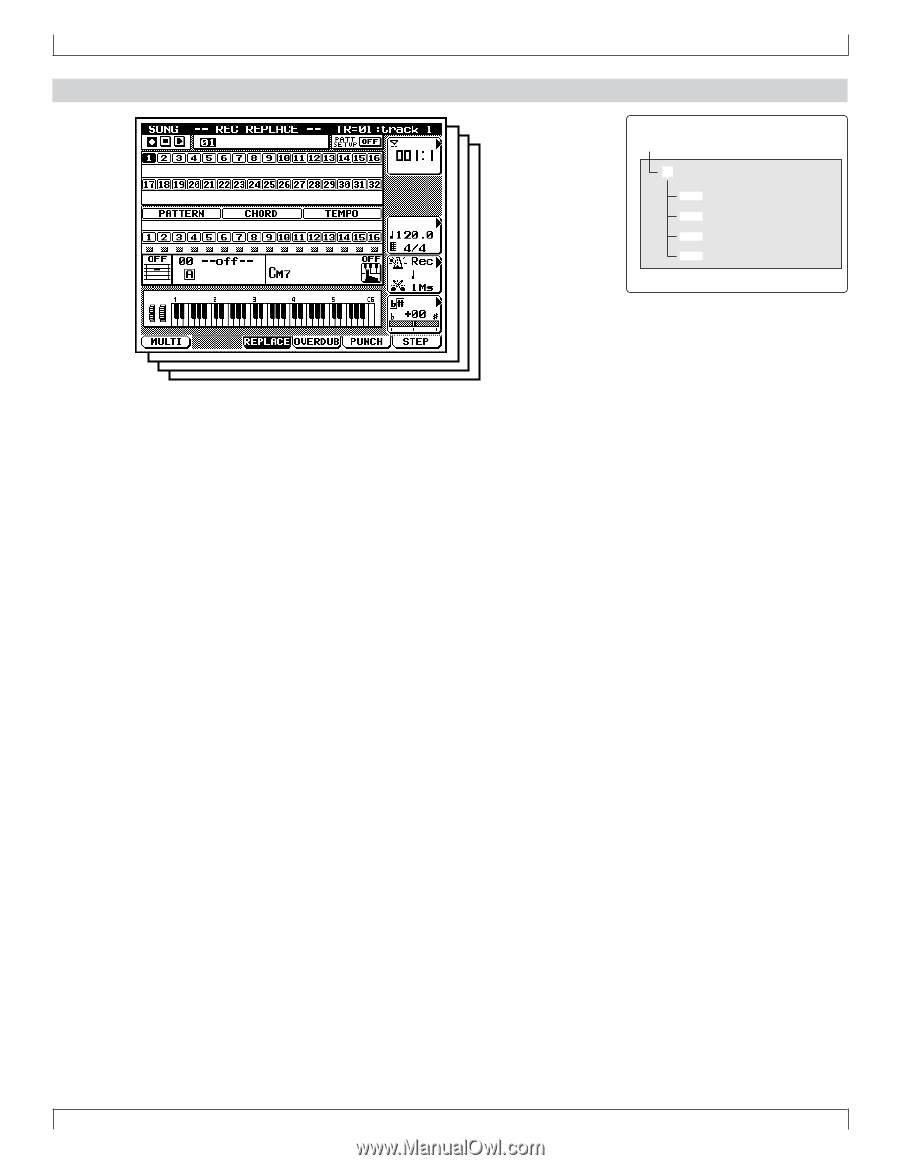
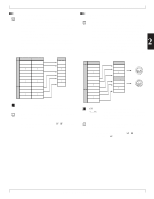
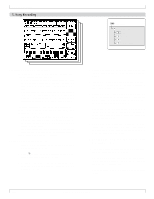
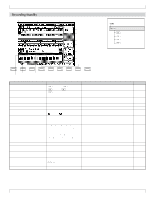
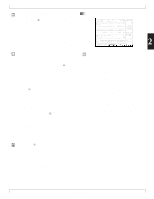
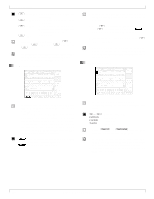
5. Song Recording 5. Song Recording sSONG PLAY eRecording Standby 3Replace 4Overdub 5Punch 6Step Recording Recording Songs on the QY700 The QY700 offers two general methods for recording songs: realtime recording and step recording. • With realtime recording, the QY700 operates as a multitrack recorder, recording the performance data as it is played. This allows you to catch all the nuances of an actual performance. • With step recording, you input your music one note at a time, almost as if you were writing the notes down on a music sheet. This allows you to create complex phrases without having to play them in real time at the keyboard. The general procedure that you use to make the recording will vary according to whether or not you are using the QY700's auto-accompaniment feature. • If you are using auto-accompaniment, you begin by enter- ing the required accompaniment settings. You can then listen to the accompaniment while recording the other parts onto the sequence tracks. • If you are not using auto-accompaniment, you can skip the accompaniment setup steps, so that the procedure is shorter. Both of these procedures are outlined below. If using auto-accompaniment: 1. At the SONG PLAY screen, select the destination song for the recording. (→ p.73) 2. Press e to enter Recording Standby. Select the appropriate recording values. (→ p.109) 3. Record the styles and sections for the PATTERN track. Use either the realtime method (→ p.112) or the step method (→ p.120). 4. Record the chords into the CHORD track, using either the realtime method (→ p.112) or the step method (→ p.120). 5. Enter VOICE mode and make provisional mixer settings for all of the parts that will be used to reproduce your recorded tracks. (→ p.170) 6. Record on track 1, again using either the realtime (→ p.112) or step (→ p.120) approach. If you are using the realtime method, you can listen to auto-accompaniment while making the recording. 7. Now record track 2. (If using the realtime method, you can listen to track 1 together with auto-accompaniment as you record.) Then proceed to record the subsequent tracks in the same way. 8. Go to SONG mode's Play Effects submode, and adjust the play-effect settings to get the right rhythms and nuances. You can listen to the recording as you make the adjustments. (→ p.80) 9. Go to SONG EDIT mode, and edit the sequence tracks as necessary. (→ p.129) 10.If necessary, use appropriate song jobs to make other types of editing changes. (→ p.138) 11.Return to VOICE mode, and adjust the tone-generator settings as necessary. Listen to the recording as you make these adjustments. 12.When you are satisfied with the results, save the song to disk. 106 Chapter 2. SONG MODE
-
 1
1 -
2
-
3
-
4
-
5
-
6
-
7
-
8
-
9
-
10
-
11
-
12
-
13
-
14
-
15
-
16
-
17
-
18
-
19
-
20
-
21
-
22
-
23
-
24
-
25
-
26
-
27
-
28
-
29
-
30
-
31
-
32
-
33
-
34
-
35
-
36
-
37
-
38
-
39
-
40
-
41
-
42
-
43
-
44
-
45
-
46
-
47
-
48
-
49
-
50
-
51
-
52
-
53
-
54
-
55
-
56
-
57
-
58
-
59
-
60
-
61
-
62
-
63
-
64
-
65
-
66
-
67
-
68
-
69
-
70
-
71
-
72
-
73
-
74
-
75
-
76
-
77
-
78
-
79
-
80
-
81
-
82
-
83
-
84
-
85
-
86
-
87
-
88
-
89
-
90
-
91
-
92
-
93
-
94
-
95
-
96
-
97
-
98
-
99
-
100
-
101
-
 102
102 -
 103
103 -
 104
104 -
 105
105 -
 106
106 -
 107
107 -
 108
108 -
 109
109 -
 110
110 -
 111
111 -
 112
112 -
113
-
114
-
115
-
116
-
117
-
118
-
119
-
120
-
121
-
122
-
123
-
124
-
125
-
126
-
127
-
128
-
129
-
130
-
131
-
132
-
133
-
134
-
135
-
136
-
137
-
138
-
139
-
140
-
141
-
142
-
143
-
144
-
145
-
146
-
147
-
148
-
149
-
150
-
151
-
152
-
153
-
154
-
155
-
156
-
157
-
158
-
159
-
160
-
161
-
162
-
163
-
164
-
165
-
166
-
167
-
168
-
169
-
170
-
171
-
172
-
173
-
174
-
175
-
176
-
177
-
178
-
179
-
180
-
181
-
182
-
183
-
184
-
185
-
186
-
187
-
188
-
189
-
190
-
191
-
192
-
193
-
194
-
195
-
196
-
197
-
198
-
199
-
200
-
201
-
202
-
203
-
204
-
205
-
206
-
207
-
208
-
209
-
210
-
211
-
212
-
213
-
214
-
215
-
216
-
217
-
218
-
219
-
220
-
221
-
222
-
223
-
224
-
225
-
226
-
227
-
228
-
229
-
230
-
231
-
232
-
233
-
234
-
235
-
236
-
237
-
238
-
239
-
240
-
241
-
242
-
243
-
244
-
245
-
246
-
247
-
248
-
249
-
250
-
251
-
252
-
253
-
254
-
255
-
256
-
257
-
258
-
259
-
260
-
261
-
262
-
263
-
264
-
265
-
266
-
267
-
268
-
269
-
270
-
271
-
272
-
273
-
274
-
275
-
276
-
277
-
278
-
279
-
280
-
281
-
282
-
283
-
284
-
285
-
286
-
287
-
288
-
289
-
290
-
291
-
292
-
293
-
294
-
295
-
296
-
297
-
298
-
299
-
300
-
301
-
302
-
303
-
304
-
305
-
306
-
307
-
308
-
309
-
310
-
311
-
312
-
313
-
314
-
315
-
316
-
317
-
318
-
319
-
320
-
321
-
322
-
323
-
324
-
325
-
326
-
327
-
328
-
329
-
330
-
331
-
332
-
333
-
334
 |
 |