HP Xw460c HP Integrated Lights-Out 2 User Guide for Firmware 1.75 and 1.77 - Page 128
iLO 2 BL c-Class tab, Enclosure bay IP addressing
 |
View all HP Xw460c manuals
Add to My Manuals
Save this manual to your list of manuals |
Page 128 highlights
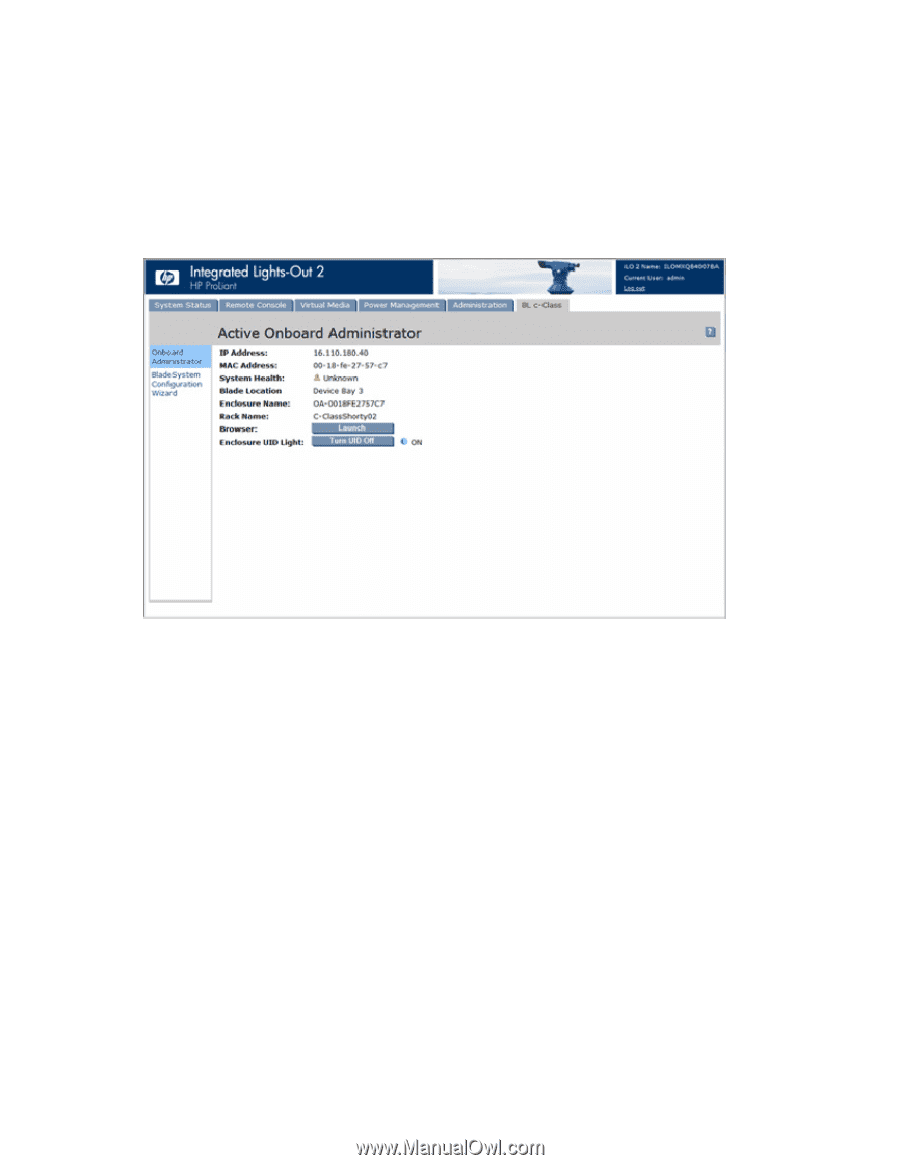
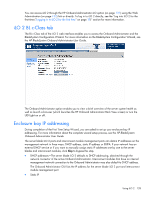
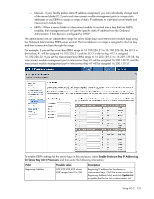
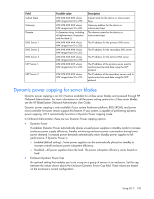
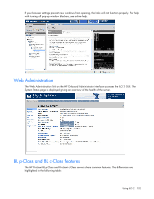
You can access iLO 2 through the HP Onboard Administrator iLO option (on page 131) using the Web Administration (on page 132) link or directly. To log in to iLO 2 directly, see the "Log into iLO 2 for the first time ("Logging in to iLO 2 for the first time" on page 19)" section for more information. iLO 2 BL c-Class tab The BL c-Class tab of the iLO 2 web interface enables you to access the Onboard Administrator and the BladeSystem Configuration Wizard. For more information on the BladeSystem Configuration Wizard, see the HP BladeSystem Onboard Administrator User Guide. The Onboard Administrator option enables you to view a brief overview of the server system health as well as launch a browser (which launches the HP Onboard Administrator Rack View screen) or turn the UID Light on or off. Enclosure bay IP addressing During completion of the First Time Setup Wizard, you are asked to set up your enclosure bay IP addressing. For more information about the complete wizard setup process, see the HP BladeSystem Onboard Administrator User Guide. The server blade iLO 2 ports and interconnect module management ports can obtain IP addresses on the management network in three ways: DHCP address, static IP address or EBIPA. If your network has an external DHCP service or if you want to manually assign static IP addresses one by one to the server blades and interconnect modules, click Skip to bypass this step. • DHCP addresses-The server blade iLO 2 defaults to DHCP addressing, obtained through the network connector of the active Onboard Administrator. Interconnect modules that have an internal management network connection to the Onboard Administrator may also default to DHCP address. The Onboard Administrator GUI lists the IP address for the server blade iLO 2 port and interconnect module management port • Static IP Using iLO 2 128
-
 1
1 -
2
-
3
-
4
-
5
-
6
-
7
-
8
-
9
-
10
-
11
-
12
-
13
-
14
-
15
-
16
-
17
-
18
-
19
-
20
-
21
-
22
-
23
-
24
-
25
-
26
-
27
-
28
-
29
-
30
-
31
-
32
-
33
-
34
-
35
-
36
-
37
-
38
-
39
-
40
-
41
-
42
-
43
-
44
-
45
-
46
-
47
-
48
-
49
-
50
-
51
-
52
-
53
-
54
-
55
-
56
-
57
-
58
-
59
-
60
-
61
-
62
-
63
-
64
-
65
-
66
-
67
-
68
-
69
-
70
-
71
-
72
-
73
-
74
-
75
-
76
-
77
-
78
-
79
-
80
-
81
-
82
-
83
-
84
-
85
-
86
-
87
-
88
-
89
-
90
-
91
-
92
-
93
-
94
-
95
-
96
-
97
-
98
-
99
-
100
-
101
-
102
-
103
-
104
-
105
-
106
-
107
-
108
-
109
-
110
-
111
-
112
-
113
-
114
-
115
-
116
-
117
-
118
-
119
-
120
-
121
-
122
-
 123
123 -
 124
124 -
 125
125 -
 126
126 -
 127
127 -
 128
128 -
 129
129 -
 130
130 -
 131
131 -
 132
132 -
 133
133 -
134
-
135
-
136
-
137
-
138
-
139
-
140
-
141
-
142
-
143
-
144
-
145
-
146
-
147
-
148
-
149
-
150
-
151
-
152
-
153
-
154
-
155
-
156
-
157
-
158
-
159
-
160
-
161
-
162
-
163
-
164
-
165
-
166
-
167
-
168
-
169
-
170
-
171
-
172
-
173
-
174
-
175
-
176
-
177
-
178
-
179
-
180
-
181
-
182
-
183
-
184
-
185
-
186
-
187
-
188
-
189
-
190
-
191
-
192
-
193
-
194
-
195
-
196
-
197
-
198
-
199
-
200
-
201
-
202
-
203
-
204
-
205
-
206
-
207
-
208
-
209
-
210
-
211
-
212
-
213
-
214
-
215
-
216
-
217
-
218
-
219
-
220
-
221
-
222
-
223
-
224
-
225
-
226
-
227
-
228
-
229
-
230
-
231
-
232
-
233
-
234
-
235
 |
 |