HP Xw460c HP Integrated Lights-Out 2 User Guide for Firmware 1.75 and 1.77 - Page 31
Viewing or modifying an existing user's settings, Deleting a user, Save User Information
 |
View all HP Xw460c manuals
Add to My Manuals
Save this manual to your list of manuals |
Page 31 highlights
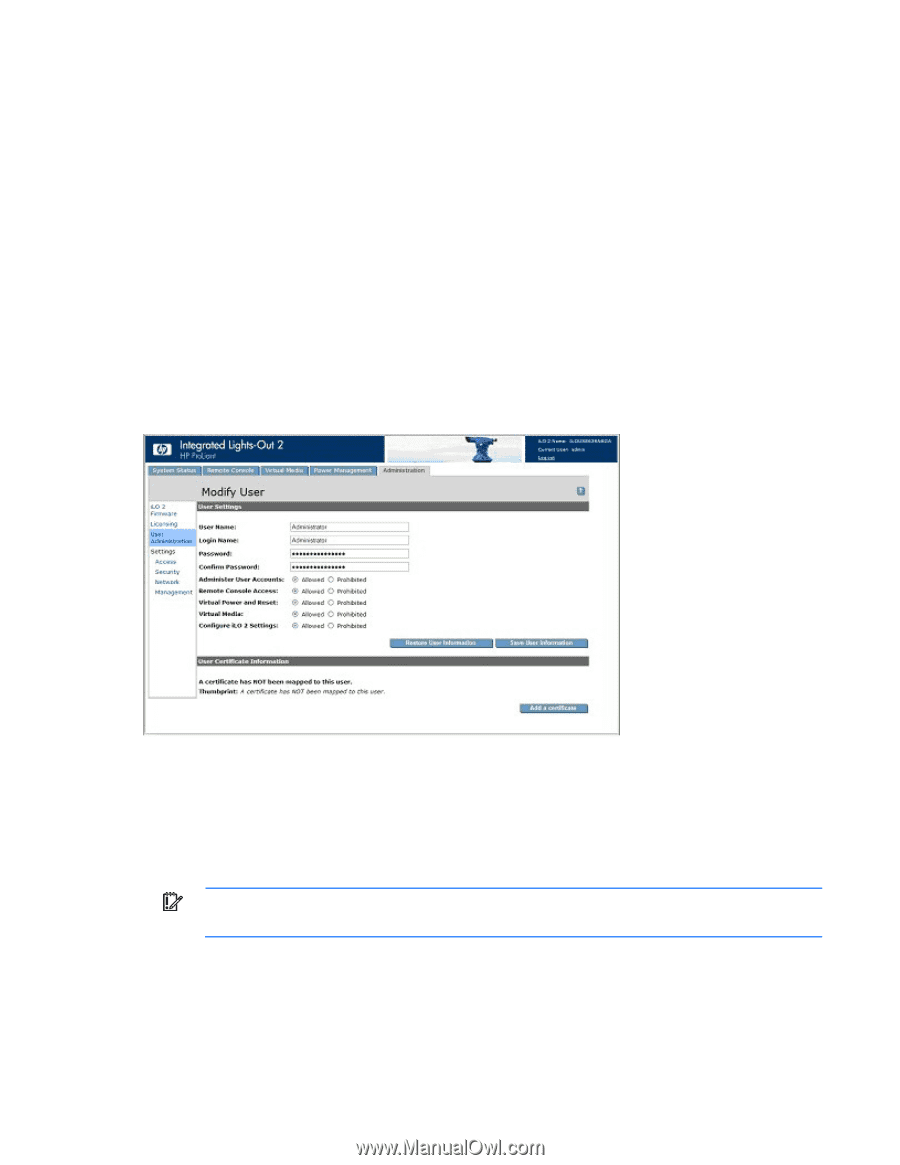
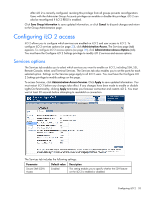
Certificate button. Click this button to map a certificate to the user. After a certificate is mapped to the user account, a 40-digit thumbprint of the certificate appears, along with the Remove this Certificate button, which can be used to remove the certificate. If Two-Factor Authentication is enabled, a different certificate should be mapped to each user. A user who presents a certificate when connecting to iLO 2 is authenticated as the user to whom the certificate is mapped. TwoFactor Authentication must be enabled to authenticate using a certificate. 6. When the user profile is complete, click Save User Information to return to the User Administration screen. To clear the user profile while entering a new user, click Restore User Information. Viewing or modifying an existing user's settings 1. Log in to iLO 2 using an account that has the Administer User Accounts privilege. You must have the Administer User Accounts privilege to manage other users on iLO 2. All users can change their own password using the View/Modify User feature. 2. Click Administration>User Administration, and select the name of the user whose information you want to modify. 3. Click View/Modify. 4. Change user information as required. 5. After changing the fields, click Save User Information to return to the User Administration screen. To recover the original user information, click Restore User Information. All changes made to the profile are discarded. Deleting a user IMPORTANT: Only users with the Administer User Accounts privilege can manage other users on iLO 2. To delete an existing user's information: 1. Log on to iLO 2 using an account that has the Administer User Accounts privilege. Click Administration. Configuring iLO 2 31
-
 1
1 -
2
-
3
-
4
-
5
-
6
-
7
-
8
-
9
-
10
-
11
-
12
-
13
-
14
-
15
-
16
-
17
-
18
-
19
-
20
-
21
-
22
-
23
-
24
-
25
-
 26
26 -
 27
27 -
 28
28 -
 29
29 -
 30
30 -
 31
31 -
 32
32 -
 33
33 -
 34
34 -
 35
35 -
 36
36 -
37
-
38
-
39
-
40
-
41
-
42
-
43
-
44
-
45
-
46
-
47
-
48
-
49
-
50
-
51
-
52
-
53
-
54
-
55
-
56
-
57
-
58
-
59
-
60
-
61
-
62
-
63
-
64
-
65
-
66
-
67
-
68
-
69
-
70
-
71
-
72
-
73
-
74
-
75
-
76
-
77
-
78
-
79
-
80
-
81
-
82
-
83
-
84
-
85
-
86
-
87
-
88
-
89
-
90
-
91
-
92
-
93
-
94
-
95
-
96
-
97
-
98
-
99
-
100
-
101
-
102
-
103
-
104
-
105
-
106
-
107
-
108
-
109
-
110
-
111
-
112
-
113
-
114
-
115
-
116
-
117
-
118
-
119
-
120
-
121
-
122
-
123
-
124
-
125
-
126
-
127
-
128
-
129
-
130
-
131
-
132
-
133
-
134
-
135
-
136
-
137
-
138
-
139
-
140
-
141
-
142
-
143
-
144
-
145
-
146
-
147
-
148
-
149
-
150
-
151
-
152
-
153
-
154
-
155
-
156
-
157
-
158
-
159
-
160
-
161
-
162
-
163
-
164
-
165
-
166
-
167
-
168
-
169
-
170
-
171
-
172
-
173
-
174
-
175
-
176
-
177
-
178
-
179
-
180
-
181
-
182
-
183
-
184
-
185
-
186
-
187
-
188
-
189
-
190
-
191
-
192
-
193
-
194
-
195
-
196
-
197
-
198
-
199
-
200
-
201
-
202
-
203
-
204
-
205
-
206
-
207
-
208
-
209
-
210
-
211
-
212
-
213
-
214
-
215
-
216
-
217
-
218
-
219
-
220
-
221
-
222
-
223
-
224
-
225
-
226
-
227
-
228
-
229
-
230
-
231
-
232
-
233
-
234
-
235
 |
 |