HP Xw460c HP Integrated Lights-Out 2 User Guide for Firmware 1.75 and 1.77 - Page 179
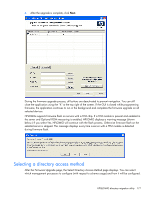
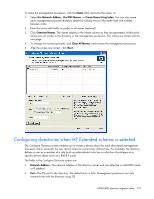
Configuring directories when HP Extended schema is selected, Use Network Address, Use DNS Names
 |
View all HP Xw460c manuals
Add to My Manuals
Save this manual to your list of manuals |
Page 179 highlights
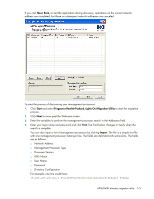
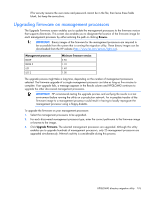
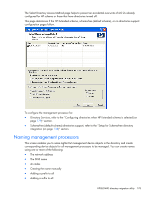
To name the management processors, click the Name field, and enter the name, or: 1. Select Use Network Address, Use DNS Names, or Create Name Using Index. You can also name each management processor directory object by clicking twice in the name field with a delay between clicks. 2. Enter the text to add (suffix or prefix) to all names (optional). 3. Click Generate Names. The names display in the Name column as they are generated. At this point, names are not written to the directory or the management processors. The names are stored until the next page. 4. To change the names (optional), click Clear All Names, and rename the management processors. 5. After the names are correct, click Next. Configuring directories when HP Extended schema is selected The Configure Directory screen enables you to create a device object for each discovered management processor and to associate the new device object to a previously defined role. For example, the directory defines a user as a member of a role (such as administrator) who has a collection of privileges on a specific device object (such as a RILOE II card). The fields in the Configure Directory screen are: • Network Address-The network address of the directory server and can either be a valid DNS name or IP address. • Port-The SSL port to the directory. The default entry is 636. Management processors can only communicate with the directory using SSL. HPQLOMIG directory migration utility 179
-
 1
1 -
2
-
3
-
4
-
5
-
6
-
7
-
8
-
9
-
10
-
11
-
12
-
13
-
14
-
15
-
16
-
17
-
18
-
19
-
20
-
21
-
22
-
23
-
24
-
25
-
26
-
27
-
28
-
29
-
30
-
31
-
32
-
33
-
34
-
35
-
36
-
37
-
38
-
39
-
40
-
41
-
42
-
43
-
44
-
45
-
46
-
47
-
48
-
49
-
50
-
51
-
52
-
53
-
54
-
55
-
56
-
57
-
58
-
59
-
60
-
61
-
62
-
63
-
64
-
65
-
66
-
67
-
68
-
69
-
70
-
71
-
72
-
73
-
74
-
75
-
76
-
77
-
78
-
79
-
80
-
81
-
82
-
83
-
84
-
85
-
86
-
87
-
88
-
89
-
90
-
91
-
92
-
93
-
94
-
95
-
96
-
97
-
98
-
99
-
100
-
101
-
102
-
103
-
104
-
105
-
106
-
107
-
108
-
109
-
110
-
111
-
112
-
113
-
114
-
115
-
116
-
117
-
118
-
119
-
120
-
121
-
122
-
123
-
124
-
125
-
126
-
127
-
128
-
129
-
130
-
131
-
132
-
133
-
134
-
135
-
136
-
137
-
138
-
139
-
140
-
141
-
142
-
143
-
144
-
145
-
146
-
147
-
148
-
149
-
150
-
151
-
152
-
153
-
154
-
155
-
156
-
157
-
158
-
159
-
160
-
161
-
162
-
163
-
164
-
165
-
166
-
167
-
168
-
169
-
170
-
171
-
172
-
173
-
 174
174 -
 175
175 -
 176
176 -
 177
177 -
 178
178 -
 179
179 -
 180
180 -
 181
181 -
 182
182 -
 183
183 -
 184
184 -
185
-
186
-
187
-
188
-
189
-
190
-
191
-
192
-
193
-
194
-
195
-
196
-
197
-
198
-
199
-
200
-
201
-
202
-
203
-
204
-
205
-
206
-
207
-
208
-
209
-
210
-
211
-
212
-
213
-
214
-
215
-
216
-
217
-
218
-
219
-
220
-
221
-
222
-
223
-
224
-
225
-
226
-
227
-
228
-
229
-
230
-
231
-
232
-
233
-
234
-
235
 |
 |
