HP Xw460c HP Integrated Lights-Out 2 User Guide for Firmware 1.75 and 1.77 - Page 19
Logging in to iLO 2 for the first time, Setting up user accounts
 |
View all HP Xw460c manuals
Add to My Manuals
Save this manual to your list of manuals |
Page 19 highlights
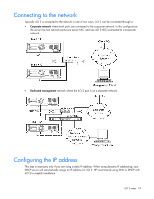
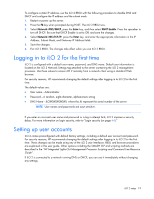
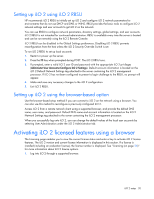
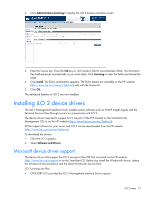
To configure a static IP address, use the iLO 2 RBSU with the following procedure to disable DNS and DHCP and configure the IP address and the subnet mask: 1. Restart or power up the server. 2. Press the F8 key when prompted during POST. The iLO 2 RBSU runs. 3. Select Network>DNS/DHCP, press the Enter key, and then select DHCP Enable. Press the spacebar to turn off DHCP. Be sure that DHCP Enable is set to Off, and save the changes. 4. Select Network>NIC>TCP/IP, press the Enter key, and enter the appropriate information in the IP Address, Subnet Mask, and Gateway IP Address fields. 5. Save the changes. 6. Exit iLO 2 RBSU. The changes take effect when you exit iLO 2 RBSU. Logging in to iLO 2 for the first time iLO 2 is configured with a default user name, password, and DNS name. Default user information is located on the iLO 2 Network Settings tag attached to the server containing the iLO 2 management processor. Use these values to access iLO 2 remotely from a network client using a standard Web browser. For security reasons, HP recommends changing the default settings after logging in to iLO 2 for the first time. The default values are: • User name-Administrator • Password-A random, eight-character, alphanumeric string • DNS Name-ILOXXXXXXXXXXXX, where the Xs represent the serial number of the server NOTE: User names and passwords are case sensitive. If you enter an incorrect user name and password or a log in attempt fails, iLO 2 imposes a security delay. For more information on login security, refer to "Login security (on page 44)." Setting up user accounts iLO 2 comes preconfigured with default factory settings, including a default user account and password. For security reasons, HP recommends changing the default settings after logging in to iLO 2 for the first time. These changes can be made using any of the iLO 2 user interfaces. RBSU and browser procedures are explained in this user guide. Other options including the SMASH CLP and scripting methods are described in the "HP Integrated Lights-Out Management Processor Scripting and Command Line Resource Guide". If iLO 2 is connected to a network running DNS or DHCP, you can use it immediately without changing any settings. iLO 2 setup 19
-
 1
1 -
2
-
3
-
4
-
5
-
6
-
7
-
8
-
9
-
10
-
11
-
12
-
13
-
 14
14 -
 15
15 -
 16
16 -
 17
17 -
 18
18 -
 19
19 -
 20
20 -
 21
21 -
 22
22 -
 23
23 -
 24
24 -
25
-
26
-
27
-
28
-
29
-
30
-
31
-
32
-
33
-
34
-
35
-
36
-
37
-
38
-
39
-
40
-
41
-
42
-
43
-
44
-
45
-
46
-
47
-
48
-
49
-
50
-
51
-
52
-
53
-
54
-
55
-
56
-
57
-
58
-
59
-
60
-
61
-
62
-
63
-
64
-
65
-
66
-
67
-
68
-
69
-
70
-
71
-
72
-
73
-
74
-
75
-
76
-
77
-
78
-
79
-
80
-
81
-
82
-
83
-
84
-
85
-
86
-
87
-
88
-
89
-
90
-
91
-
92
-
93
-
94
-
95
-
96
-
97
-
98
-
99
-
100
-
101
-
102
-
103
-
104
-
105
-
106
-
107
-
108
-
109
-
110
-
111
-
112
-
113
-
114
-
115
-
116
-
117
-
118
-
119
-
120
-
121
-
122
-
123
-
124
-
125
-
126
-
127
-
128
-
129
-
130
-
131
-
132
-
133
-
134
-
135
-
136
-
137
-
138
-
139
-
140
-
141
-
142
-
143
-
144
-
145
-
146
-
147
-
148
-
149
-
150
-
151
-
152
-
153
-
154
-
155
-
156
-
157
-
158
-
159
-
160
-
161
-
162
-
163
-
164
-
165
-
166
-
167
-
168
-
169
-
170
-
171
-
172
-
173
-
174
-
175
-
176
-
177
-
178
-
179
-
180
-
181
-
182
-
183
-
184
-
185
-
186
-
187
-
188
-
189
-
190
-
191
-
192
-
193
-
194
-
195
-
196
-
197
-
198
-
199
-
200
-
201
-
202
-
203
-
204
-
205
-
206
-
207
-
208
-
209
-
210
-
211
-
212
-
213
-
214
-
215
-
216
-
217
-
218
-
219
-
220
-
221
-
222
-
223
-
224
-
225
-
226
-
227
-
228
-
229
-
230
-
231
-
232
-
233
-
234
-
235
 |
 |