Intel VC820 Design Guide - Page 74
Motherboard Interfaces, Hole Locations and Keepout Zones For Support Components
 |
View all Intel VC820 manuals
Add to My Manuals
Save this manual to your list of manuals |
Page 74 highlights
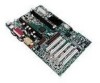
Layout/Routing Guidelines Motherboard Interfaces Figure 2-39 shows the Hole Locations and Keepout Zones For Support Components (from the motherboard surface to 0.100" above the motherboard surface.). Figure 2-39. Hole Locations and Keepout Zones For Support Components1,2 Primary Side 4x Thru ∅ 0.159 +0.002 -0.001 1.270 0.806 0.232 0.231 0.375 4x ∅ 0.300 Keepout Secondary Side 1.038 0.175 4.706 4.881 5.256 1. All dimensions are in inches and all tolearnces ±0.04, unless otherwise specified. 2. Dash lines represent control line for connector key features when placed on planar. 3. Retention solution not to exceed height of 2.75" off of primary side of planar and 0.150" off of secondary side of planar. 4. Retention mechanism must stay within cross-hacth area. NOTES: 1. The dashed lines represent the centerlines for the connector keying features. 2. Drawing not to scale Figure 2-40 shows the dimensions of the grounding pad needed to ground the heat sink. Figure 2-40. Grounding Pad Dimensions for the SECC2 GRM 0.364 0.182 Ground Pad Areas, See Detail A Heat Sink Area 0.232 0.464 Detail A NOTE: Drawing not to scale. Notes: 1. All dimensions are in inches and all tolerances are ±0.004, unless otherwise specified. 2. Retention mechanisim must stay within Cross-Hatch area. 3. Entire specified plating area must be plated and grounded with a minimum of eight VIAS. It is not recommended to use the GRM without the minimum size ground pads in the correct locations. If the GRM is used without the correct pads, then there is a high risk that the metal clip that grounds to the motherboard will be touching the solder mask on the top layer of the board, and possibly short out traces immediately beneath the solder mask, resulting in board failure. The required thickness of the pad is less than 0.001" (using 1/2 oz. copper). 2-48 Intel®820 Chipset Design Guide
-
 1
1 -
2
-
3
-
4
-
5
-
6
-
7
-
8
-
9
-
10
-
11
-
12
-
13
-
14
-
15
-
16
-
17
-
18
-
19
-
20
-
21
-
22
-
23
-
24
-
25
-
26
-
27
-
28
-
29
-
30
-
31
-
32
-
33
-
34
-
35
-
36
-
37
-
38
-
39
-
40
-
41
-
42
-
43
-
44
-
45
-
46
-
47
-
48
-
49
-
50
-
51
-
52
-
53
-
54
-
55
-
56
-
57
-
58
-
59
-
60
-
61
-
62
-
63
-
64
-
65
-
66
-
67
-
68
-
 69
69 -
 70
70 -
 71
71 -
 72
72 -
 73
73 -
 74
74 -
 75
75 -
 76
76 -
 77
77 -
 78
78 -
 79
79 -
80
-
81
-
82
-
83
-
84
-
85
-
86
-
87
-
88
-
89
-
90
-
91
-
92
-
93
-
94
-
95
-
96
-
97
-
98
-
99
-
100
-
101
-
102
-
103
-
104
-
105
-
106
-
107
-
108
-
109
-
110
-
111
-
112
-
113
-
114
-
115
-
116
-
117
-
118
-
119
-
120
-
121
-
122
-
123
-
124
-
125
-
126
-
127
-
128
-
129
-
130
-
131
-
132
-
133
-
134
-
135
-
136
-
137
-
138
-
139
-
140
-
141
-
142
-
143
-
144
-
145
-
146
-
147
-
148
-
149
-
150
-
151
-
152
-
153
-
154
-
155
-
156
-
157
-
158
-
159
-
160
-
161
-
162
-
163
-
164
-
165
-
166
-
167
-
168
-
169
-
170
-
171
-
172
-
173
-
174
-
175
-
176
-
177
-
178
-
179
-
180
-
181
-
182
-
183
-
184
-
185
-
186
-
187
-
188
-
189
-
190
-
191
-
192
-
193
-
194
-
195
-
196
-
197
-
198
-
199
-
200
-
201
-
202
-
203
-
204
-
205
-
206
-
207
-
208
-
209
-
210
-
211
-
212
-
213
-
214
-
215
-
216
-
217
-
218
-
219
-
220
-
221
-
222
-
223
-
224
-
225
-
226
-
227
-
228
-
229
-
230
-
231
-
232
-
233
-
234
-
235
-
236
-
237
-
238
-
239
-
240
-
241
-
242
 |
 |
