Netgear DC112A User Manual - Page 10
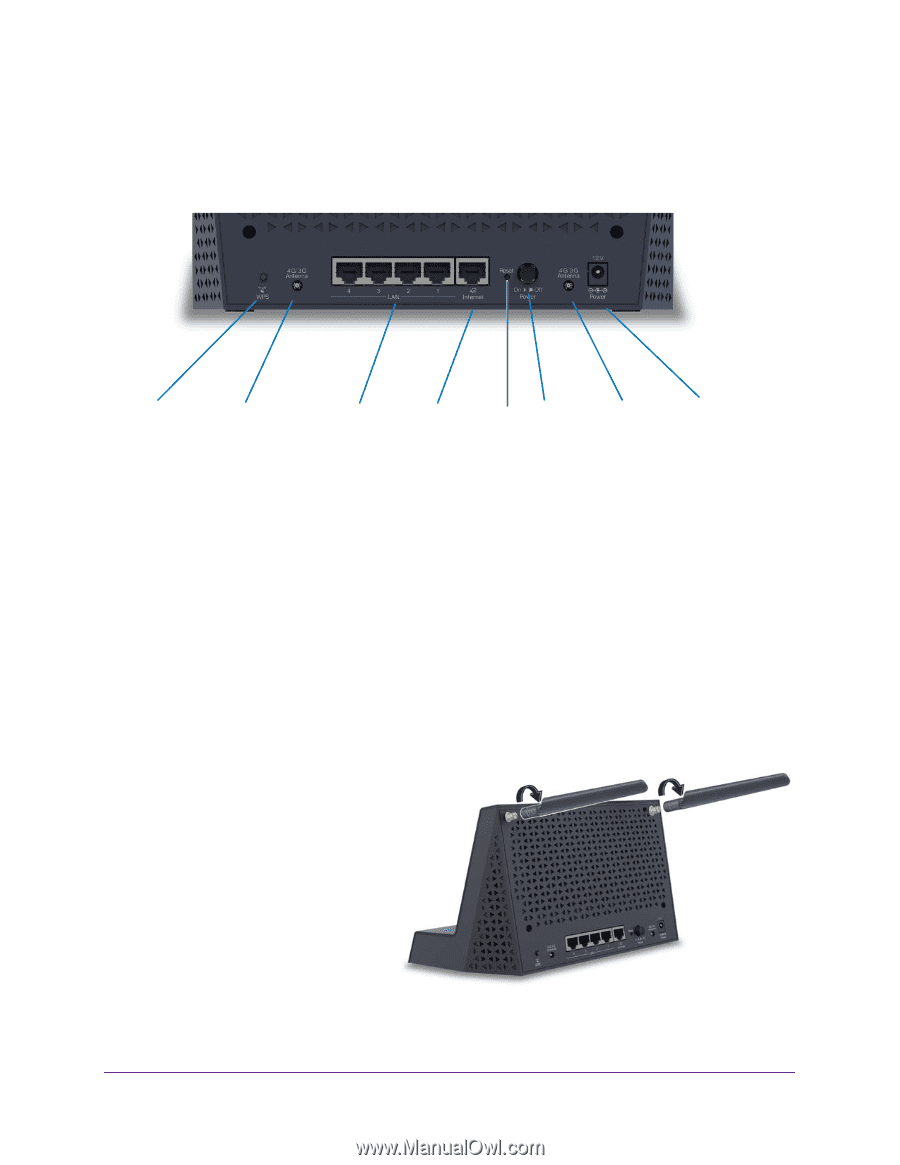
Rear Panel, Attach the External WiFi Antennas, Reset, Ethernet, Internet, Power, LAN ports 1-4, button
 |
View all Netgear DC112A manuals
Add to My Manuals
Save this manual to your list of manuals |
Page 10 highlights
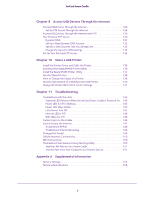
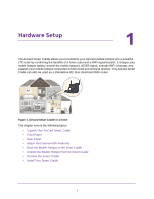
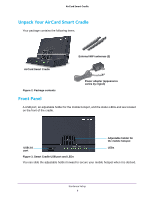
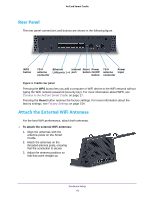
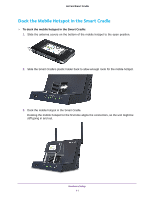
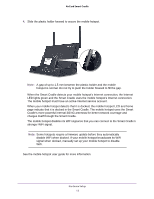
AirCard Smart Cradle Rear Panel The rear panel connections and buttons are shown in the following figure. WPS button TS-9 Ethernet Internet Reset Power antenna LAN ports 1-4 port button On/Off connector button TS-9 Power antenna input connector Figure 4. Cradle rear panel Pressing the WPS button lets you add a computer or WiFi device to the WiFi network without typing the WiFi network password (security key). For more information about WPS, see Connect to the AirCard Smart Cradle on page 17. Pressing the Reset button restores the factory settings. For more information about the factory settings, see Factory Settings on page 154. Attach the External WiFi Antennas For the best WiFi performance, attach both antennas. To attach the external WiFi antennas: 1. Align the antennas with the antenna posts on the Smart Cradle. 2. Attach the antennas on the threaded antenna posts, ensuring that the connection is secure. 3. Adjust the antenna positions so that they point straight up. Hardware Setup 10
-
 1
1 -
2
-
3
-
4
-
 5
5 -
 6
6 -
 7
7 -
 8
8 -
 9
9 -
 10
10 -
 11
11 -
 12
12 -
 13
13 -
 14
14 -
 15
15 -
16
-
17
-
18
-
19
-
20
-
21
-
22
-
23
-
24
-
25
-
26
-
27
-
28
-
29
-
30
-
31
-
32
-
33
-
34
-
35
-
36
-
37
-
38
-
39
-
40
-
41
-
42
-
43
-
44
-
45
-
46
-
47
-
48
-
49
-
50
-
51
-
52
-
53
-
54
-
55
-
56
-
57
-
58
-
59
-
60
-
61
-
62
-
63
-
64
-
65
-
66
-
67
-
68
-
69
-
70
-
71
-
72
-
73
-
74
-
75
-
76
-
77
-
78
-
79
-
80
-
81
-
82
-
83
-
84
-
85
-
86
-
87
-
88
-
89
-
90
-
91
-
92
-
93
-
94
-
95
-
96
-
97
-
98
-
99
-
100
-
101
-
102
-
103
-
104
-
105
-
106
-
107
-
108
-
109
-
110
-
111
-
112
-
113
-
114
-
115
-
116
-
117
-
118
-
119
-
120
-
121
-
122
-
123
-
124
-
125
-
126
-
127
-
128
-
129
-
130
-
131
-
132
-
133
-
134
-
135
-
136
-
137
-
138
-
139
-
140
-
141
-
142
-
143
-
144
-
145
-
146
-
147
-
148
-
149
-
150
-
151
-
152
-
153
-
154
-
155
-
156
 |
 |