HTC EVO Design 4G Sprint EVO DESIGN 4G USER GUIDE - Page 98
Create Another Email Account, Check Your Mail Inbox, Switch Between Email Accounts
 |
View all HTC EVO Design 4G Sprint manuals
Add to My Manuals
Save this manual to your list of manuals |
Page 98 highlights
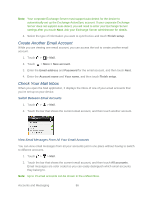
Note: Your corporate Exchange Server must support auto-detect for the device to automatically set up the Exchange ActiveSync account. If your corporate Exchange Server does not support auto-detect, you will need to enter your Exchange Server settings after you touch Next. Ask your Exchange Server administrator for details. 4. Select the type of information you want to synchronize and touch Finish setup. Create Another Email Account While you are viewing one email account, you can access the tool to create another email account. 1. Touch > > Mail. 2. Touch > More > New account. 3. Enter the Email address and Password for the email account, and then touch Next. 4. Enter the Account name and Your name, and then touch Finish setup. Check Your Mail Inbox When you open the Mail application, it displays the inbox of one of your email accounts that you've set up on your device. Switch Between Email Accounts 1. Touch > > Mail. 2. Touch the bar that shows the current email account, and then touch another account. View Email Messages From All Your Email Accounts You can view email messages from all your accounts just in one place without having to switch to different accounts. 1. Touch > > Mail. 2. Touch the bar that shows the current email account, and then touch All accounts. Email messages are color coded so you can easily distinguish which email accounts they belong to. Note: Up to 15 email accounts can be shown in the unified inbox. Accounts and Messaging 86
-
 1
1 -
2
-
3
-
4
-
5
-
6
-
7
-
8
-
9
-
10
-
11
-
12
-
13
-
14
-
15
-
16
-
17
-
18
-
19
-
20
-
21
-
22
-
23
-
24
-
25
-
26
-
27
-
28
-
29
-
30
-
31
-
32
-
33
-
34
-
35
-
36
-
37
-
38
-
39
-
40
-
41
-
42
-
43
-
44
-
45
-
46
-
47
-
48
-
49
-
50
-
51
-
52
-
53
-
54
-
55
-
56
-
57
-
58
-
59
-
60
-
61
-
62
-
63
-
64
-
65
-
66
-
67
-
68
-
69
-
70
-
71
-
72
-
73
-
74
-
75
-
76
-
77
-
78
-
79
-
80
-
81
-
82
-
83
-
84
-
85
-
86
-
87
-
88
-
89
-
90
-
91
-
92
-
 93
93 -
 94
94 -
 95
95 -
 96
96 -
 97
97 -
 98
98 -
 99
99 -
 100
100 -
 101
101 -
 102
102 -
 103
103 -
104
-
105
-
106
-
107
-
108
-
109
-
110
-
111
-
112
-
113
-
114
-
115
-
116
-
117
-
118
-
119
-
120
-
121
-
122
-
123
-
124
-
125
-
126
-
127
-
128
-
129
-
130
-
131
-
132
-
133
-
134
-
135
-
136
-
137
-
138
-
139
-
140
-
141
-
142
-
143
-
144
-
145
-
146
-
147
-
148
-
149
-
150
-
151
-
152
-
153
-
154
-
155
-
156
-
157
-
158
-
159
-
160
-
161
-
162
-
163
-
164
-
165
-
166
-
167
-
168
-
169
-
170
-
171
-
172
-
173
-
174
-
175
-
176
-
177
-
178
-
179
-
180
-
181
-
182
-
183
-
184
-
185
-
186
-
187
-
188
-
189
-
190
-
191
-
192
-
193
-
194
-
195
-
196
-
197
-
198
-
199
-
200
-
201
-
202
-
203
-
204
-
205
-
206
-
207
-
208
-
209
-
210
-
211
-
212
-
213
-
214
-
215
-
216
-
217
-
218
-
219
-
220
-
221
-
222
-
223
-
224
-
225
-
226
-
227
-
228
-
229
-
230
-
231
-
232
-
233
-
234
-
235
-
236
-
237
-
238
-
239
-
240
-
241
-
242
-
243
-
244
-
245
-
246
-
247
-
248
-
249
-
250
-
251
-
252
-
253
-
254
-
255
-
256
-
257
-
258
-
259
-
260
-
261
-
262
-
263
-
264
-
265
-
266
-
267
-
268
-
269
-
270
-
271
-
272
-
273
-
274
-
275
-
276
 |
 |
