HP rp3440 User Service Guide, Sixth Edition - HP 9000 rp3410/rp3440 - Page 140
Removing and Replacing an Internal Hard Disk Drive, Removing a Hard Disk Drive
 |
View all HP rp3440 manuals
Add to My Manuals
Save this manual to your list of manuals |
Page 140 highlights
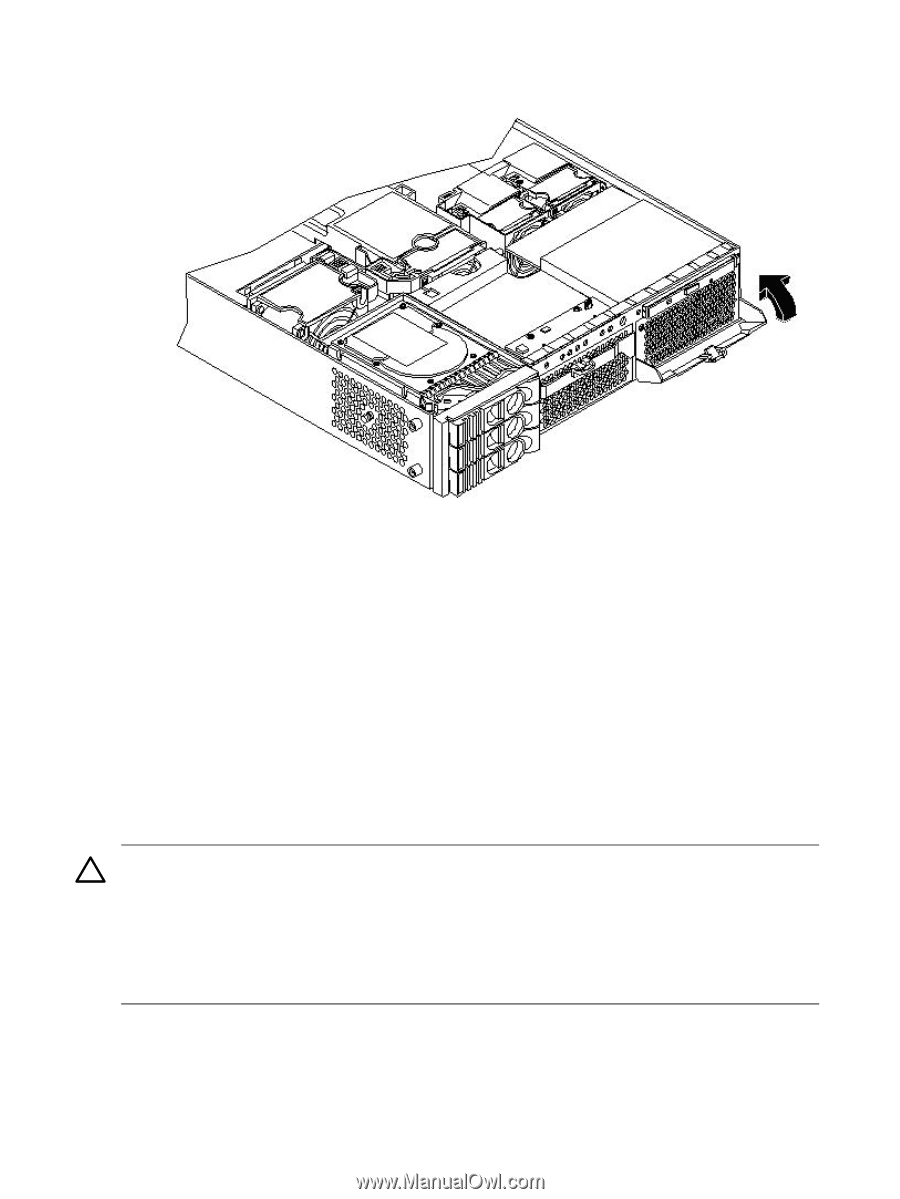
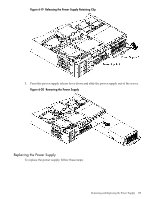
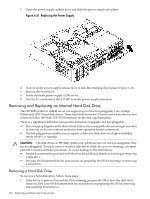
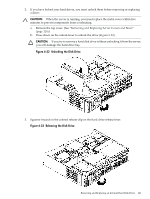
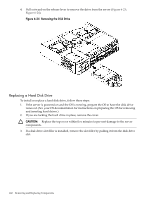
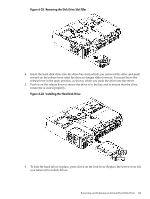
1. Open the power supply release lever and slide the power supply into place. Figure 6-21 Replacing the Power Supply 2. Push in on the power supply release lever to lock the retaining clip in place (Figure 6-21). 3. Replace the front bezel. 4. Verify that both power supply LEDs are lit. 5. Use the PS command of the iLO MP to verify power supply operation. Removing and Replacing an Internal Hard Disk Drive The HP 9000 rp3410 or rp3440 server can support up to three hot-pluggable, Low-Voltage Differential (LVD) hard disk drives. These hard disk drives are 3.5-inch form factor devices that connect to Ultra 160 Wide LVD SCSI interfaces on the disk cage backplane. There is a significant difference between the terms hot-swappable and hot-pluggable: • Hot-swapping happens at the device level; that is, a hot-swappable device manages insertion or removal on its own without assistance from operating system commands. • The hot-plug process enables you to replace a defective disk drive in a high-availability server while it is running. CAUTION: The disk drives in HP 9000 rp3410 and rp3440 servers are not hot-swappable; they are hot-pluggable. To safely remove or insert disk drives while the server is running, you must perform a manual software procedure. To avoid damage to the hard drives: • See the documentation provided with the drive for additional details on inserting or removing a disk drive. • See your OS documentation for instructions on preparing the OS for inserting or removing a hard drive. Removing a Hard Disk Drive To remove a hard disk drive, follow these steps: 1. If the server is powered on and the OS is running, prepare the OS to have the disk drive removed. (See your OS documentation for instructions on preparing the OS for removing and inserting hard drives.) 140 Removing and Replacing Components
-
 1
1 -
2
-
3
-
4
-
5
-
6
-
7
-
8
-
9
-
10
-
11
-
12
-
13
-
14
-
15
-
16
-
17
-
18
-
19
-
20
-
21
-
22
-
23
-
24
-
25
-
26
-
27
-
28
-
29
-
30
-
31
-
32
-
33
-
34
-
35
-
36
-
37
-
38
-
39
-
40
-
41
-
42
-
43
-
44
-
45
-
46
-
47
-
48
-
49
-
50
-
51
-
52
-
53
-
54
-
55
-
56
-
57
-
58
-
59
-
60
-
61
-
62
-
63
-
64
-
65
-
66
-
67
-
68
-
69
-
70
-
71
-
72
-
73
-
74
-
75
-
76
-
77
-
78
-
79
-
80
-
81
-
82
-
83
-
84
-
85
-
86
-
87
-
88
-
89
-
90
-
91
-
92
-
93
-
94
-
95
-
96
-
97
-
98
-
99
-
100
-
101
-
102
-
103
-
104
-
105
-
106
-
107
-
108
-
109
-
110
-
111
-
112
-
113
-
114
-
115
-
116
-
117
-
118
-
119
-
120
-
121
-
122
-
123
-
124
-
125
-
126
-
127
-
128
-
129
-
130
-
131
-
132
-
133
-
134
-
 135
135 -
 136
136 -
 137
137 -
 138
138 -
 139
139 -
 140
140 -
 141
141 -
 142
142 -
 143
143 -
 144
144 -
 145
145 -
146
-
147
-
148
-
149
-
150
-
151
-
152
-
153
-
154
-
155
-
156
-
157
-
158
-
159
-
160
-
161
-
162
-
163
-
164
-
165
-
166
-
167
-
168
-
169
-
170
-
171
-
172
-
173
-
174
-
175
-
176
-
177
-
178
-
179
-
180
-
181
-
182
-
183
-
184
-
185
-
186
-
187
-
188
-
189
-
190
-
191
-
192
-
193
-
194
-
195
-
196
-
197
-
198
-
199
-
200
-
201
-
202
-
203
-
204
-
205
-
206
-
207
-
208
-
209
-
210
 |
 |