HP rp3440 User Service Guide, Sixth Edition - HP 9000 rp3410/rp3440 - Page 189
Removing and Replacing the Hard Disk Drive (SCSI) Backplane, Removing the Hard Drive Disk SCSI
 |
View all HP rp3440 manuals
Add to My Manuals
Save this manual to your list of manuals |
Page 189 highlights
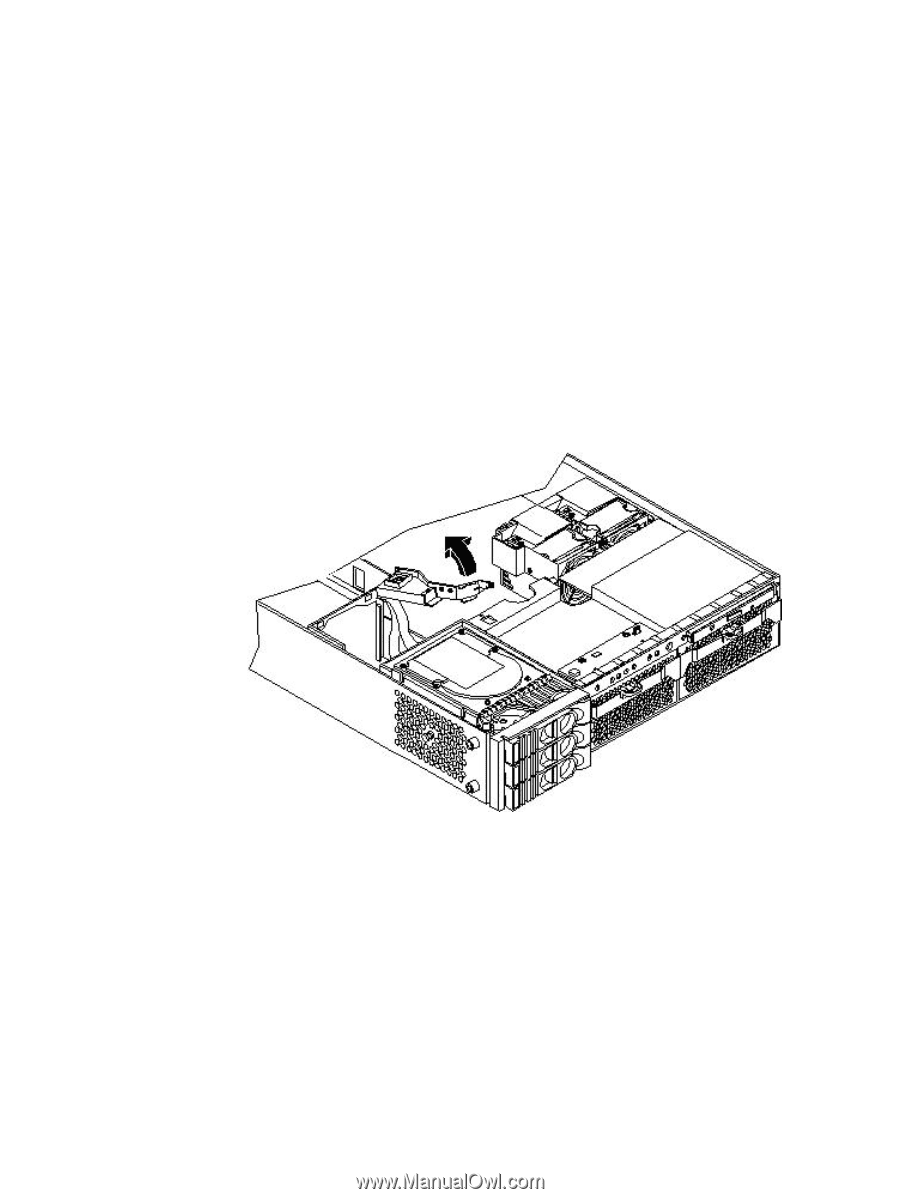
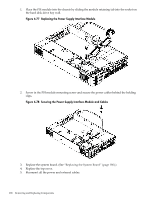
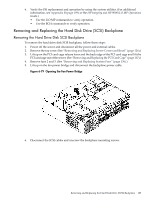
6. Verify the PSI replacement and operation by using the system utilities. (For additional information, see Appendix B (page 199) or the HP Integrity and HP 9000 iLO MP Operations Guide.) • Use the iLO MP commands to verify operation. • Use the BCH commands to verify operation. Removing and Replacing the Hard Disk Drive (SCSI) Backplane Removing the Hard Drive Disk SCSI Backplane To remove the hard drive disk SCSI backplane, follow these steps: 1. Power off the server and disconnect all the power and external cables. 2. Remove the top cover. (See "Removing and Replacing Server Covers and Bezel" (page 126).) 3. Lift up on the PCI card cage release lever and the back edge of the PCI card cage and lift the PCI card cage out of the server. (See "Removing and Replacing the PCI Card Cage" (page 167).) 4. Remove fans 2 and 3. (See "Removing and Replacing System Fans" (page 136).) 5. Lift up on the fan power bridge and disconnect the backplane power cable. Figure 6-79 Opening the Fan Power Bridge 6. Disconnect the SCSI cables and unscrew the backplane mounting screws. Removing and Replacing the Hard Disk Drive (SCSI) Backplane 189
-
 1
1 -
2
-
3
-
4
-
5
-
6
-
7
-
8
-
9
-
10
-
11
-
12
-
13
-
14
-
15
-
16
-
17
-
18
-
19
-
20
-
21
-
22
-
23
-
24
-
25
-
26
-
27
-
28
-
29
-
30
-
31
-
32
-
33
-
34
-
35
-
36
-
37
-
38
-
39
-
40
-
41
-
42
-
43
-
44
-
45
-
46
-
47
-
48
-
49
-
50
-
51
-
52
-
53
-
54
-
55
-
56
-
57
-
58
-
59
-
60
-
61
-
62
-
63
-
64
-
65
-
66
-
67
-
68
-
69
-
70
-
71
-
72
-
73
-
74
-
75
-
76
-
77
-
78
-
79
-
80
-
81
-
82
-
83
-
84
-
85
-
86
-
87
-
88
-
89
-
90
-
91
-
92
-
93
-
94
-
95
-
96
-
97
-
98
-
99
-
100
-
101
-
102
-
103
-
104
-
105
-
106
-
107
-
108
-
109
-
110
-
111
-
112
-
113
-
114
-
115
-
116
-
117
-
118
-
119
-
120
-
121
-
122
-
123
-
124
-
125
-
126
-
127
-
128
-
129
-
130
-
131
-
132
-
133
-
134
-
135
-
136
-
137
-
138
-
139
-
140
-
141
-
142
-
143
-
144
-
145
-
146
-
147
-
148
-
149
-
150
-
151
-
152
-
153
-
154
-
155
-
156
-
157
-
158
-
159
-
160
-
161
-
162
-
163
-
164
-
165
-
166
-
167
-
168
-
169
-
170
-
171
-
172
-
173
-
174
-
175
-
176
-
177
-
178
-
179
-
180
-
181
-
182
-
183
-
 184
184 -
 185
185 -
 186
186 -
 187
187 -
 188
188 -
 189
189 -
 190
190 -
 191
191 -
 192
192 -
 193
193 -
 194
194 -
195
-
196
-
197
-
198
-
199
-
200
-
201
-
202
-
203
-
204
-
205
-
206
-
207
-
208
-
209
-
210
 |
 |