HP rp3440 User Service Guide, Sixth Edition - HP 9000 rp3410/rp3440 - Page 63
Removing and Replacing Server Covers and Bezels, Hard Drive Lock
 |
View all HP rp3440 manuals
Add to My Manuals
Save this manual to your list of manuals |
Page 63 highlights
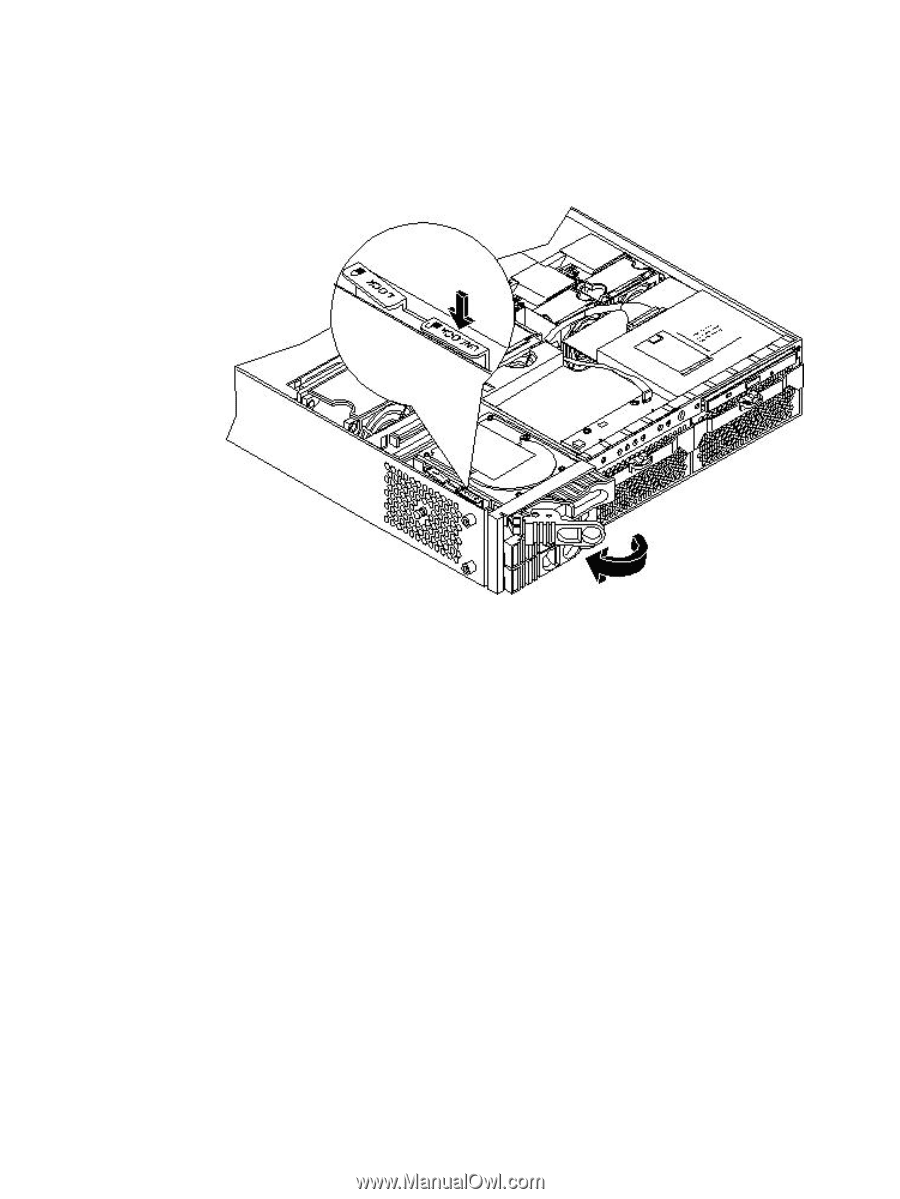
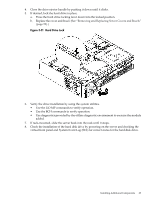
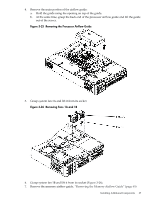
4. Close the drive ejector handle by pushing it down until it clicks. 5. If desired, lock the hard drive in place. a. Press the hard drive locking lever down into the locked position. b. Replace the cover and bezel. (See "Removing and Replacing Server Covers and Bezels" (page 52).) Figure 3-21 Hard Drive Lock 6. Verify the drive installation by using the system utilities. • Use the iLO MP commands to verify operation. • Use the BCH commands to verify operation. • Use diagnostics provided by the offline diagnostic environment to exercise the module added. 7. If rack-mounted, slide the server back into the rack until it stops. 8. Check the installation of the hard disk drive by powering on the server and checking the virtual front panel and System Event Log (SEL) for correct status for the hard disk drive. Installing Additional Components 63
-
 1
1 -
2
-
3
-
4
-
5
-
6
-
7
-
8
-
9
-
10
-
11
-
12
-
13
-
14
-
15
-
16
-
17
-
18
-
19
-
20
-
21
-
22
-
23
-
24
-
25
-
26
-
27
-
28
-
29
-
30
-
31
-
32
-
33
-
34
-
35
-
36
-
37
-
38
-
39
-
40
-
41
-
42
-
43
-
44
-
45
-
46
-
47
-
48
-
49
-
50
-
51
-
52
-
53
-
54
-
55
-
56
-
57
-
 58
58 -
 59
59 -
 60
60 -
 61
61 -
 62
62 -
 63
63 -
 64
64 -
 65
65 -
 66
66 -
 67
67 -
 68
68 -
69
-
70
-
71
-
72
-
73
-
74
-
75
-
76
-
77
-
78
-
79
-
80
-
81
-
82
-
83
-
84
-
85
-
86
-
87
-
88
-
89
-
90
-
91
-
92
-
93
-
94
-
95
-
96
-
97
-
98
-
99
-
100
-
101
-
102
-
103
-
104
-
105
-
106
-
107
-
108
-
109
-
110
-
111
-
112
-
113
-
114
-
115
-
116
-
117
-
118
-
119
-
120
-
121
-
122
-
123
-
124
-
125
-
126
-
127
-
128
-
129
-
130
-
131
-
132
-
133
-
134
-
135
-
136
-
137
-
138
-
139
-
140
-
141
-
142
-
143
-
144
-
145
-
146
-
147
-
148
-
149
-
150
-
151
-
152
-
153
-
154
-
155
-
156
-
157
-
158
-
159
-
160
-
161
-
162
-
163
-
164
-
165
-
166
-
167
-
168
-
169
-
170
-
171
-
172
-
173
-
174
-
175
-
176
-
177
-
178
-
179
-
180
-
181
-
182
-
183
-
184
-
185
-
186
-
187
-
188
-
189
-
190
-
191
-
192
-
193
-
194
-
195
-
196
-
197
-
198
-
199
-
200
-
201
-
202
-
203
-
204
-
205
-
206
-
207
-
208
-
209
-
210
 |
 |