HP rp3440 User Service Guide, Sixth Edition - HP 9000 rp3410/rp3440 - Page 165
Removing and Replacing the System Battery, Battery Notice, Removing the System Battery
 |
View all HP rp3440 manuals
Add to My Manuals
Save this manual to your list of manuals |
Page 165 highlights
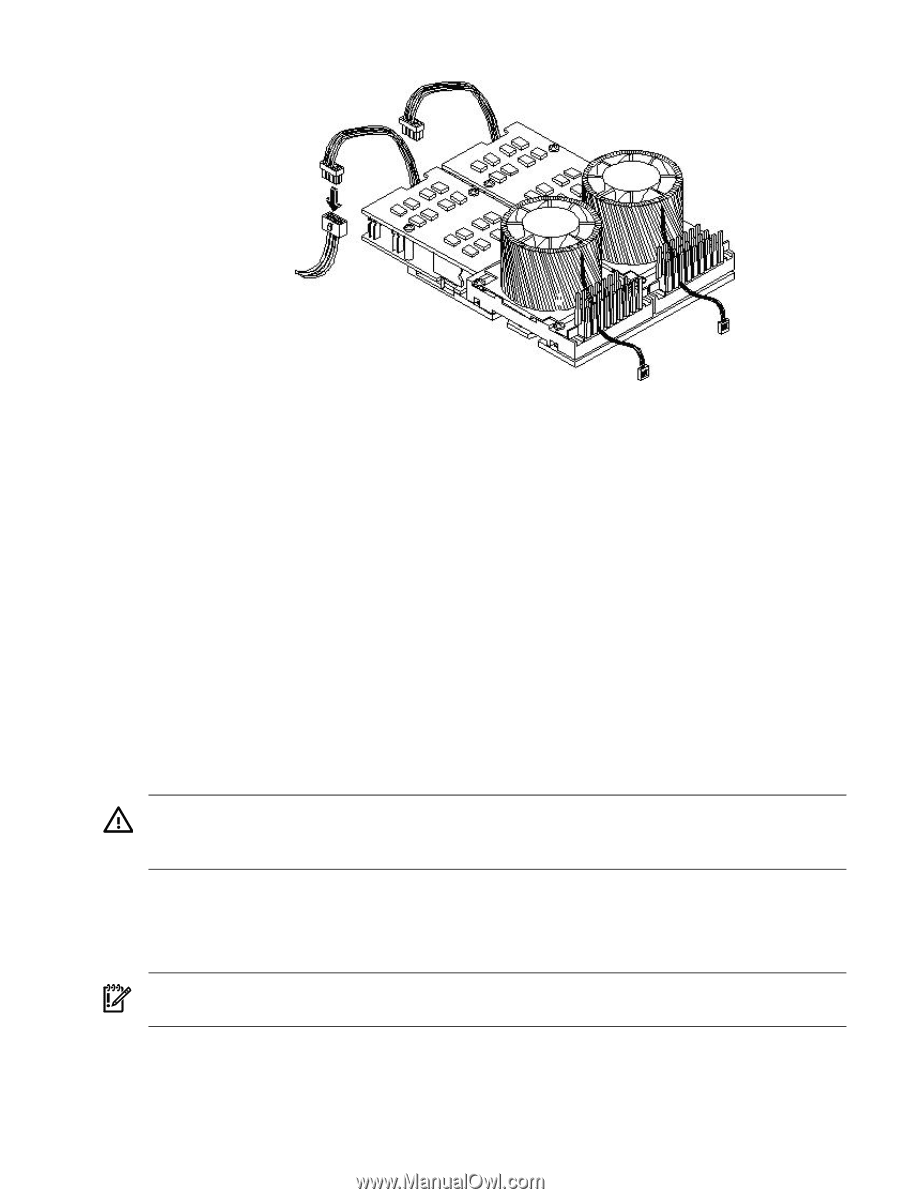
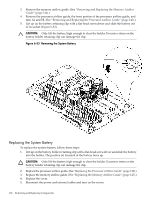
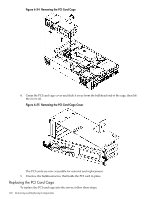
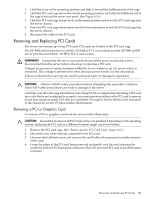
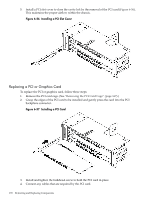
Figure 6-52 Connecting the Power Pod Cable 16. Replace the processor airflow guide. (See "Replacing the Processor Airflow Guide" (page 148).) 17. Replace the memory airflow guide. (See "Replacing the Memory Airflow Guide" (page 145).) 18. Replace the cover. 19. Verify processor replacement and operation by using the system utilities. (For additional information, see Appendix B (page 199) or the HP Integrity and HP 9000 iLO MP Operations Guide.) • Use the iLO MP commands to verify operation. • Use the BCH commands to verify operation. • Use MAKODIAG provided by the ODE to exercise the newly installed processors. Removing and Replacing the System Battery The server has two batteries. The main system battery is located on the system board. The other batter is located on the underside of the iLO MP card. (See ""Removing and Replacing the iLO MP Card Battery" (page 175).) Battery Notice This product contains a Lithium battery. WARNING! Lithium batteries can explode if mistreated. Do not recharge, disassemble, or dispose of lithium batteries in a fire. Failure to observe this warning can result in personal injury or damage to equipment. Replace only with the identical or equivalent battery. Follow the manufacturer's recommendations. Dispose of used batteries according to the manufacturer's instructions. Removing the System Battery IMPORTANT: Prior to removing the system battery, log the system settings such as LAN configuration settings, boot settings, and so on. To remove the system battery, follow these steps: 1. Power off the server and disconnect the power and external cables. 2. Remove the top cover. (See "Removing and Replacing Server Covers and Bezel" (page 126).) Removing and Replacing the System Battery 165
-
 1
1 -
2
-
3
-
4
-
5
-
6
-
7
-
8
-
9
-
10
-
11
-
12
-
13
-
14
-
15
-
16
-
17
-
18
-
19
-
20
-
21
-
22
-
23
-
24
-
25
-
26
-
27
-
28
-
29
-
30
-
31
-
32
-
33
-
34
-
35
-
36
-
37
-
38
-
39
-
40
-
41
-
42
-
43
-
44
-
45
-
46
-
47
-
48
-
49
-
50
-
51
-
52
-
53
-
54
-
55
-
56
-
57
-
58
-
59
-
60
-
61
-
62
-
63
-
64
-
65
-
66
-
67
-
68
-
69
-
70
-
71
-
72
-
73
-
74
-
75
-
76
-
77
-
78
-
79
-
80
-
81
-
82
-
83
-
84
-
85
-
86
-
87
-
88
-
89
-
90
-
91
-
92
-
93
-
94
-
95
-
96
-
97
-
98
-
99
-
100
-
101
-
102
-
103
-
104
-
105
-
106
-
107
-
108
-
109
-
110
-
111
-
112
-
113
-
114
-
115
-
116
-
117
-
118
-
119
-
120
-
121
-
122
-
123
-
124
-
125
-
126
-
127
-
128
-
129
-
130
-
131
-
132
-
133
-
134
-
135
-
136
-
137
-
138
-
139
-
140
-
141
-
142
-
143
-
144
-
145
-
146
-
147
-
148
-
149
-
150
-
151
-
152
-
153
-
154
-
155
-
156
-
157
-
158
-
159
-
 160
160 -
 161
161 -
 162
162 -
 163
163 -
 164
164 -
 165
165 -
 166
166 -
 167
167 -
 168
168 -
 169
169 -
 170
170 -
171
-
172
-
173
-
174
-
175
-
176
-
177
-
178
-
179
-
180
-
181
-
182
-
183
-
184
-
185
-
186
-
187
-
188
-
189
-
190
-
191
-
192
-
193
-
194
-
195
-
196
-
197
-
198
-
199
-
200
-
201
-
202
-
203
-
204
-
205
-
206
-
207
-
208
-
209
-
210
 |
 |