HP rp3440 User Service Guide, Sixth Edition - HP 9000 rp3410/rp3440 - Page 77
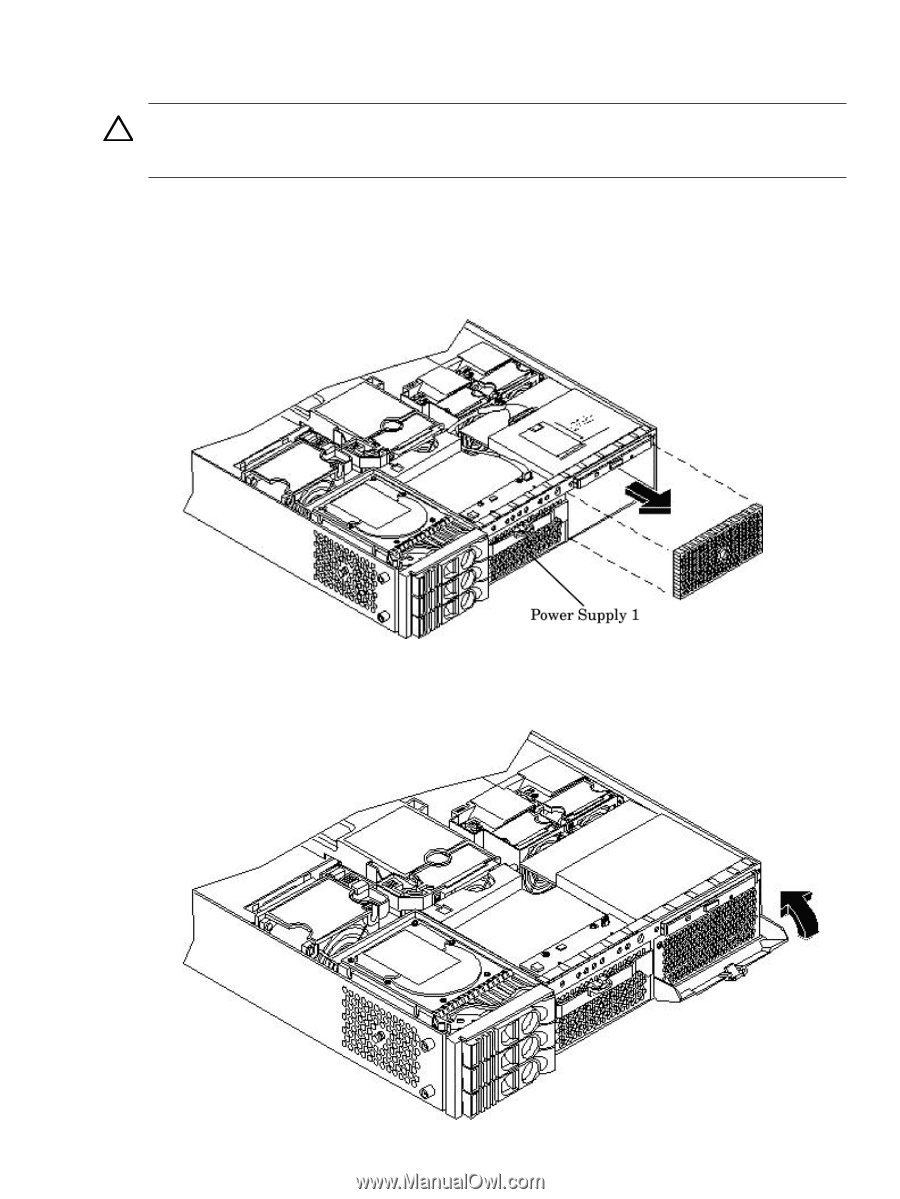
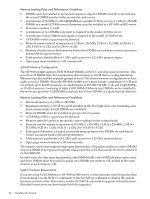
CAUTION, Removing the Power Supply Filler Panel, Replacing the Power Supply
 |
View all HP rp3440 manuals
Add to My Manuals
Save this manual to your list of manuals |
Page 77 highlights
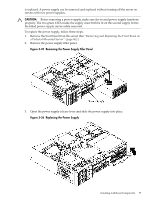
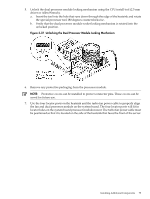
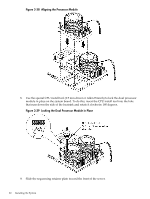
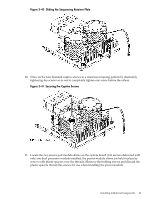
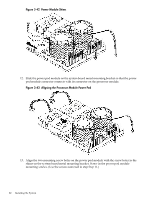
is replaced. A power supply can be removed and replaced without turning off the server on servers with two power supplies. CAUTION: Before removing a power supply, make sure the second power supply functions properly. The two green LEDs inside the supply must both be lit on the second supply before the failed power supply can be safely removed. To replace the power supply, follow these steps: 1. Remove the front bezel from the server (See "Removing and Replacing the Front Bezel on a Pedestal-Mounted Server" (page 60).) 2. Remove the power supply filler panel. Figure 3-35 Removing the Power Supply Filler Panel 3. Open the power supply release lever and slide the power supply into place. Figure 3-36 Replacing the Power Supply Installing Additional Components 77
-
 1
1 -
2
-
3
-
4
-
5
-
6
-
7
-
8
-
9
-
10
-
11
-
12
-
13
-
14
-
15
-
16
-
17
-
18
-
19
-
20
-
21
-
22
-
23
-
24
-
25
-
26
-
27
-
28
-
29
-
30
-
31
-
32
-
33
-
34
-
35
-
36
-
37
-
38
-
39
-
40
-
41
-
42
-
43
-
44
-
45
-
46
-
47
-
48
-
49
-
50
-
51
-
52
-
53
-
54
-
55
-
56
-
57
-
58
-
59
-
60
-
61
-
62
-
63
-
64
-
65
-
66
-
67
-
68
-
69
-
70
-
71
-
 72
72 -
 73
73 -
 74
74 -
 75
75 -
 76
76 -
 77
77 -
 78
78 -
 79
79 -
 80
80 -
 81
81 -
 82
82 -
83
-
84
-
85
-
86
-
87
-
88
-
89
-
90
-
91
-
92
-
93
-
94
-
95
-
96
-
97
-
98
-
99
-
100
-
101
-
102
-
103
-
104
-
105
-
106
-
107
-
108
-
109
-
110
-
111
-
112
-
113
-
114
-
115
-
116
-
117
-
118
-
119
-
120
-
121
-
122
-
123
-
124
-
125
-
126
-
127
-
128
-
129
-
130
-
131
-
132
-
133
-
134
-
135
-
136
-
137
-
138
-
139
-
140
-
141
-
142
-
143
-
144
-
145
-
146
-
147
-
148
-
149
-
150
-
151
-
152
-
153
-
154
-
155
-
156
-
157
-
158
-
159
-
160
-
161
-
162
-
163
-
164
-
165
-
166
-
167
-
168
-
169
-
170
-
171
-
172
-
173
-
174
-
175
-
176
-
177
-
178
-
179
-
180
-
181
-
182
-
183
-
184
-
185
-
186
-
187
-
188
-
189
-
190
-
191
-
192
-
193
-
194
-
195
-
196
-
197
-
198
-
199
-
200
-
201
-
202
-
203
-
204
-
205
-
206
-
207
-
208
-
209
-
210
 |
 |