HP rp3440 User Service Guide, Sixth Edition - HP 9000 rp3410/rp3440 - Page 170
Replacing a PCI or Graphics Card, Installing a PCI Slot Cover
 |
View all HP rp3440 manuals
Add to My Manuals
Save this manual to your list of manuals |
Page 170 highlights
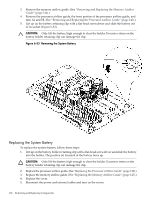
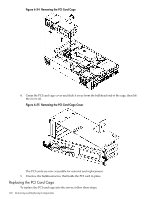
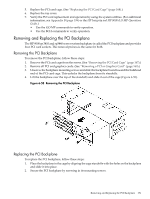
5. Install a PCI slot cover to close the cavity left by the removal of the PCI card (Figure 6-56). This maintains the proper airflow within the chassis. Figure 6-56 Installing a PCI Slot Cover Replacing a PCI or Graphics Card To replace the PCI or graphics card, follow these steps: 1. Remove the PCI card cage. (See "Removing the PCI Card Cage" (page 167).) 2. Grasp the edges of the PCI card to be installed and gently press the card into the PCI backplane connector. Figure 6-57 Installing a PCI Card 3. Install and tighten the bulkhead screw to hold the PCI card in place. 4. Connect any cables that are required by the PCI card. 170 Removing and Replacing Components
-
 1
1 -
2
-
3
-
4
-
5
-
6
-
7
-
8
-
9
-
10
-
11
-
12
-
13
-
14
-
15
-
16
-
17
-
18
-
19
-
20
-
21
-
22
-
23
-
24
-
25
-
26
-
27
-
28
-
29
-
30
-
31
-
32
-
33
-
34
-
35
-
36
-
37
-
38
-
39
-
40
-
41
-
42
-
43
-
44
-
45
-
46
-
47
-
48
-
49
-
50
-
51
-
52
-
53
-
54
-
55
-
56
-
57
-
58
-
59
-
60
-
61
-
62
-
63
-
64
-
65
-
66
-
67
-
68
-
69
-
70
-
71
-
72
-
73
-
74
-
75
-
76
-
77
-
78
-
79
-
80
-
81
-
82
-
83
-
84
-
85
-
86
-
87
-
88
-
89
-
90
-
91
-
92
-
93
-
94
-
95
-
96
-
97
-
98
-
99
-
100
-
101
-
102
-
103
-
104
-
105
-
106
-
107
-
108
-
109
-
110
-
111
-
112
-
113
-
114
-
115
-
116
-
117
-
118
-
119
-
120
-
121
-
122
-
123
-
124
-
125
-
126
-
127
-
128
-
129
-
130
-
131
-
132
-
133
-
134
-
135
-
136
-
137
-
138
-
139
-
140
-
141
-
142
-
143
-
144
-
145
-
146
-
147
-
148
-
149
-
150
-
151
-
152
-
153
-
154
-
155
-
156
-
157
-
158
-
159
-
160
-
161
-
162
-
163
-
164
-
 165
165 -
 166
166 -
 167
167 -
 168
168 -
 169
169 -
 170
170 -
 171
171 -
 172
172 -
 173
173 -
 174
174 -
 175
175 -
176
-
177
-
178
-
179
-
180
-
181
-
182
-
183
-
184
-
185
-
186
-
187
-
188
-
189
-
190
-
191
-
192
-
193
-
194
-
195
-
196
-
197
-
198
-
199
-
200
-
201
-
202
-
203
-
204
-
205
-
206
-
207
-
208
-
209
-
210
 |
 |
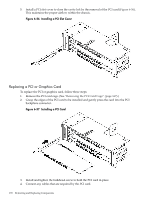
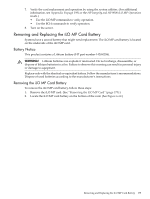
5.
Install a PCI slot cover to close the cavity left by the removal of the PCI card (
Figure 6-56
).
This maintains the proper airflow within the chassis.
Figure 6-56 Installing a PCI Slot Cover
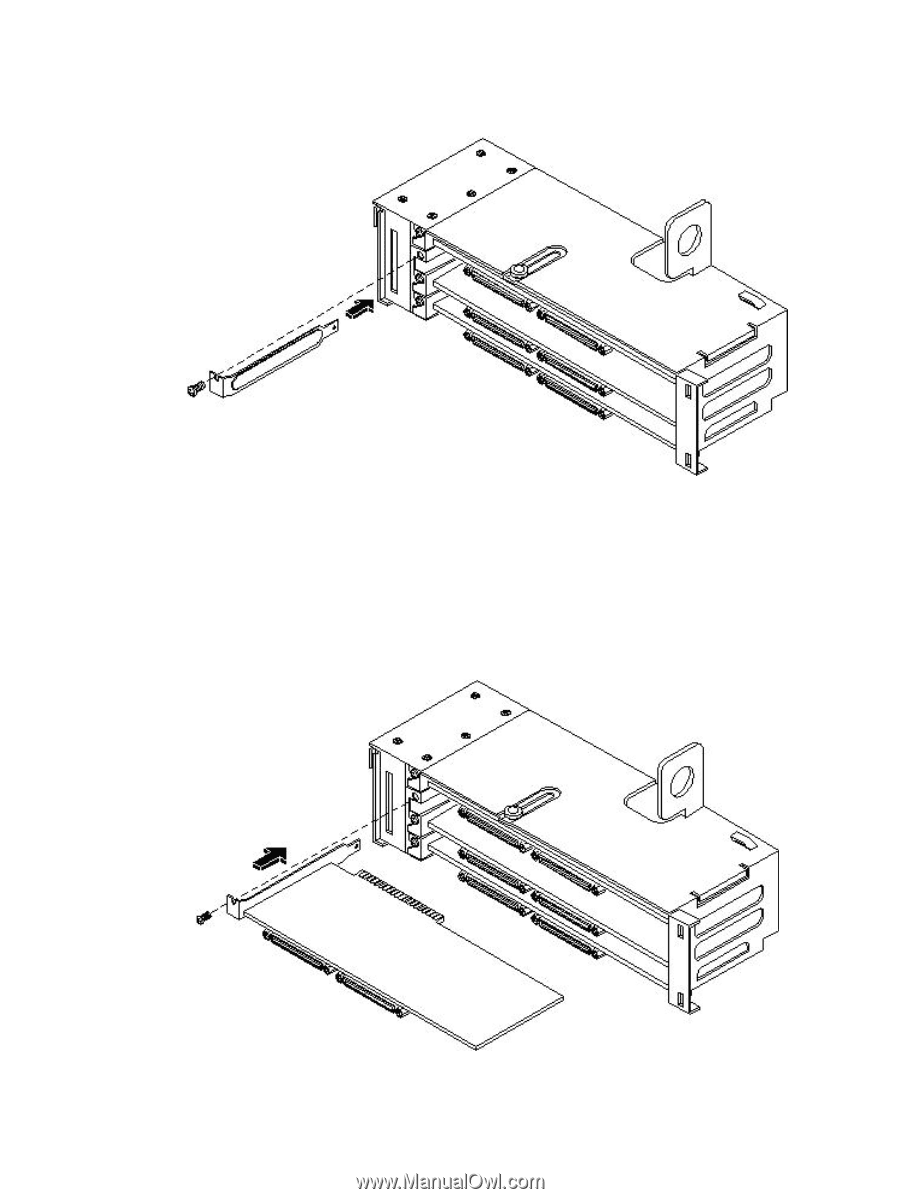
Replacing a PCI or Graphics Card
To replace the PCI or graphics card, follow these steps:
1.
Remove the PCI card cage. (See
“Removing the PCI Card Cage” (page 167)
.)
2.
Grasp the edges of the PCI card to be installed and gently press the card into the PCI
backplane connector.
Figure 6-57 Installing a PCI Card
3.
Install and tighten the bulkhead screw to hold the PCI card in place.
4.
Connect any cables that are required by the PCI card.
170
Removing and Replacing Components